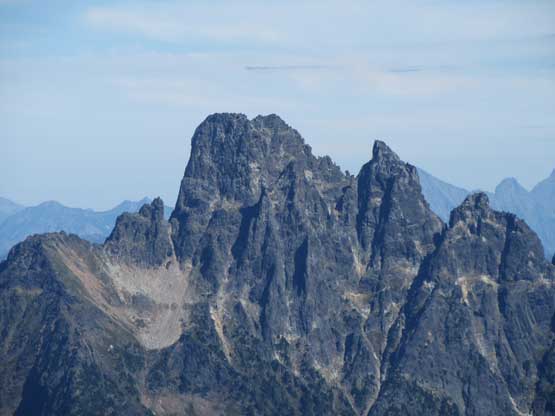
American Border Peak
September 6, 2019
2437m
Twin Lakes / Mt. Baker Highway, WA
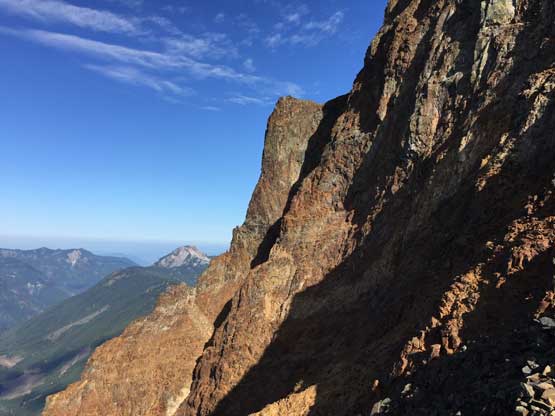
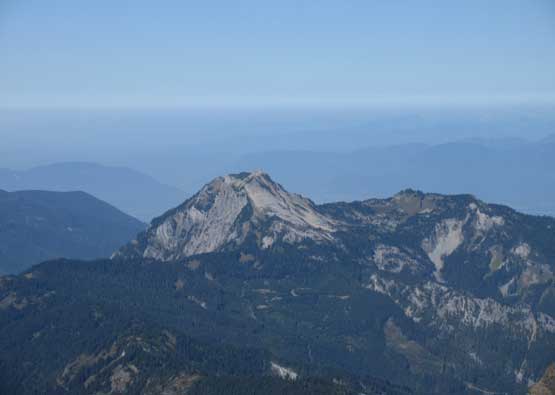
The “Border Peaks” are two iconic spires that locate north of Mt. Baker Highway and south of Slesse Creek in the Chilliwack River valley. American Border Peak is the taller, and more important of the two from a peak-bagger’s perspective. It ranks Top 100 in Washington’s prominence list and Top 200 in Washington’s elevation list and adding to the stats, this is a very eye-catching summit when viewing from almost every single vantage point in the Chilliwack area. It’s also one of those “taller peaks” on the Fraser Valley’s skyline and I can clearly make it out while driving around Metro Vancouver on a clear day. For the sake of these reasons American Border Peak is one of my must-do objectives, despite its reputation of being perhaps the shittest summit in the close vicinity. The peak is composed of ancient sediments and volcanic choss that appeared to have undergone some higher degree of oxidation. The reddish coloured choss is by far the worst type of rocks I’ve found anywhere, as the law seemed universal in Rockies or the Cascades. The rocks on American Border Peak are nowhere as bad as Goodsirs, but for someone that doesn’t have a Rockies background I can totally see how this can easily turn into a choss nightmare.
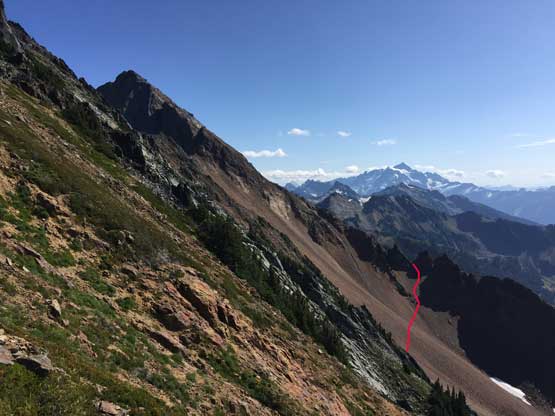
A couple years ago I had ascended the nearby Canadian Border Peak and that was a pretty tough day but I knew American Border Peak’s only gonna be tougher. The timing wasn’t difficult, but I waited patiently for the right partner. Towards the end of this past summer Connor and I had some talk about this summit and upon seeing a high pressure system kicking in towards the end of the first week of September we spontaneously pulled the trigger. We made the decision while scrambling Coquihalla Mtn. a mere two-day prior. The weather had been stable for a couple days and we figured that Friday might be the best shot of this season. There are a few ways to approach and ascend and the one we chose was the “standard route”, following the detailed description on SummitPost credit to Paul Klenke. We were both aware of a shorter approach from Tamihi Creek on B.C. side but we wanted to pick one with the least amount of uncertainty, and when it comes to beta Paul Klenke’s hard to beat. The standard approach of this peak starts from Twin Lakes and traverses/ascends three bowls around the S/SW/W side of Mt. Larabee on steep choss, bush and vegetation. This long traverse is not to be underestimated and “wet grass” is an absolute no-go. The standard “Southeast Route” requires a great deal of 3rd class scrambling on choss and two short pitches of climbing up to 5.4, complicated with route-finding and objective hazards from fallen rocks.
The recommended method is to break the climb into two days with a bivy in the “3rd bowl” while traversing around Mt. Larabee, but for those capable of moving fast on loose rocks this is very doable in one day. I picked up Connor from Bellingham on Thursday night and then drove to the trail-head by Twin Lakes before midnight. The road to Twin Lakes were narrow and rough, but imposed no difficulty to my trusty Tacoma. I pitched my tent beside the truck while Connor opted to sleep open under the stars. At around 2 am I woke up with sounds of mice, and noticed that at least two mice had gotten into my duffle bag eating my food, so I went out and closed the zip, and went back to sleep. The alarm went off at around 4:30 am. We opted to wake up earlier in order to cook some spicy ramen for breakfast.
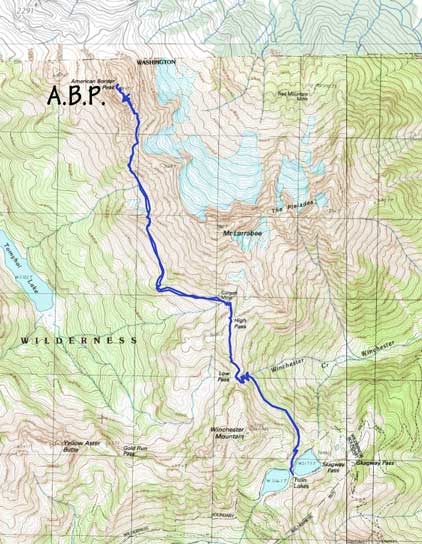
American Border Peak standard route. GPX DL
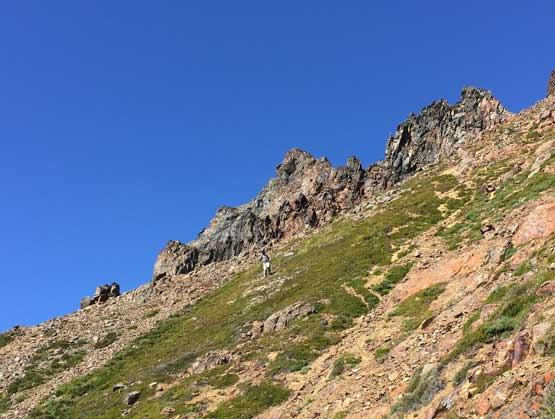
We only needed about 15 minutes of head-lamps before it’s bright enough to see. The trail ascended a little bit but then lost close to 100 m elevation while traversing around Winchester Mtn. towards Low Pass. This was frustrating. The hike up to High Pass involved unnecessarily many switchbacks which seemed like the norm in Washington state. Not wasting much time we picked up the easy-to-miss unmaintained trail down towards Gargett Mine, and made there in less than 1 hour after leaving the car. I spent a few minutes swapping trail-runners for mountaineering boots while Connor took his time loading up water bottles. This was the last reliable water source so we loaded 3 L each.

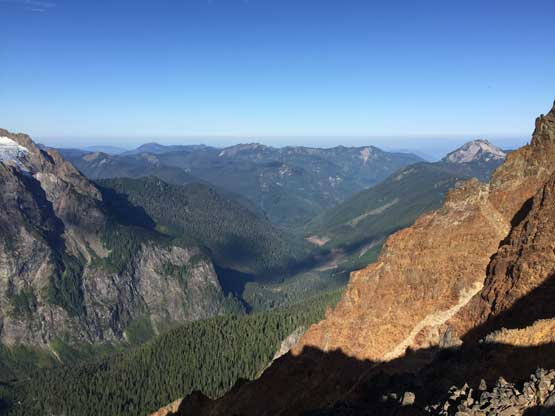
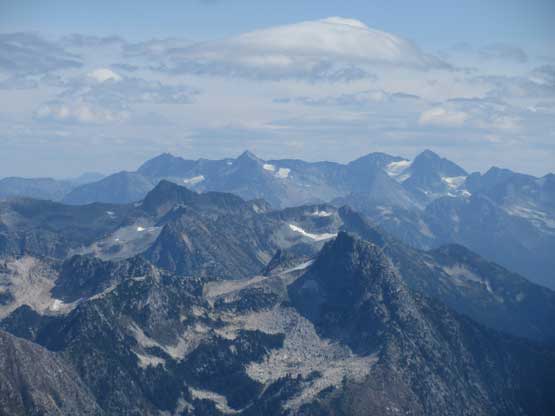
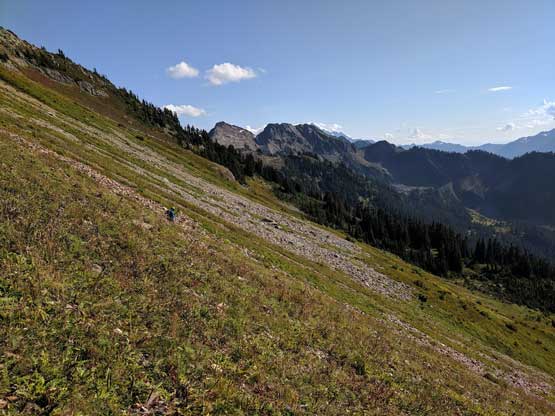
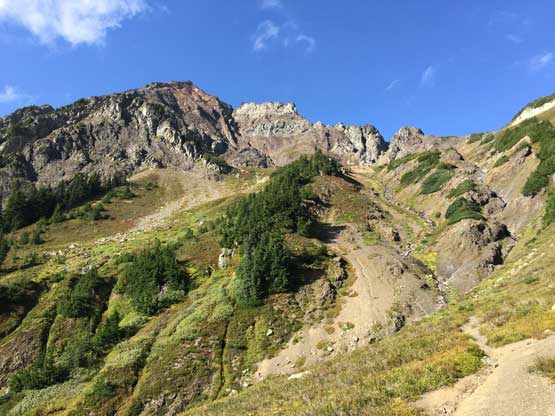
The morning horizon of remote peaks in Silesia Creek valley, from High Pass
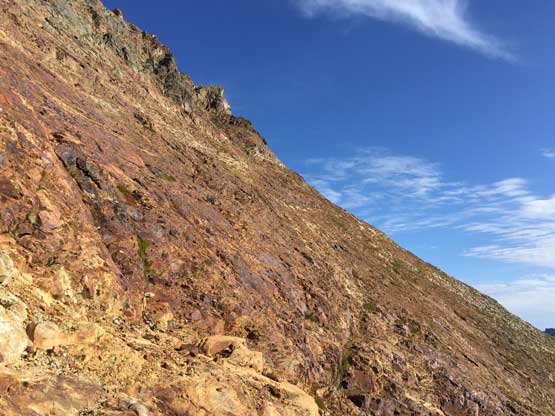
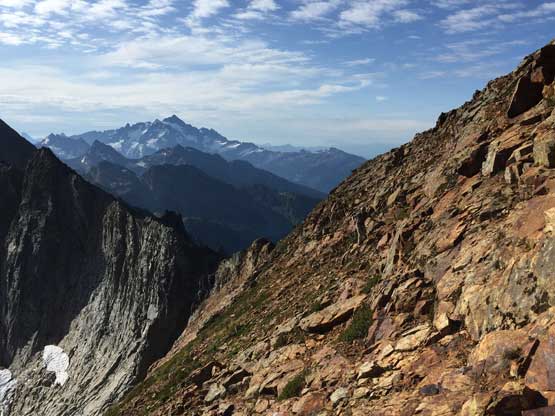
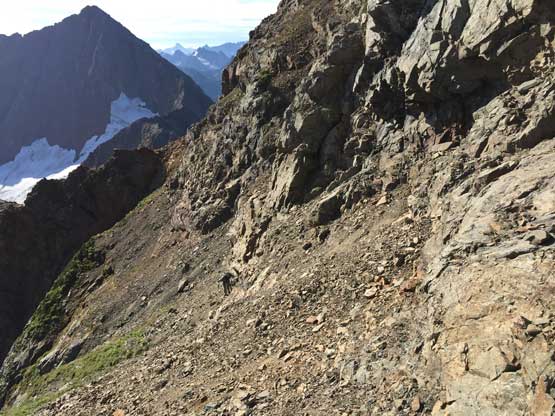
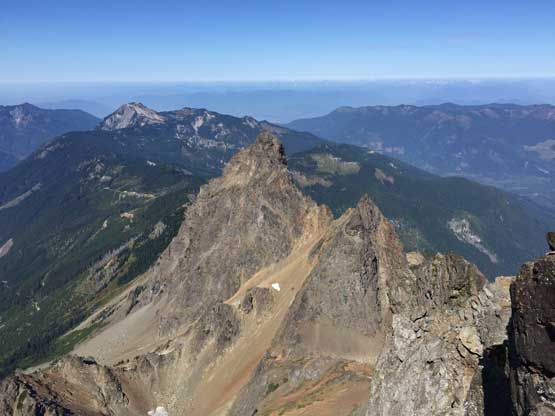
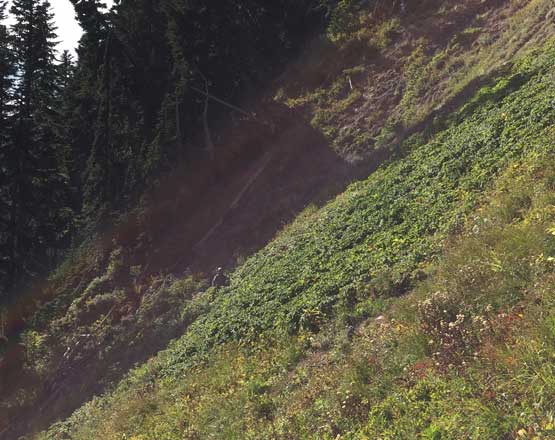
The first bowl traverse was the easiest, but also the most confusing. Other than aiming for the “SW Rib of Mt. Larabee at 5400-feet contour” we knew little about what exactly to expect. As soon as leaving the trail we got to taste the side-hill traversing on Larabee’s choss. We didn’t know what would be the best route so we aimed for a downward diagonal traversing bearing. The exact aiming and elevation was purely navigated by my Gaia GPS app and I have to say the technology did a great job. Right at around 5400 feet contour we noticed a zone of opening that appeared not super bushy, so went for it. We kept our bearing low and didn’t gain elevation until we were around that corner in the mature forest. This section of forested traverse was on some steep zones sandwiched between cliffs so it’s important to get it correct. After the corner turn Connor said we should take a sharp right gaining elevation but I somehow led us into a field of secondary growth and the bushwhacking was slow and wasteful in time. Onto the open terrain we were facing the second bowl traverse aiming for that obvious 6300-feet notch. This bowl started out easily on grass and scree but foreshortened, and to gain the notch required a long stretch of battle against red volcanic choss. It was as loose as Rockies’ treadmill scree but the rocks were bigger and not regular.
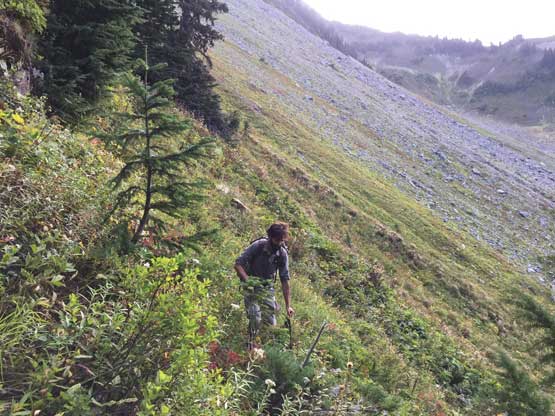
Connor entering the brushes at near 5400 feet contour

A while later, this is me leading into the second bowl. Photo by Connor M.

Connor plodding up the typical scree towards the 6300-ft notch…
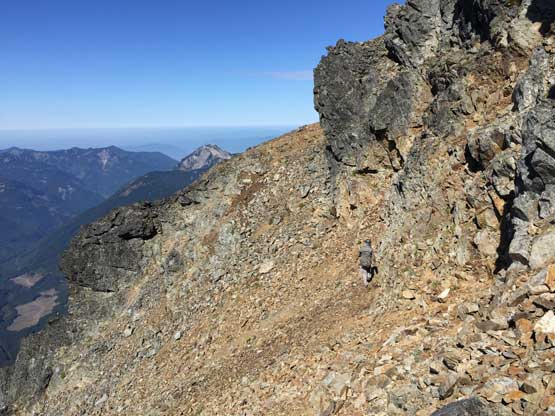
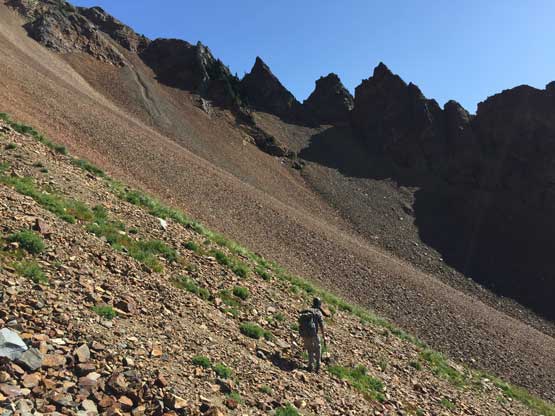
We took a short break at the 6300-ft notch separating the second and the third bowl before committing to the next stretch, the shittest of the approach. Descending from the notch required edging on some compact dirt followed by traversing a large slope of the aforementioned reddish choss. I knew this peak’s gonna be shit, so didn’t let those 4-letter words fly around, but I have to say that the terrain was pretty damn unpleasant. The next while involved contouring at a certain elevation dealing with a couple very shitty gullies that all involved some degree of compact choss, and a few short zones of bushwhacking. At some point we made the call to start ascending diagonally up towards the final notch at 6800-ft but the exact route wasn’t obvious. We scrambled on either steep grass/dirt or some down-sloping white/grey rocks on increasingly steep terrain. The route slowly began to make sense, and we eventually crested the notch and tasted the first beam of sunshine, about 3 hours after starting the day.

Connor carefully descending into the 3rd bowl from the 6300-ft notch
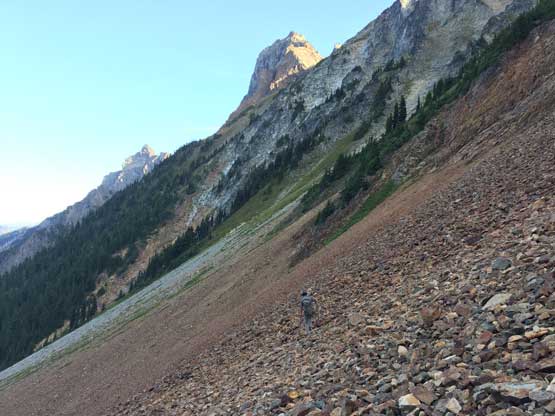
Traversing the red choss at the start of the 3rd bowl. Our objective in front

Connor crossing a sketchy gully. Getting out of it was compact dirt

Typical, typical terrain…

Connor’s flying ahead once we started going up again.
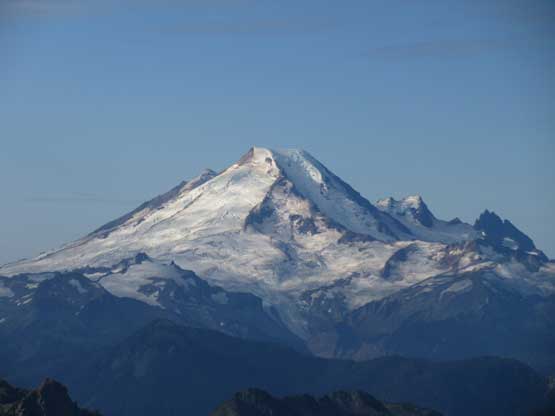
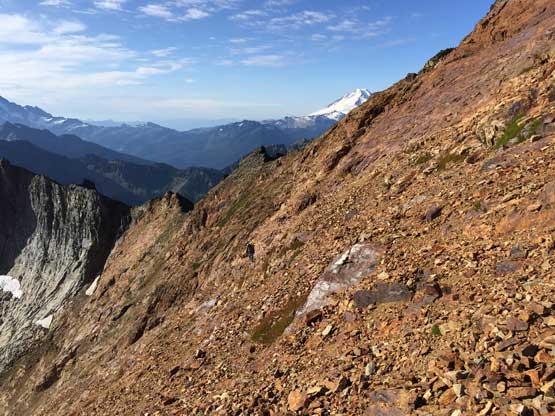
The morning view of Mt. Baker

Me grunting up. Photo by Connor M.

Looking back at the massif of Tomyhoi Peak

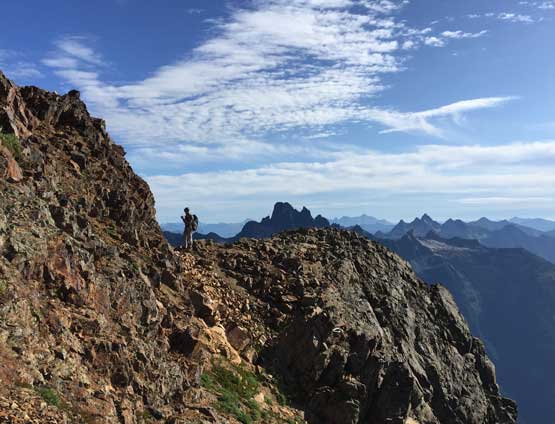
Arriving at the 6800-ft notch underneath our objective.
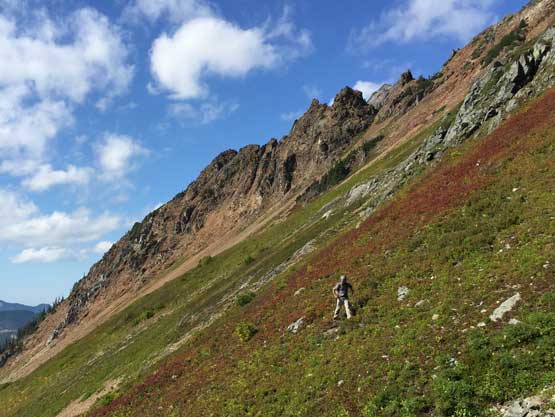
At this point we were definitely ahead of schedule so no need to rush anymore. We took a half-an-hour break at the notch for food and energy and then ditched some water and food before resuming the ascent. From here onward we followed the exact description in Klenke’s beta. The first bit was ascending ~150 feet above the notch and then once making sense, we bailed onto the “red face traverse”. This diagonal traverse on down-sloping reddish choss was similar to one microscopic section on South Goodsir’s upper route but not as steep nor exposed. Other than keeping our eye on rock fall the technical challenge was trivial, and in no time we were already in that shallow gully climber’s left of “Gaulle’s Nose”. The gully had one step of “class 3+” but otherwise, no harder than “class 3”.
The west side of the 6800-ft notch gets steep almost immediately
After gaining ~50 m elevation we came to this view under the “red face”
This is a view into Tamihi Creek valley in Canada
Looking across the “red face traverse”. This view reminded me Goodsirs somehow…
Connor starting the “red traverse” with Mt. Shuksan behind

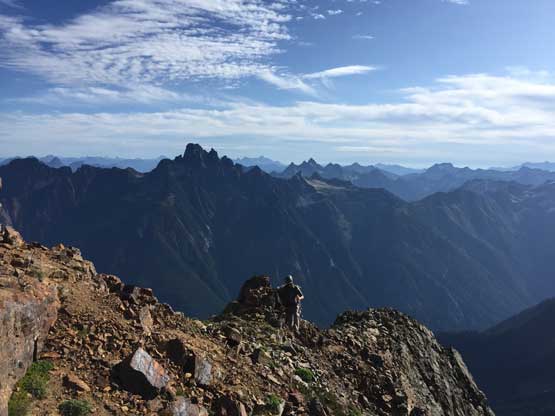
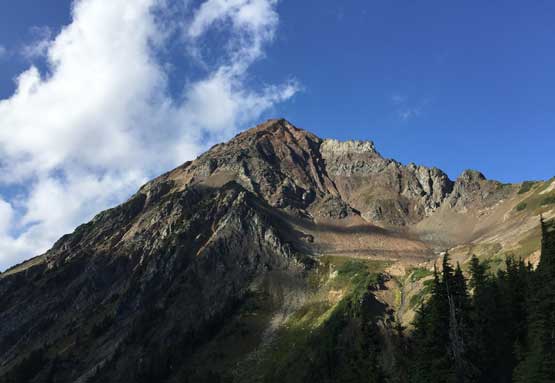
The first photo of Mt. Larabee, the dark massif on left
Connor looks tiny on the “red face traverse”. It’s actually quite straightforward

Connor starting gaining elevation into that shallow gully.

Into the shallow gully beside “Gaulle’s Nose”, this is the typical terrain
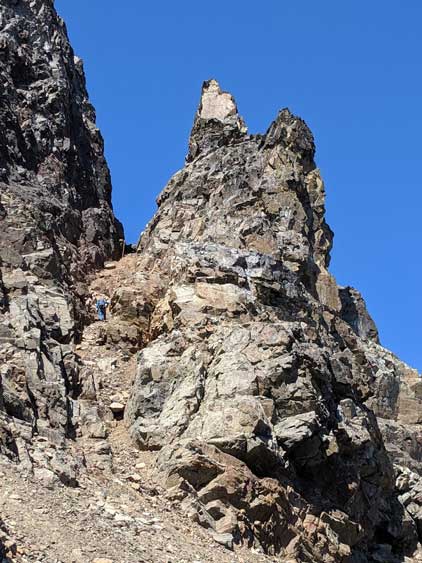
After a short step of tricky scrambling Connor made to above the nose
Connor scrambling with Slesse Mtn. behind as a backdrop
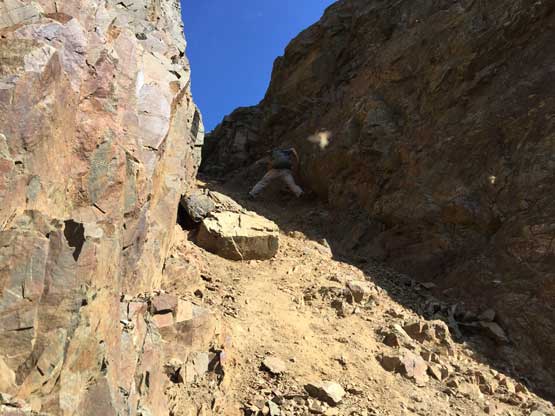
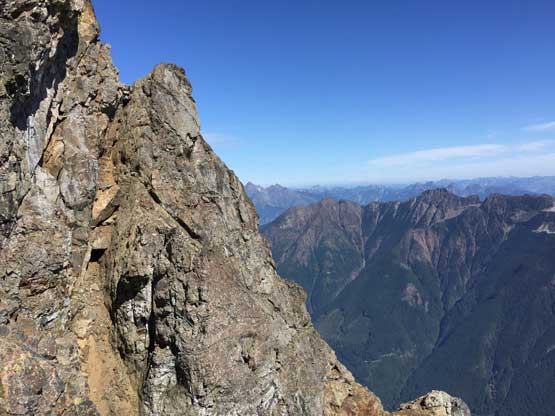
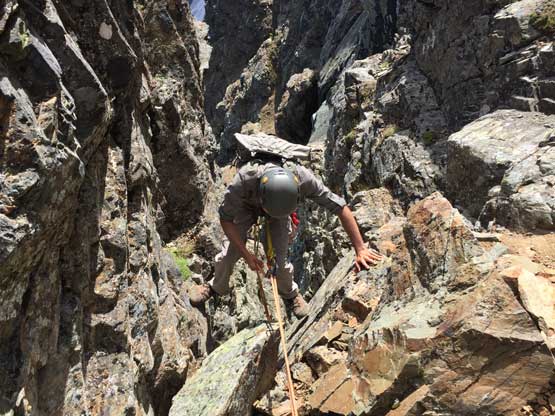
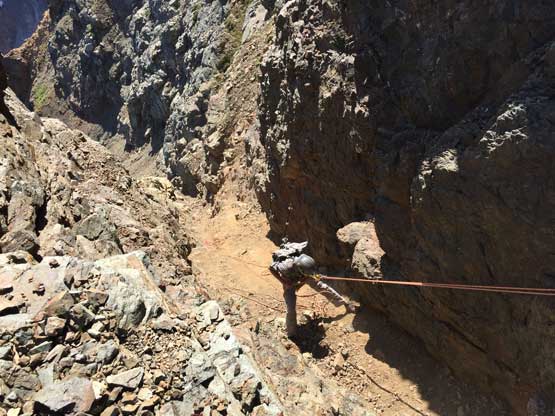
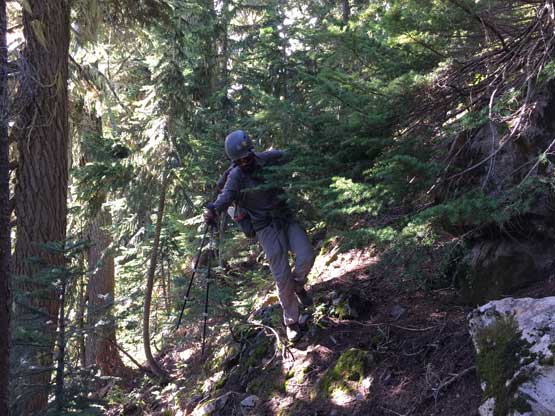
There came our first taste of “exposed compact dirt” immediately after dropping down the north side of “Gaulle’s Nose” onto the first key ledge traverse. This was aiming towards the “snow gully” aka. the first proper gully of the climb. The goats that we had been chasing up the mountain since the 3rd bowl traverse much lower down had finally deviated from the route we were going to take. They went farther right of the “snow gully” and that was a huge relief. After carefully negotiating compact dirt we made into that “snow gully” except for at this time of a year, there was absolutely no snow left there. It was a correct decision to not bringing ice axe nor crampons in this trip. The scramble in this gully started out with nothing but the typical chossy 3rd class but became sketchy about halfway up. The ground was extremely hardpacted and the walls had nothing solid to grab, or to press against. Connor made to the top first and I asked him to toss a rope down so that I could just easily batman up the rope. I then led the second key ledge traverse placing two cams that probably wouldn’t hold had I fall, and belayed Connor across at the base of the crux chimney. In retrospect we should have just soloed this ledge. It’s very exposed but not difficult (class 3+).

Me onto the “first key ledge” traversing towards the first gully

The exposure down into Slesse Creek is huge…

At the base of the first gully aka. the “snow gully” but with no snow…
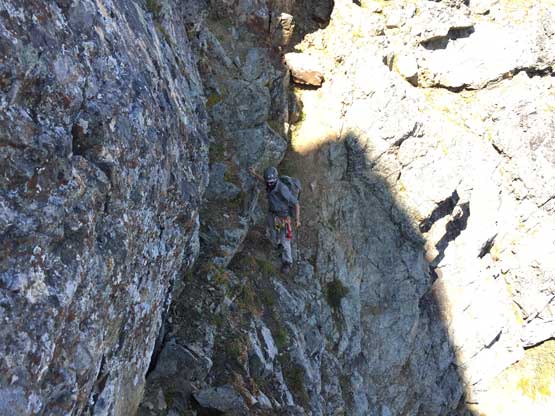
Connor carefully traversing towards the base of the gully

Connor at the base of the “snow gully with no snow”.
This is upper half of the gully. Connor mantling up like a mad man.
Connor following the “2nd key ledge traverse” towards the crux chimney
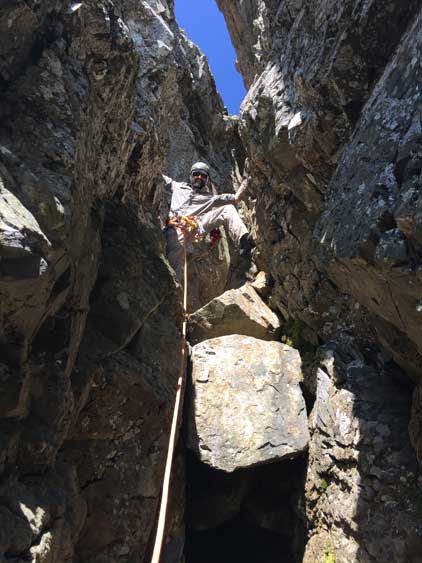
While sorting the rope we changed the belay station a little bit moving upwards to the immediate base of the chimney. Connor put two pieces, one cam and one nut to build a station and then swapped his footwear for rock shoes. I had brought rock shoes too but I decided against using them because I didn’t want to carry two pairs of boots through that tunnel. We had to carry one backpack and both of our boots through the tunnel because the upper mountain’s scramble wasn’t short and certainly not prime rock shoe terrain. I estimated that with two pairs of shoes in the backpack I probably wouldn’t fit through that tunnel, so no rock shoe for me. Connor made the initial 5.4 wall climber’s left of the chockstone easy and then gave me a belay from the middle of the this gully. Connor then led another pitch of 30 m with another 5th class chockstone right below the tunnel. The fan above the tunnel on the exit apparently had unavoidable choss and I got showered by a ton. Thankfully the belay station was relatively sheltered. Climbing this upper chockstone on mountaineering boots was challenging to say the least but I did free it without hauling the rope. Climbing through the tunnel was easy, but very unique, one of the coolest I’ve ever done. It’s definitely not big enough for a backpack so I removed the pack, pushed it through the tunnel and then crawled through.

This is the initial crux into the chimney. 5.4 climbing on climber’s left side wall
As you can see, the terrain here is more overhanging

Connor belaying me from the middle of the crux chimney
Connor starting the upper pitch in this chimney

Me following up. Photo by Connor M.

Above the tunnel now. Time to ditch gears
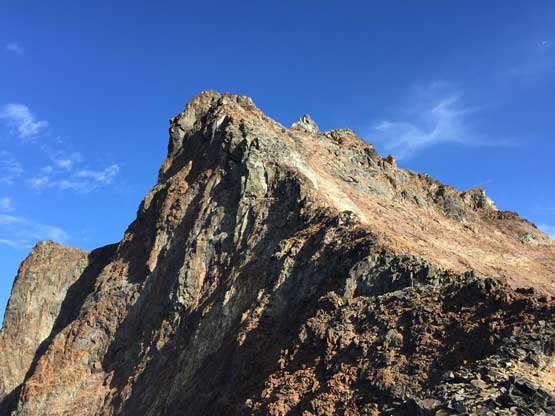
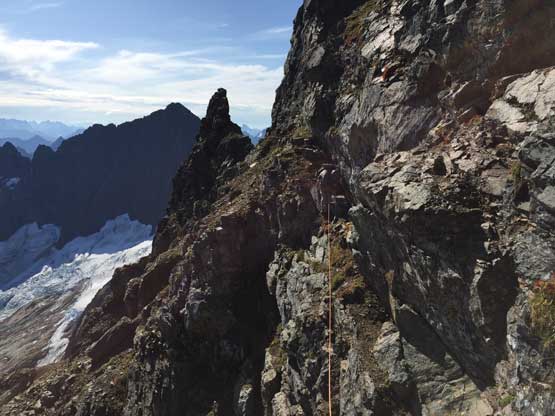
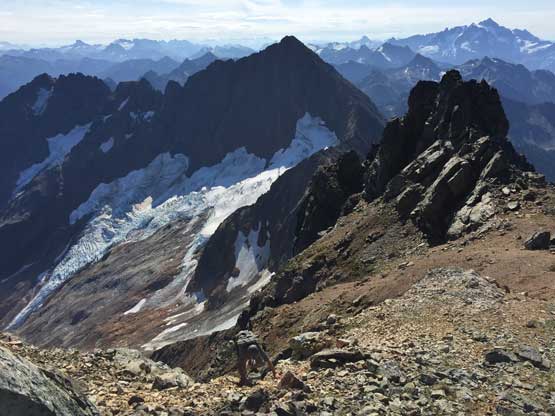
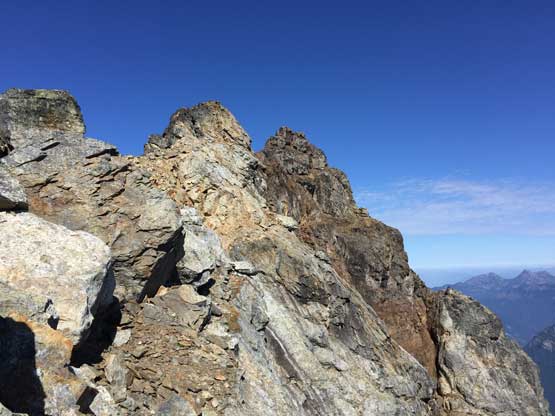
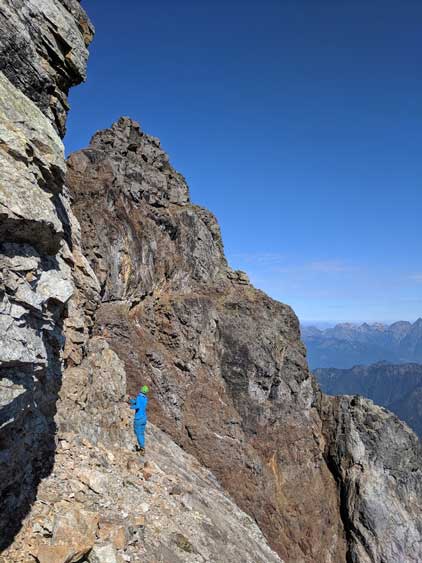
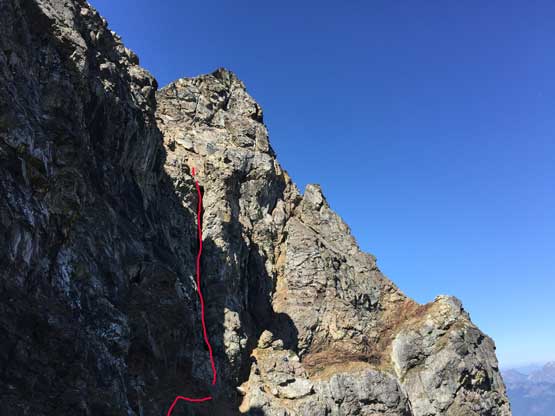
After taking another lengthy break for food and energy we made another food/water ditch before committing to the final scramble. The next stretch onto the summit (south) ridge was harder than anticipated with a great deal of compact dirt type of choss, and exposed scrambling at “class 3+”. We even saw a rappelling anchor above that zone on the ridge but we had already ditched the rope. The scramble along the ridge wasn’t bad but we incorrectly understood the beta. Traversing on the climber’s right (east) side of the ridge led us to a dead end and costed at least 15 min of time. Once backtracked we easily ascended “class 2” terrain on the west side of the ridge and suddenly popped out on the false summit with the final summit tower ahead. The tower appeared difficult and exposed, but had blocky positive holds (class 4-) and the next thing we were standing on the summit of American Border Peak. Not bad, not bad…

Connor picking his route up the shitty, compact dirt type of 3rd class above the crux.

Connor (tiny) scrambling above the crux, with Slesse Mtn. behind
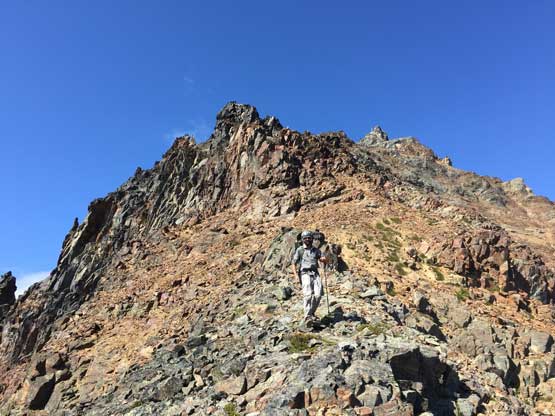
This is looking back after gaining the south ridge proper.
The scrambling along south ridge looked easy ahead
Wrong way. Me exploring the right side but had to backtrack
Connor leading the left (west) side bypass and it went.
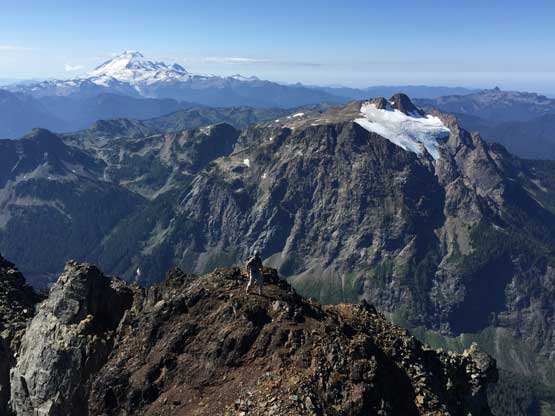
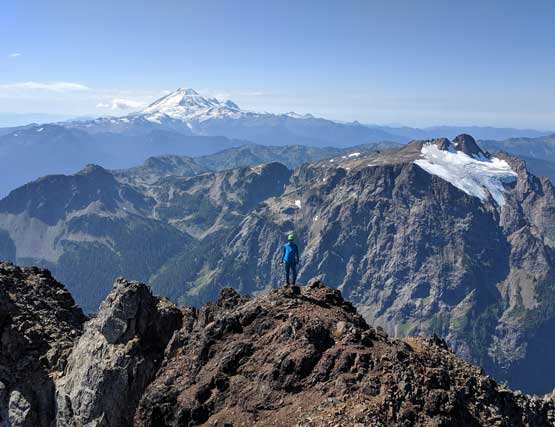
Connor arriving at the false summit with Mt. Baker and Tomyhoi Peak behind

Me scrambling the summit block. Photo by Connor M.
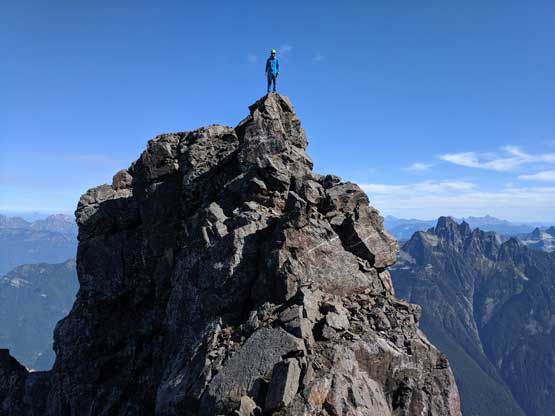
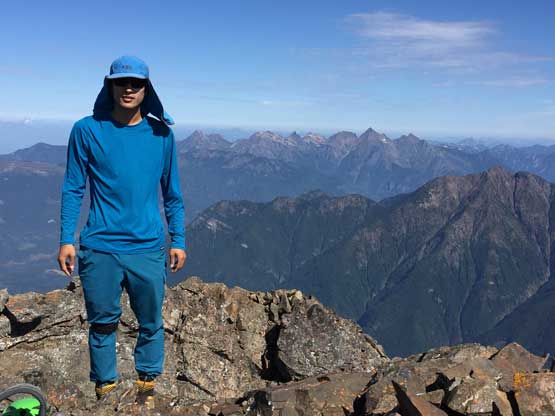
Me on the summit of American Border Peak now. Photo by Connor M.

Connor working his way up the summit block

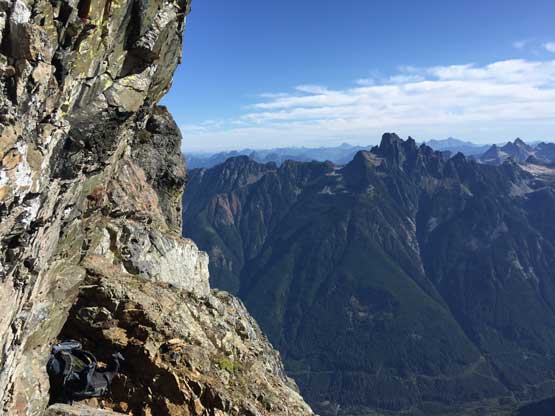
Partial Summit Panorama from American Border Peak. Click to view large size.
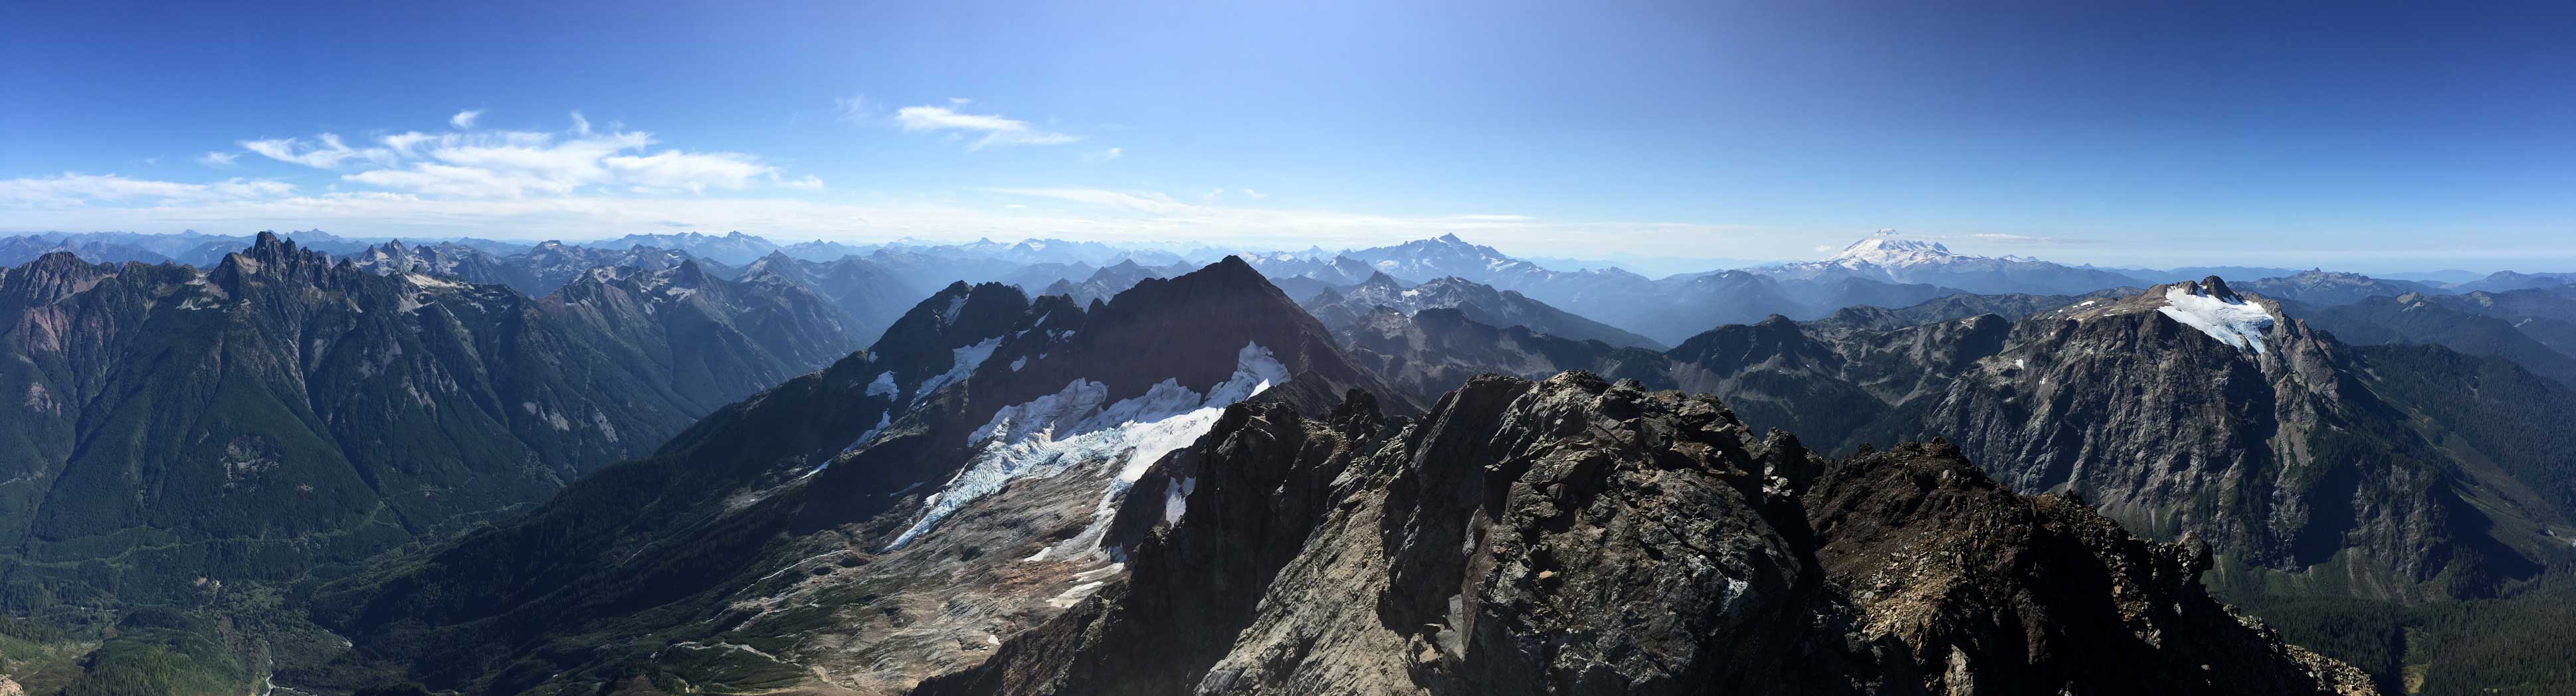
Partial Summit Panorama from American Border Peak. Click to view large size.

Slesse Mtn. is lower now, with Silvertip Mtn. behind just to the right

This is Mt. Blum to the south

Church Mtn. is the spire; Bearpaw Mtn. is the ridge to the right

The glacier on Tomyhoi Peak is much lower than us now
Mt. McGuire in the Chilliwack Valley

Welch Peak is the highest in Cheam Range
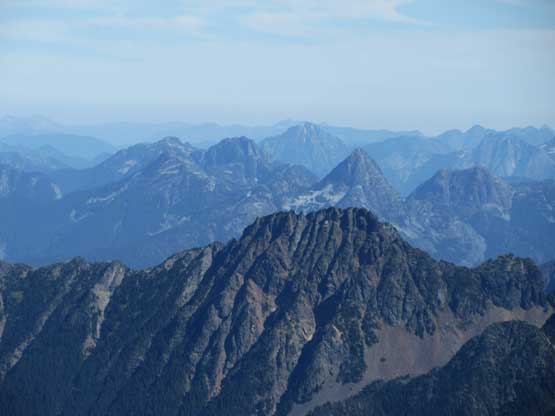
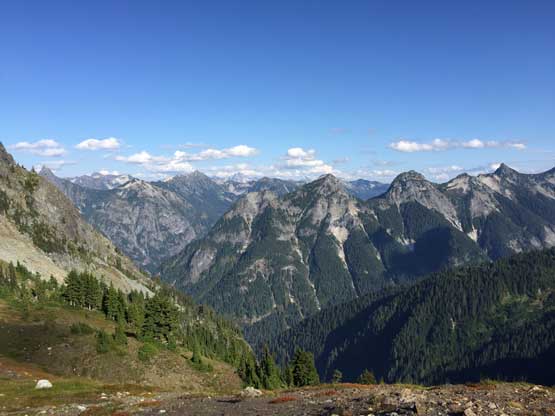
Looking into the core of “BC Cascades” over the summit of Crossover Peak
Mt. Lindeman

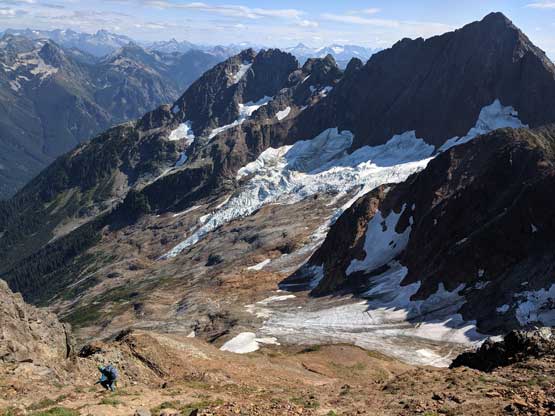
Impressive icefalls on the glacier on the NE Face of Mt. Larabee
Me on the summit of American Border Peak

Connor on the summit of American Border Peak
Looking down at Canadian Border Peak.

Another photo of me on the summit of American Border Peak
About half an hour later we leisurely started the descent. The down-climb of summit block required great care but was pretty straightforward. The down-climb of that stretch of compact choss above the crux chimney was very shitty though and I didn’t like it at all. If I had a chance I probably would opt to rappel but down-climbing was OK too. For the rappel the recommended way is to rappel through the tunnel but I had no idea how that’s possible with a backpack, so we had to rappel over the lip of that large chockstone making a challenging overhanging drop. Connor made it down with no problem, but just as I committed to the overhung the rope’s tension broke a piece of block into two, smashing onto my knee and legs and then bounces down the chimney, breaking into at least 50 pieces crushing towards Connor. We were both hit but somehow escaped injury although my right knee had some minor pain for at least a week after the trip. My knee’s pain was pretty bad at the time but didn’t seen to cause any functional issue so we were OK. The second rappel was easier than the first one. We then coiled the rope and soloed back across the “second key ledge traverse” and made another rappel into that “snow gully without snow”. The upper section of that gully was too shitty to down-climb. I waited for Connor to completely clean the path before making my own rappel. I pulled and coiled the rope in the middle of this gully, down-scrambled the rest, and traversed back across the “first key ledge traverse”.
Me back to the false summit now. Photo by Connor M.

Easy scrambling down along the upper south ridge. The only “easy” section on route
Can’t get rid of the views. What a day…

Connor working his way carefully down the zone of 3rd class compact dirt
This is looking down into Slesse Creek valley
Connor on the first rappel over the chockstone into the overhang

Me standing on the anchor boulder…

Connor on his second rappel now

Me finishing the rappel of the crux chimney.
Connor on the “second key ledge traverse”
A review shot of the crux chimney from above the “snow gully”
A zoomed-in shot of Slesse Mountain that I bagged a month ago

Mt. Rexford and Nesakwatch Spires
Mt. Rahm, Mt. Custer and Mt. Spickard in the distance
Connor rappelling the “snow gully with no snow”…
Me rappelling in the middle of the “snow gully with no snow”

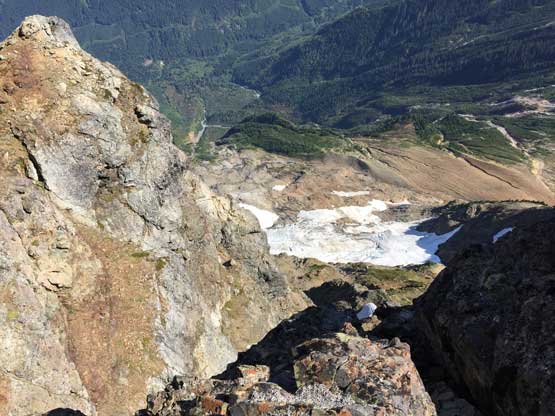
Above “Gaulle’s Nose”, looking back to review the “snow gully”
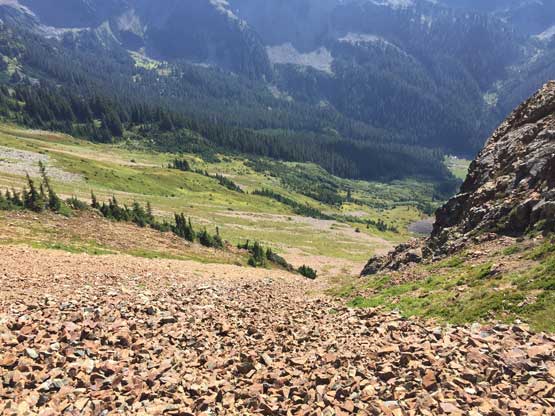
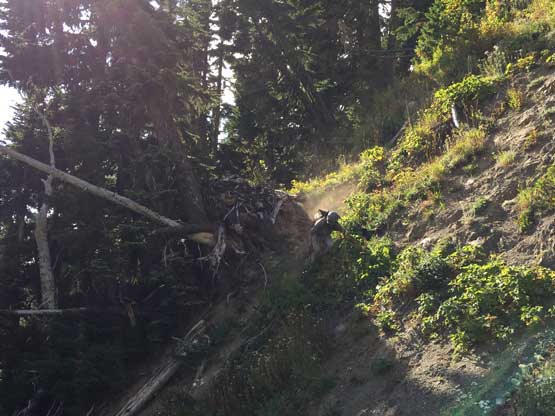
From the top of that shallow gully beside “Gaulle’s Nose” we picked up our lines, easily but carefully down-climbed reddish choss onto the “red face traverse”. This traverse felt much harder on the return with the downward direction but with slow and careful work we all made back across without a problem. The next long break was at the 6800-ft notch where we ditched water and food, but soon enough we had to face that 3rd bowl traverse, the shittest of the three. I looked no forward to this stretch at all, but forced myself to commit into the game, and got over with it. The ascent back onto that 6300-ft notch was shitty as expected, and so was the descent off the other side. Onto the grassy traverse in the second bowl we could finally have a short break with choss, but the bush soon took over. We somehow screwed up the 5400-ft ledge and went too high, and were punished by steeper-than-necessary terrain along with some side-hilling in waist-deep brushes that we couldn’t see our feet. Keeping our spirit positive we soon overcame the 1st bowl traverse back to Gargett Mine and that finally marked the “home-free point”. We took a not-so-long break there, and did the last 40-min hike-out in one single push.

Descending the shallow gully below the nose. This is the harder step
Me descending with Mt. Larabee ahead. Photo by Connor M.

The “red face traverse” ahead
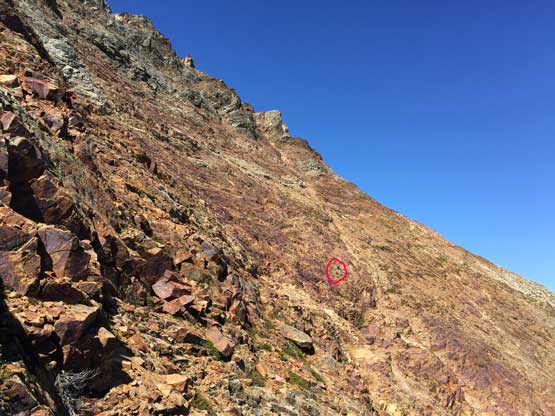
Connor, in the red circle, on the “red face traverse”, slowly and carefully…

One last look of the glaciers on Mt. Larabee
Descending the easy ridge into the “6800-ft notch”
This is one last look sideways across the “red face”

Slesse Mountain
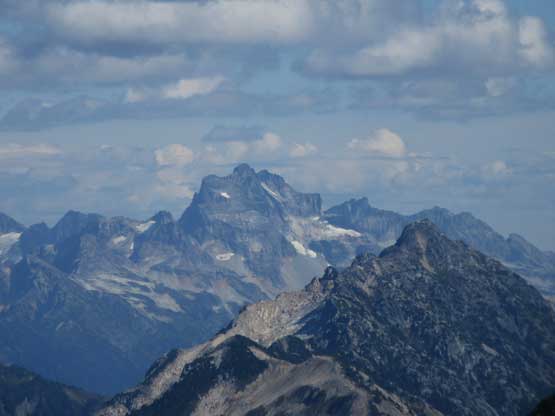
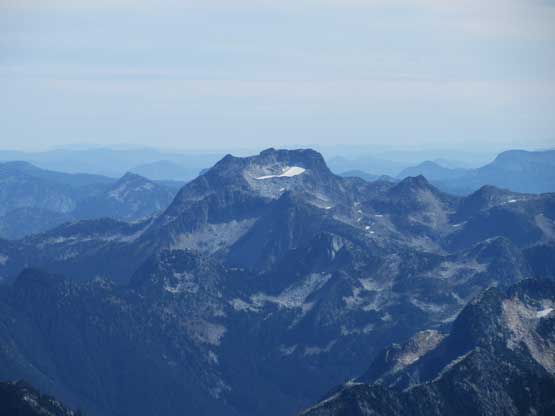
A zoomed-in shot of Mt. Redoubt
Down from the 6800-ft notch, we had to aim at the next, 6300-ft notch
Easy, but steep descent and traverses

Me slowly descending. Photo by Connor M.

Merging into a zone of white rocks

Connor bushwhacking…
Now at the basin looking at the elevation regain to the 6300-ft notch

Looking up to see the spires on the connecting ridge between Larabee and ABP

Looking back at American Border Peak (center)
This is the typical scree on the south side of 6300-ft notch

Connor working his way down

Traversing the second bowl.
Me heading into some brushes in the second bowl. Photo by Connor M.
Connor on the steep grass traverses

Into the woods
More bushwhacking… At 5400-ft contouring
We picked a bad exit and had to wallow through this patch of brushes
And, more brushes…
Back to Gargett Mine now, looking up towards Mt. Larabee
A review shot of Mt. Larabee from High Pass
This is a view into the remote Silesia Creek peaks, from High Pass

Back to Twin Lakes now. Done…
Our round trip time was just over 11 hours and considering the long breaks I think we did it pretty efficiently. The peak lives up to its reputation. I wouldn’t say it’s super difficult, but downright tedious and dangerous with lots of objective hazards from rock-fall. I don’t think I would recommend it to anyone but the die-hard peak-baggers who just “have to” bag it, but if you did pay the effort (and accept the risks) to get there, this is gonna be a very memorable summit. To me this was a awesome peak to end this awesome summer season. Looking forward to the next.
