Mount Assiniboine
August 13-14, 2013
3618m
Mt. Assiniboine Provincial Park, AB/BC
Mount Assiniboine is the highest peak in Southern Canadian Rockies, towering more than 500 vertical meters above its adjacent peaks. Though not visible from any major roads, it’s one of the icons of Canadian Rockies that regularly appears in tourist’s centers. “Matterhorn of the Canadian Rockies” attracts not just local climbers, but also worldwide. My first time seeing this majestic mountain is from the summit of Mount Bourgeau in the August of 2011. Back in that time I still wasn’t used to even just “easy scrambling” and I couldn’t believe how fast I’d progressed…
After summitting Daly, Niles, Wilcox, and then Chephren in the previous weekend, and having another ambitious plan over the following weekend, I should have a well deserved break in between. But the weather was too good and I had to take advantage of it. I didn’t want to push too hard physically, but the objective must be worthwhile. I started to think about Mt. Vaux, but decided to go for Mt. French. That was the plan until at the last minute seeing Dan Kim’s invite for a 2-day ascent of the mighty Mt. Assiniboine. Oh well, I gotta have to bail French then.. Dan messaged me just in time at about 7 minutes before Assiniboine Lodge’s closing time. We managed to book R.C. Hind Hut at the last minute. This is gotta be my dream trip, and yet probably my biggest ascent to date. After quickly gearing up I left Edmonton on Monday evening and met Dan in Calgary, at 5am Tuesday morning. Dan has extensive experience on rock climbing and mountaineering and I’m very grateful to have him as my partner on this ascent.

Mt. Assiniboine approach and ascent route via BC side and NE Ridge. GPX DL
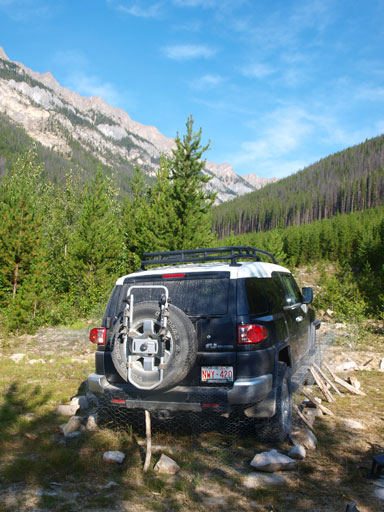
Our plan was to approach via Assiniboine Creek, commonly known just as the BC side approach. This involves about 43km one-way driving on logging road, but with the majority sections except for the last 5km being in a much better shape than the popular Smith Dorrien. The last 5km on Aurora Creek FSR was narrow and rough. A small car can probably manage to get to within 2km to the trail-head. But to get over a (very suspicious) bridge and then a wash-out you definitely need a high clearance 4×4. Dan’s truck barely made through and we were very glad not having to walk those extra k’s. There’re chicken wires at the proper parking lot and we were grateful to have those. It took us longer than expected and we eventually started our day at almost 10am in the morning.
There were chicken wires at the parking lot
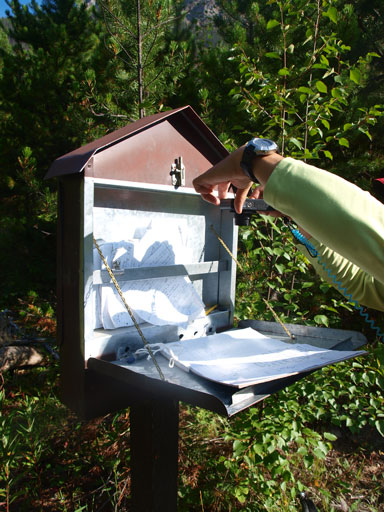
The climber’s registration box
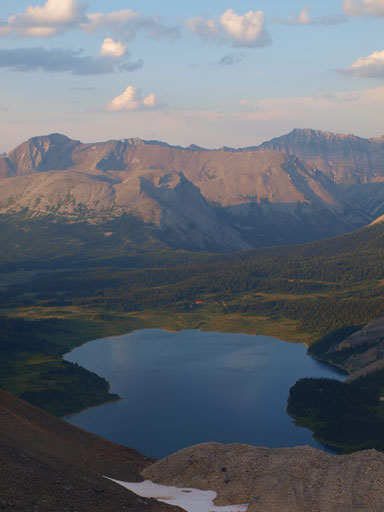
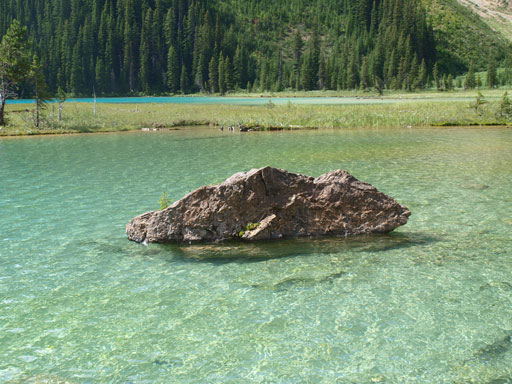
The approach was needless to say, tedious and boring, especially with a big backpack and on mountaineering boots. There are a couple minor wash-outs on the Assiniboine Creek Trail at the initial part but it’s generally in good shape. There’s one interesting creek crossing using a log bridge and a chain. It was a bit wet and I didn’t really appreciate the grip on that log on my mountaineering boots and I honestly think it’s the sketchiest part of the entire trip. Crampons will help a big time if wet. After this log crossing the trail flattens for the next few kilometers. The Lunette Lake turn-off was clearly marked by a cairn and we would pick the left hand branch, and after another half an hour or so we arrived at the beautiful Assiniboine Lake. This is probably the only memorable thing from the entire approach. Trust me it’ll be one of the most beautiful lakes you’ve seen. Think about Lake O’Hara, and it’s very similar. We contoured around it’s right hand side shore before merging on rock and ready for the ugly slog ahead.
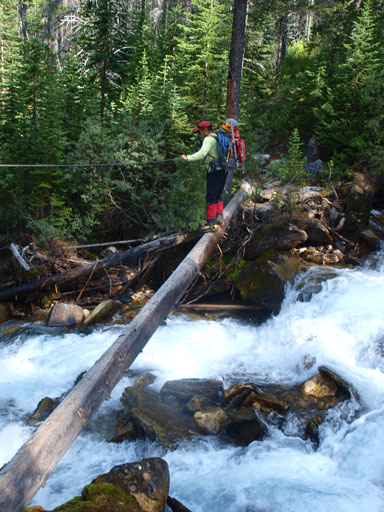
Dan crossing the sketchy log bridge
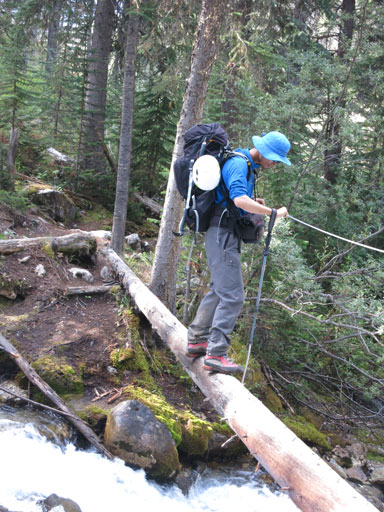
Me doing the same. Photo by Dan Kim
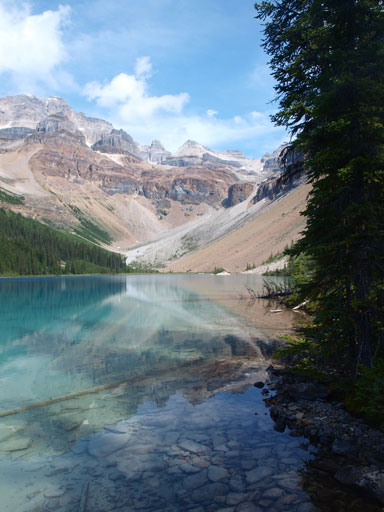
Eventually we made to Assiniboine Lake

The water was crystal clear
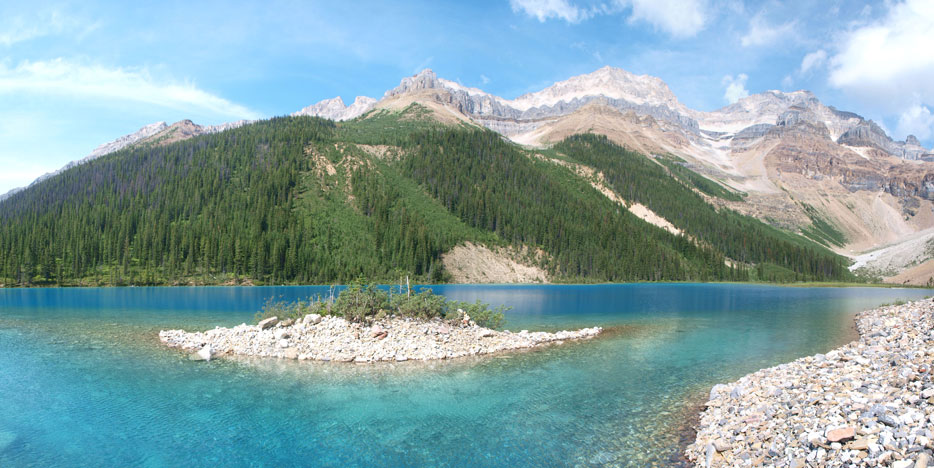
Panorama of the lake
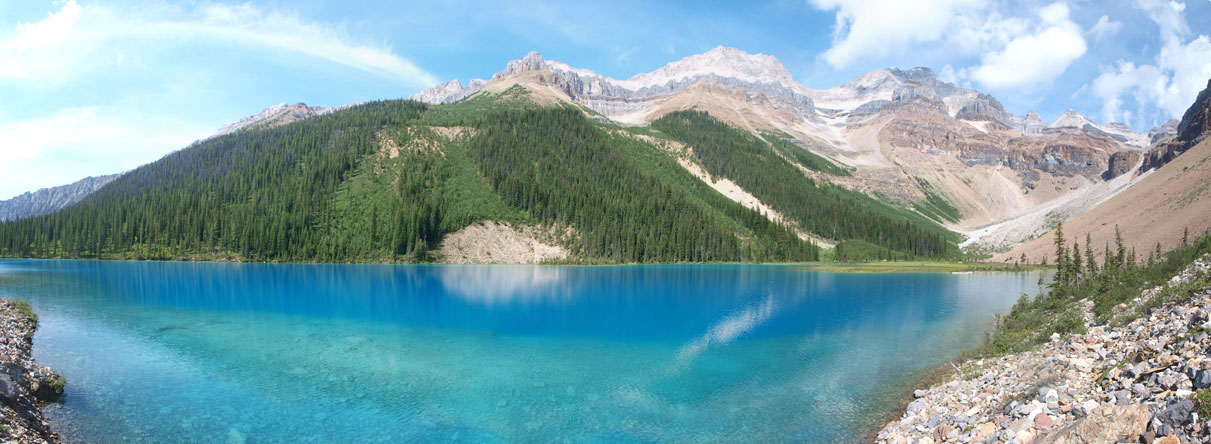
Another panorama
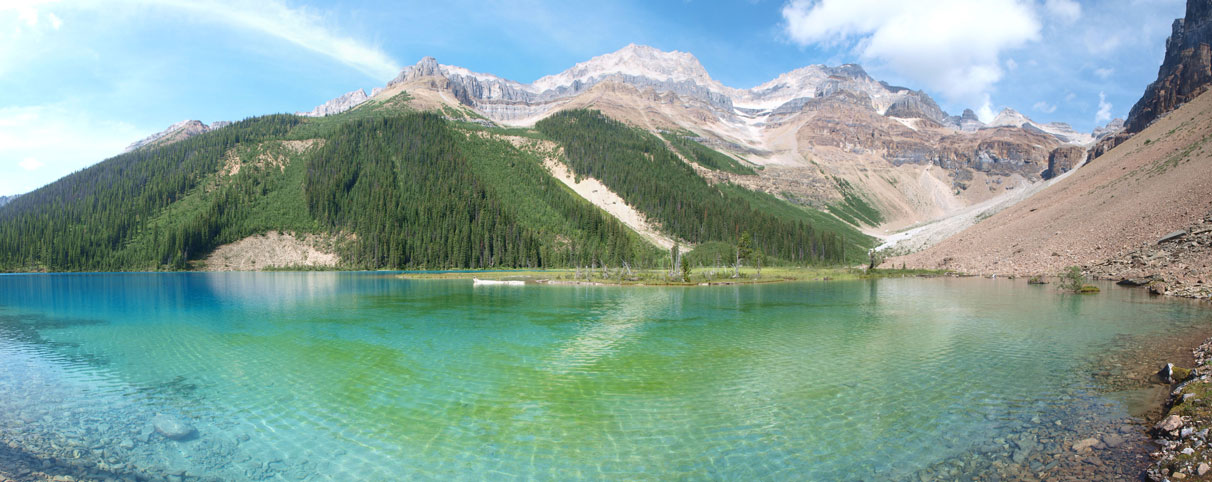
The lake’s colours were variable, so I took another panorama
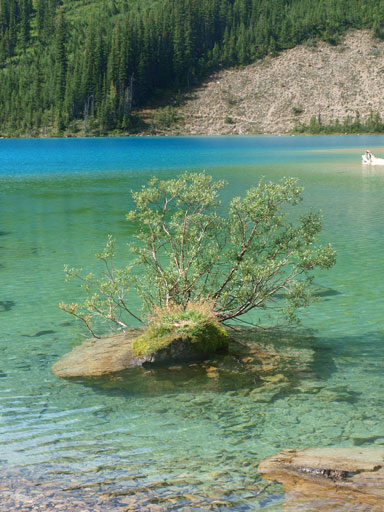
I love this little tree on a boulder in the lake
Dan just finished Edith Cavell, and I just ascended Chephren, and we were both going slow. The next section was aiming for a light grey pile of scree. After side-hilling on terious rubble for a while we dropped down to the valley floor where grass offered easier travelling. That pile of scree is on climber’s right of an obvious rock buttress. Route goes up this scree cone and then cut climber’s left. You should not go up the obvious gully being straight ahead of you. There’re paths on this scree cone and it was not as bad as it looks, but still, it was a slog! We eventually finished this section and then we finally got our eyes on the distant glacier, which was still far away. It took us forever to get to its toe…
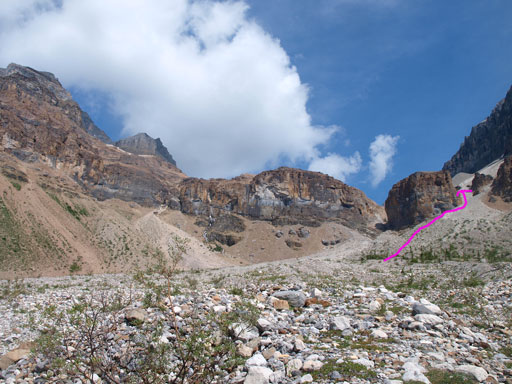
At the far end of Assiniboine Lake, looking ahead to the slog

Slogging up this giant scree cone
Higher up we merged into a gully
Looking back

Taking a break below some waterfalls
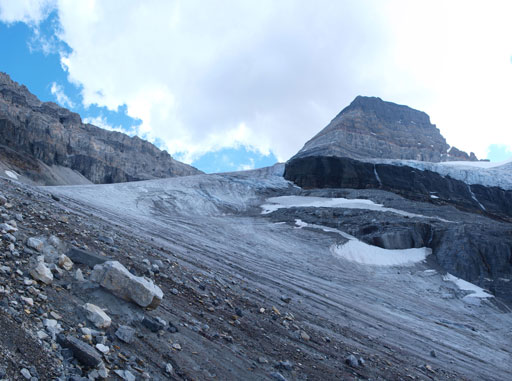
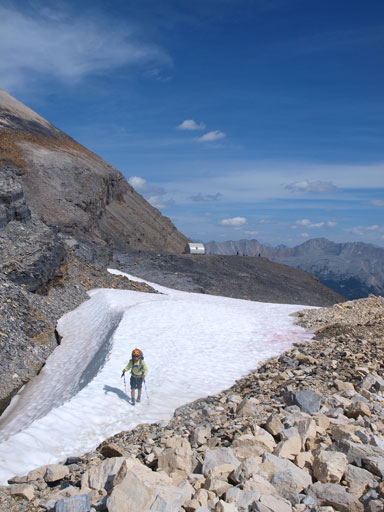
Finally we made to the glacier
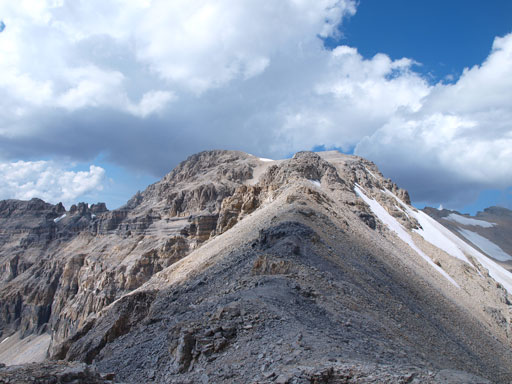
We would soon crampon-up the dry portion. There were quite a few holes that can easily suck a person in so if all snow covered I’ll suggest roping up this glacier. We roped up at the firn line. We soon picked a set of tracks and it brought us to the base of the final slog, the scree bash up to Assiniboine/Strom col. This part was probably the loosest of the entire trip. Thankfully it was (relatively) short lived. At the col we decided to ditch our backpacks and go bag Mount Strom since it’s right there. Strom is just a short diversion of our Assiniboine trip so I’ll write it in a separate trip report. It took us maybe 15 minutes to get up Strom, and we got great view of our primary objective.

Started the glacier travel
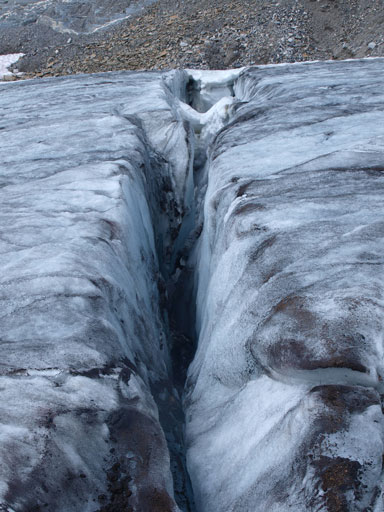
There were man-eating crevasses on this glacier
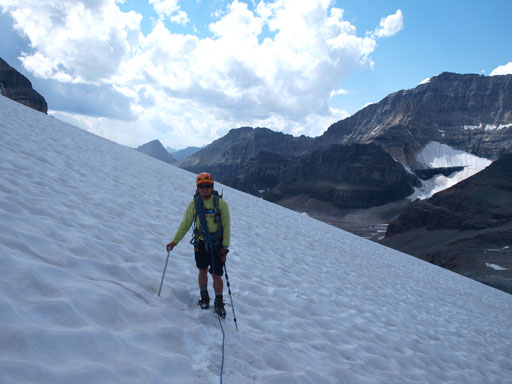
So we roped up once merging onto snow
After some tedious slog we made to Assiniboine/Strom col
Zooming-in towards the NE Ridge of Assiniboine from the summit of Strom
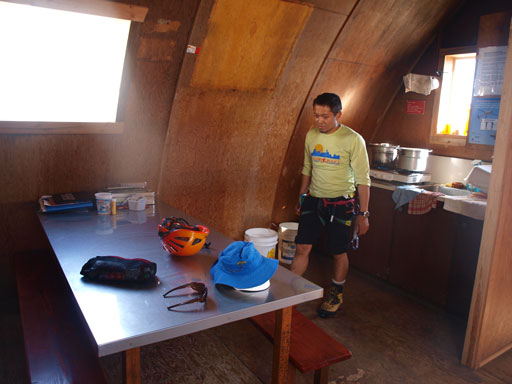
We had to lose some elevation to get down to Hind Hut. We managed to get there minutes before a quick shower. Thankfully it was the only shower we got and it didn’t dump any snow higher up. I was really debating whether I should go bag Wedgewood Peak or not but decided to save energy. Instead I carried Dan’s GPS and walked down to the base of Assiniboine’s NE Ridge to make our life easier next morning. The Hut was pretty full but everyone else was doing Assiniboine on Tuesday. They all made it and informed us the perfect condition. No need for ice axe, crampons, nor rock shoes. That also meant we would have the entire mountain to ourselves on Wednesday. Oh wow..
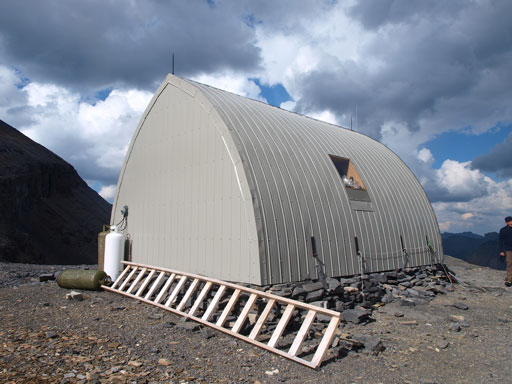
This is the R.C. Hind Hut

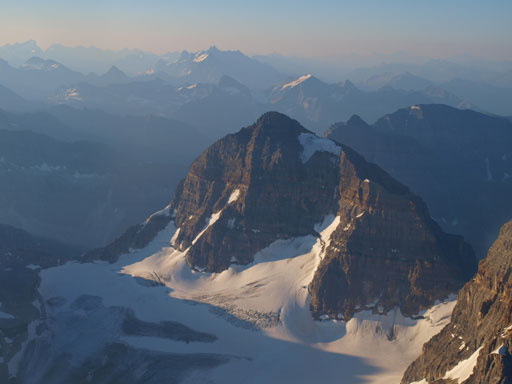
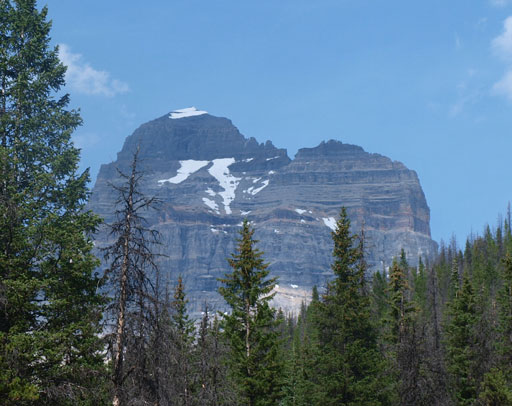
Our objective, the mighty Mount Assiniboine
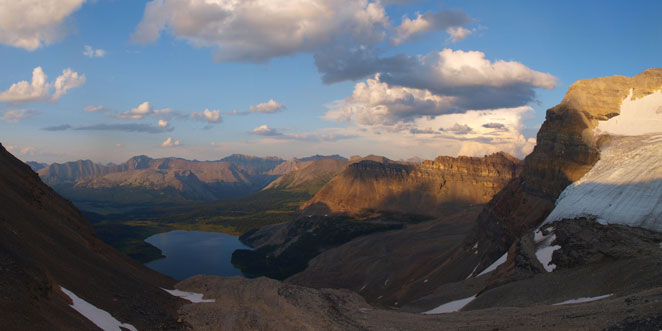
The view was gorgeous at sunset hours
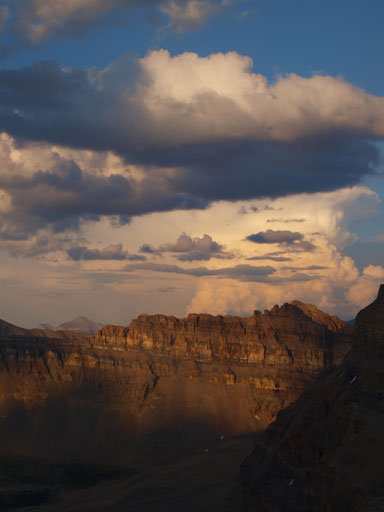
A distant thunderstorm
Lake Magog

Mount Magog
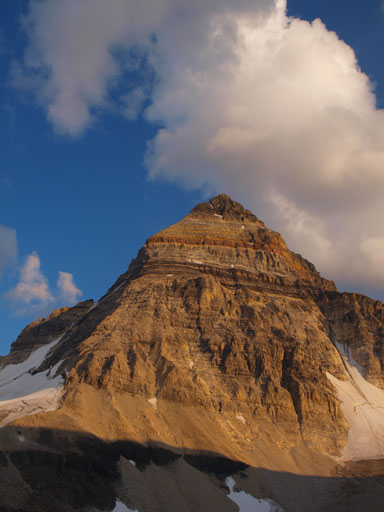
Mount Assiniboine

Mount Strom
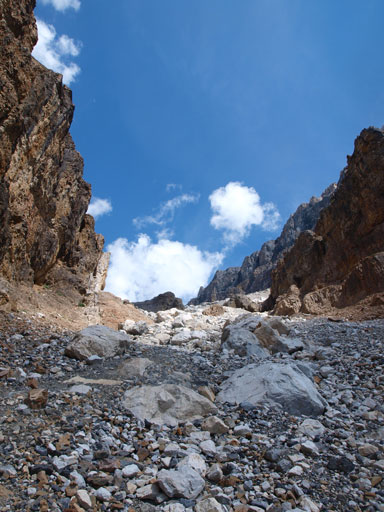
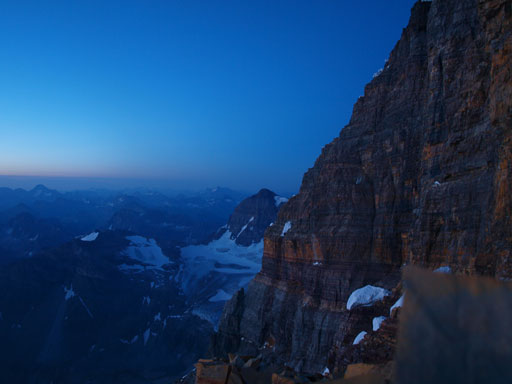
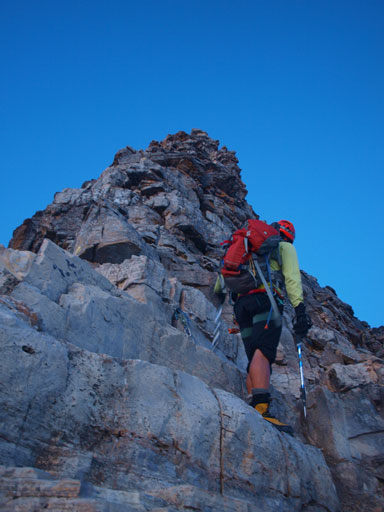
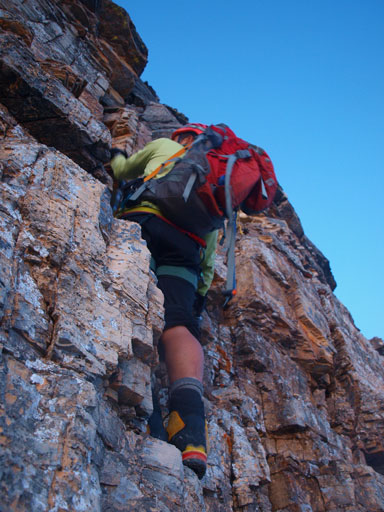
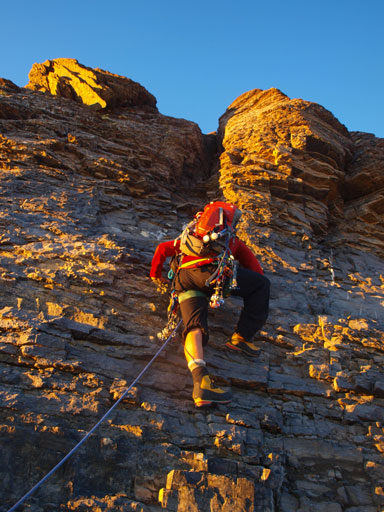
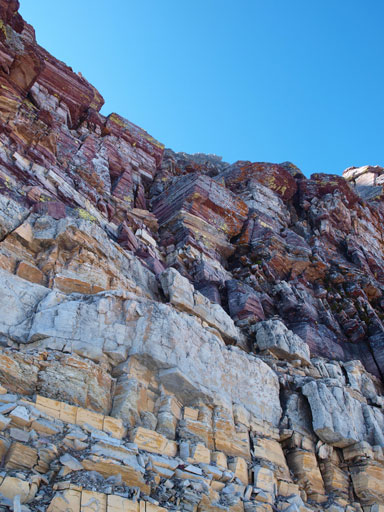
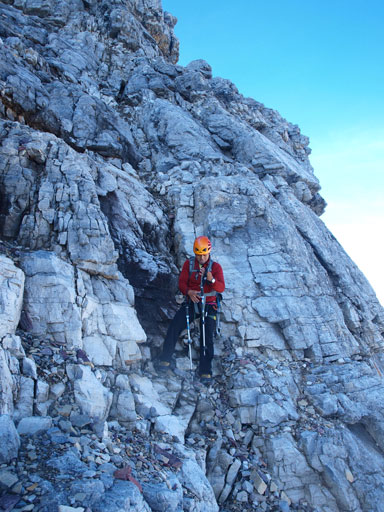
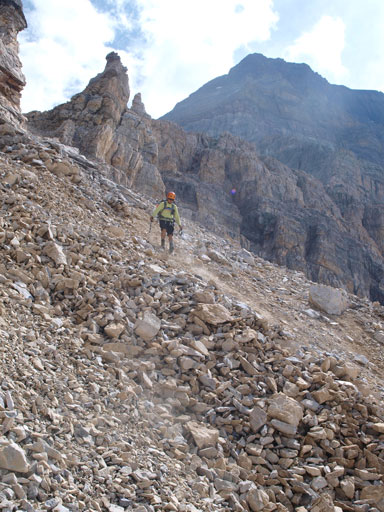
I gave up the sunset photos since I was pretty tired and I needed sleep.. Thankfully I did get pretty good sleep in this (crowded) hut. Dan and I woke up at 3am in the morning. It always takes longer to get ready in a hut or hostel, then in your bivy sack. We eventually started our day at 3:50am, in the dark. With all the stars lighting up the sky it was impossible to get lost. We didn’t need the GPS tracks since I had fresh memories of the details. Following a guide’s suggestion we went up a snow slope to the right of a small cliff band, and picked up a trail and followed it cutting climber’s left. This way we avoided some nasty scree slogging. The next 1 hour or so was a mix of easy to moderate scrambling, with a couple difficult scrambling sections. There’re trails for most of the way and it was hard to get lost. Basically we just went upwards following common sense. Terrain gets looser and steeper just above the black band, and below the red band. Mostly a loose moderate scramble at this point.
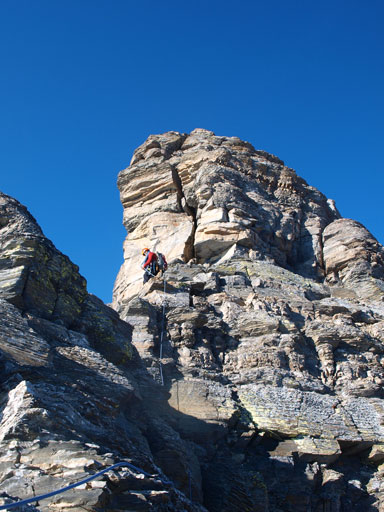
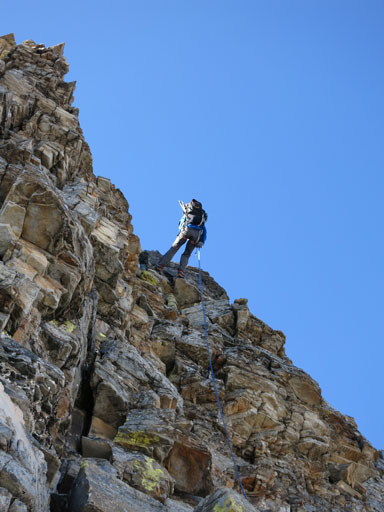
It was still dark when we got to the base of red band. We wasted about 10 minutes searching for the break before eventually committing to one. It turned out to be just difficult scrambling and we all got through with no issue. Unless icy or snowy, an experienced scrambler will not need a rope on the red band, both on ascent and on descent. The NE Ridge officially starts at above the red band. Some moderate scrambling brought us to the base of the crux pitch, the grey band.
Starting in dark
It was still quite dark when we got above the red band
Approaching the grey band
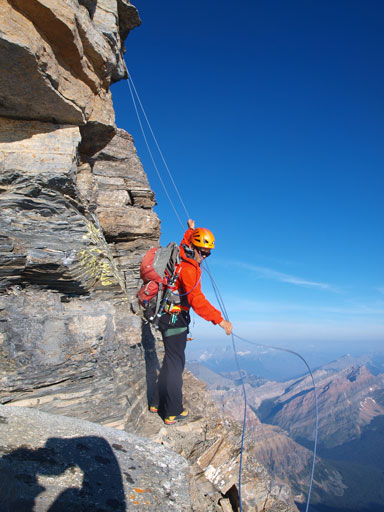
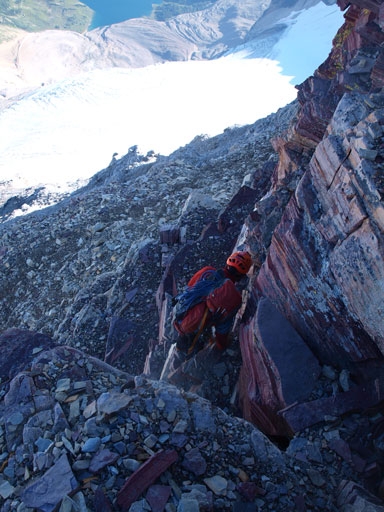
The ridge climb would soon switch to a face climb at this band as we traversing climber’s right onto the north face, looking for the easiest break. After wasting about 10 minutes we decided to pitch it out. I’m pretty sure we didn’t go up the “proper” chimney, but oh well. Dan did a great job leading up our chimney with only 2 or 3 pieces of protection. Compared to the crux pitch of East ridge of Edith Cavell, I found this one being more challenging. It’s less exposed and shorter, but technically harder. I would want rock shoes to comfortably solo this pitch, and I was very grateful to have a top-rope belay here.

Dan searching for a line up the grey band
The climbing starts

Sky was getting brighter
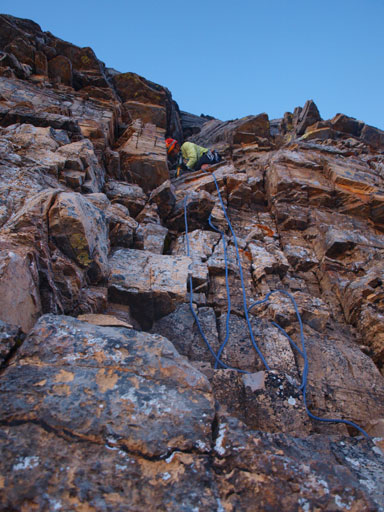
We decided to rope up here.
Now it’s alpenglow

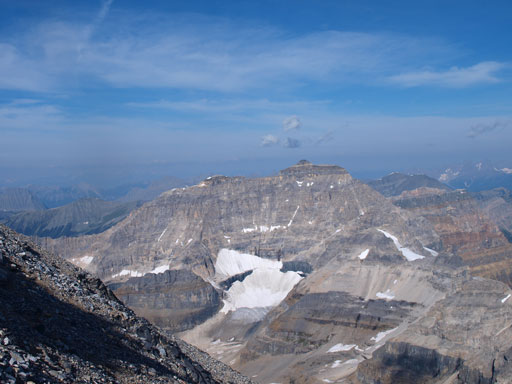
The 3200-meter The Marshall looks tiny from here.
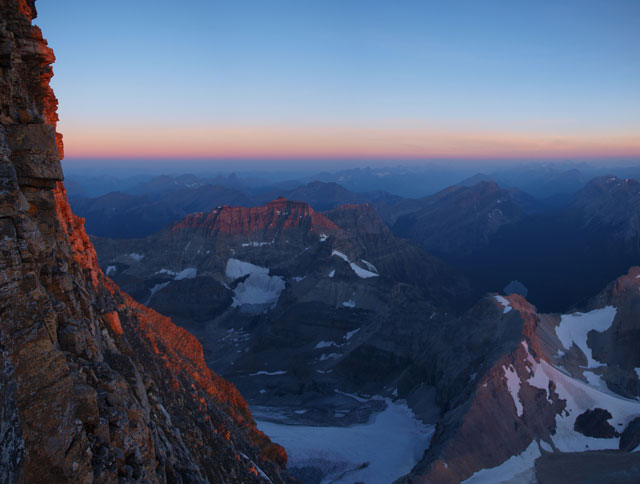
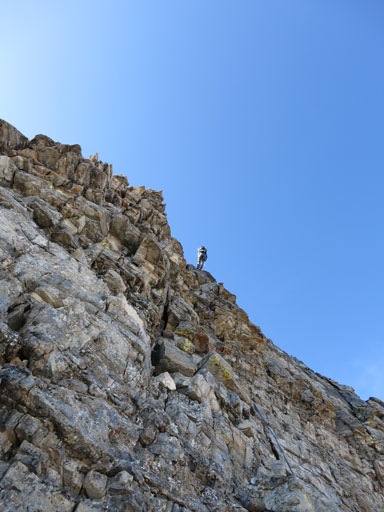
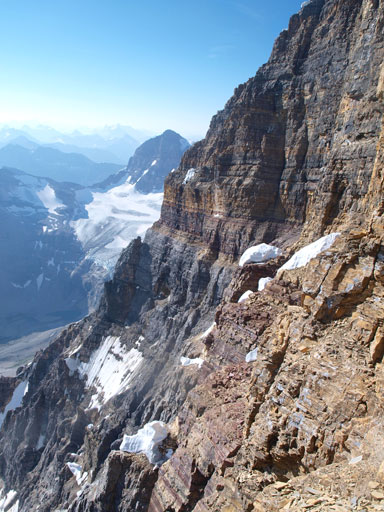
The sun finally came out once we cleared the crux and the view fully opened up. My favourite shot would be looking over the East face. The climb continued up the NE ridge over a couple short 5th class steps. We short-ropped for the rest. I did remember putting a couple pieces or pro at one band that was a little awkward with no good holds. Having Dan’s altimeter handy we knew we were getting there, and yes. We would soon top out the NE ridge. In front of us would be the false summit, and the true summit was shortly behind.

Sunrise time!

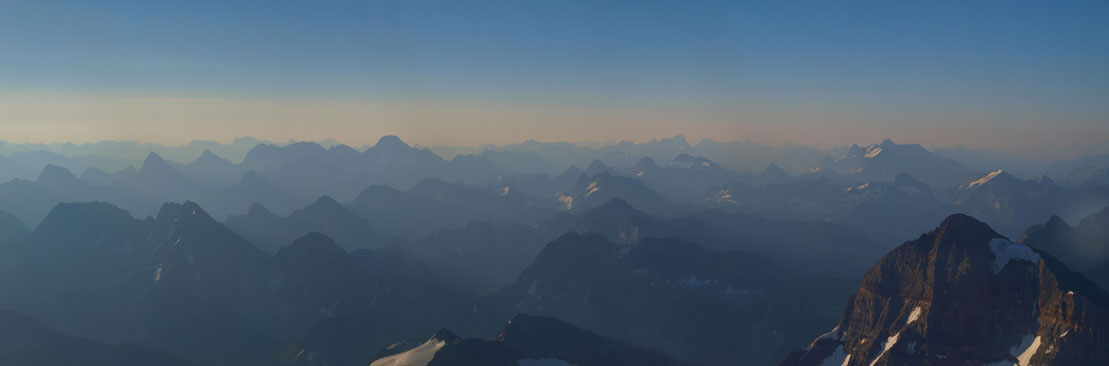
Panorama view again.

Dan
Dan led up the next step

Panorama looking over the East face
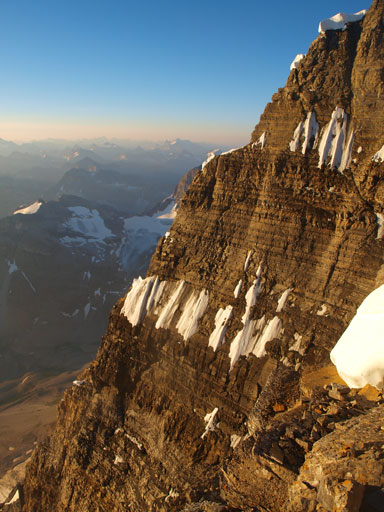
Assiniboine’s East face

The next step
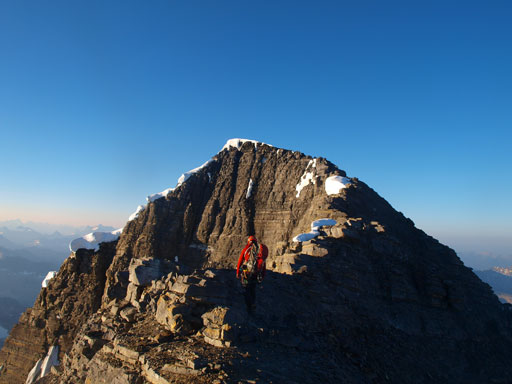
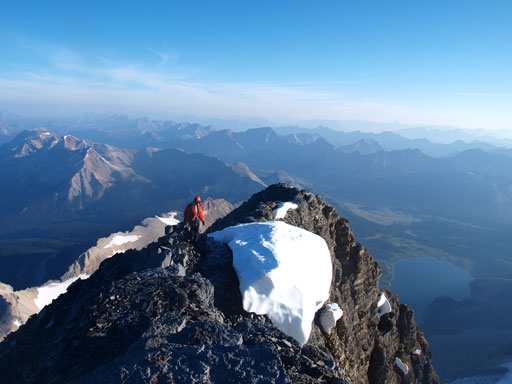
Finally topping out on the summit ridge. False summit is just ahead
3.5 hours hut to summit. Not a bad pace! There was a big cornice on the top obscuring my panorama. Sky was blue but it was quite smoky. We could barely see Mount Temple from the summit. The view was still good and we were looking down at everything.

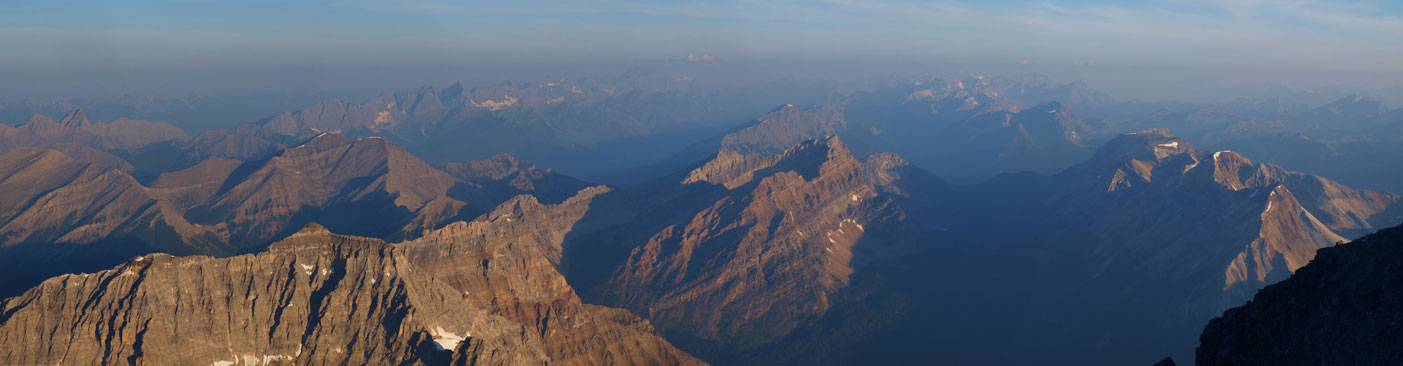
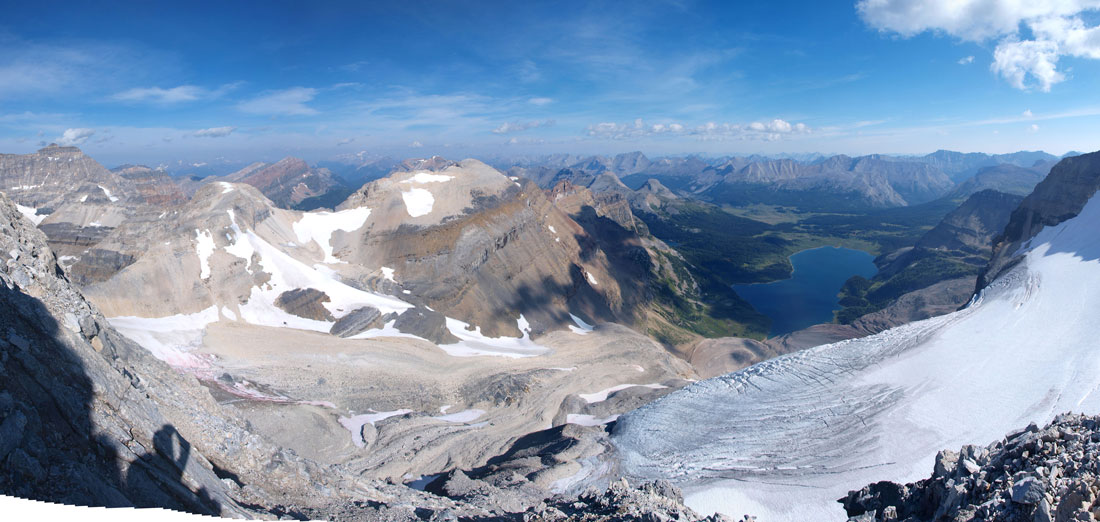
Panorama view from the summit
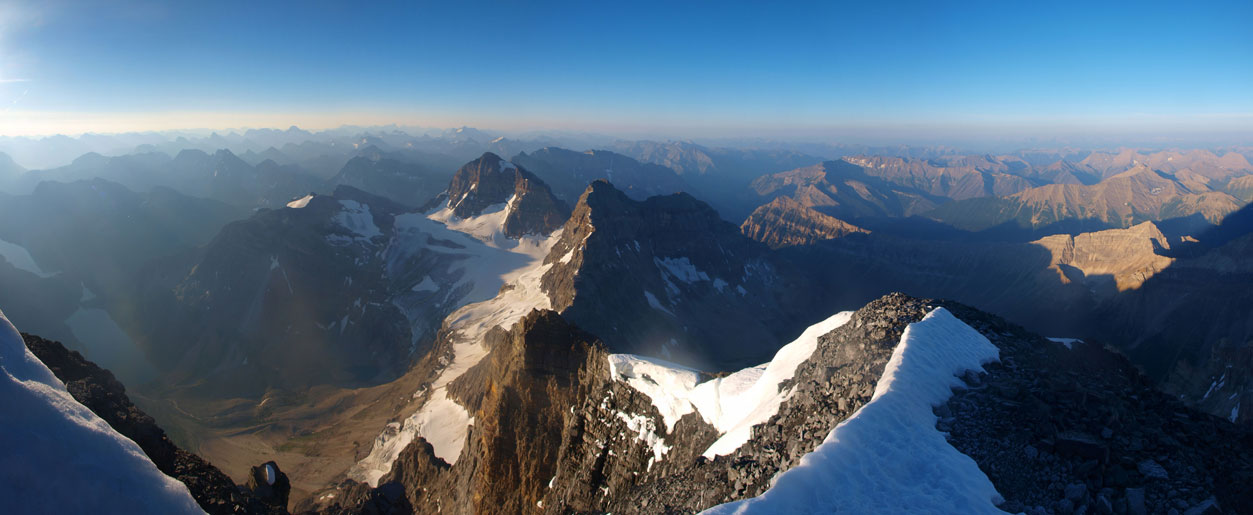
Another panorama view

It took us a while to guess which bump is Lunette “Peak”
Eon Mountain looks tiny
Can you spot Sir Douglas, Joffre, and King George?

An ocean of peaks
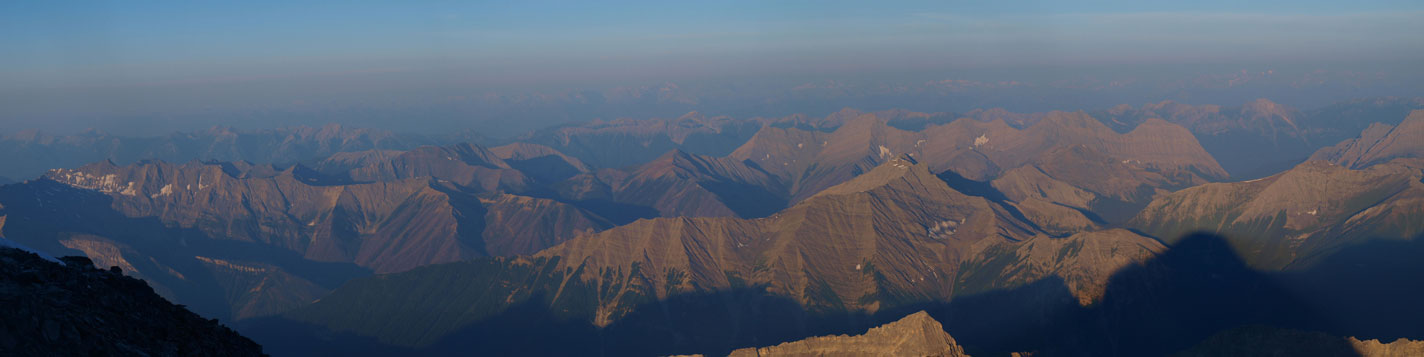
Another ocean of peaks
Everything is below!

Me on the summit of 3618-meter Mount Assiniboine

Our entry
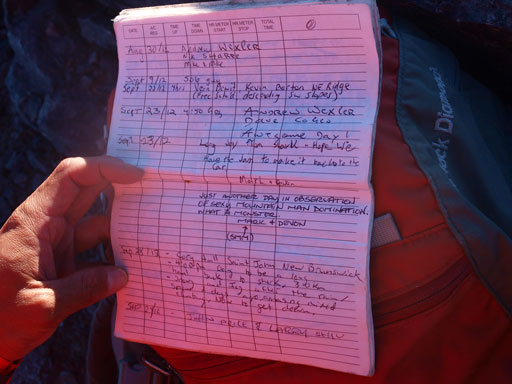
Familiar names from last year’s entry
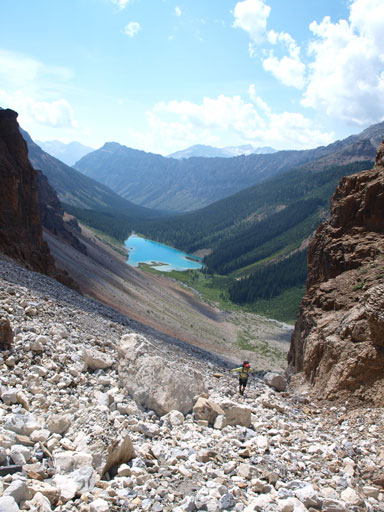
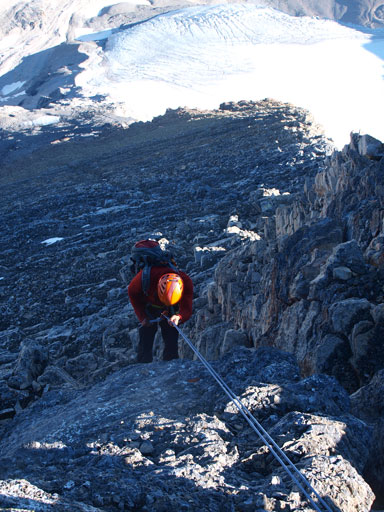
Since we planned to hike out and drive back to Calgary the same day, we didn’t stay long on the top. There were rappel anchors at above pretty much every sketchy section. We did 4 rappels in total including the one down the crux band. We down-climbed the red band since it’s pretty “easy”, and we didn’t want to take out the rope again. After the red band it was pretty much a “walk” down the rest. With daylight time we could manage to pick the easiest lines. I think except for one rock band it’s moderate scrambling at most. We arrived back at Hind Hut, and our round trip time was just under 7 hours hut to hut.
Time to descent
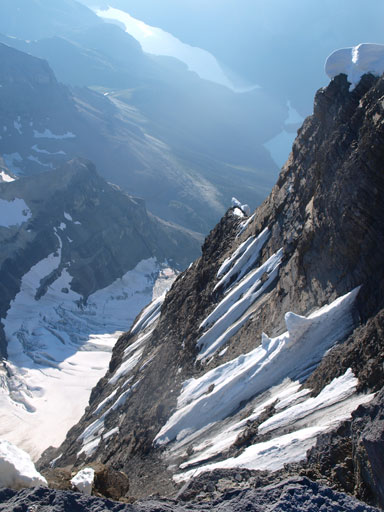
Looking down the shear drop down the east face

Rapping time!
Dan
Descending

Dan ready to rap the crux
Same as above
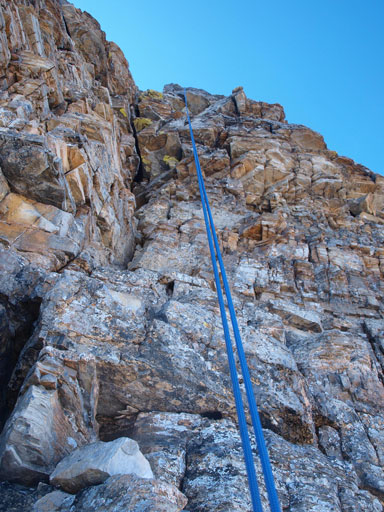
Looking up the crux
Me rapping down the crux. Photo by Dan Kim
A closer look at me rapping the crux. Photo by Dan Kim
Looking over the East face
Dan down-climbing the red band
Looking up the red band
The rest was just moderate to difficult scrambling at most
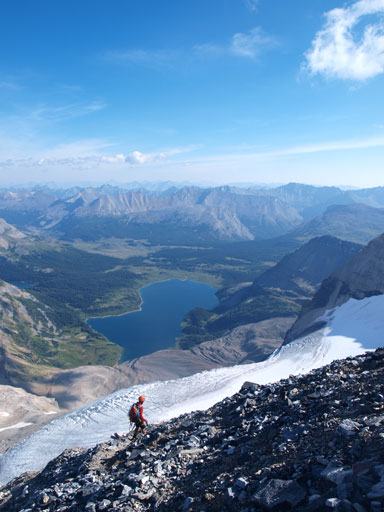
Can’t get rid of Lake Magog
The Marshall
Panorama view from the lower N. Ridge
Back to the hut, time to take another break
Again, I was tempted to slog up Wedgewood but decided it’s probably not worth. I still have a big trip a couple days later and slogging up 200 vertical meters’ scree just didn’t appeal to me that much. Yes it’s a peak, but oh well.. Neither of us was looking forward to the hike-out as we knew it’s gonna be a loooong slog back. Think about Brazeau’s return, Cline’s descent, and also Edith Cavell’s west ridge descent. We knew exactly what to expect… I didn’t want to say much about the unpleasant de-proach. Again, the memorable part was still Assiniboine Lake. I think one day I’ll bivy at this lake to enjoy the scenery. After eternity we arrived at Dan’s truck.. I think it took us 2.5 hours for the final 7km hike-out.
The first part of the return was slogging back to Assiniboine/Strom col
Over the col, time to scree ski

Back to the glacier
Eventually got back to Assiniboine Lake

And then into the woods
Looking back at the “big Ass”. Were we really up there a couple hours ago?!!
Overall, it was for-sure one of my favourite ascents, and I’m proud to have the mighty Assiniboine bagged on first try. The climb, however, was a bit disappointing since the majority part was a slog. The East ridge of Edith Cavell was a better climb (in my opinion). I also have to thank Dan a big time trusting my scrambling/climbing skills, and I’m also very glad to learn rock climbing techniques from Dan during the trip.

Hi Steven, in the future I’d like to summit peaks like this but I do not possess the technical skills to do so. What kind of training/programs/organizations would you recommend? Thank you!
Hi Lisa. For technical rock climbing I (and my regular partners) hired a guide privately for 2 days through Yamuska. For glacier travel we did the same hiring guide privately. Taking their courses is another option. But even more important is to constantly do mountaineering trips after you do the training. The course is basically just a starter but if you do 10 trips with an experienced mountaineer chances are you can learn a lot of stuffs too.
Hey Steven, were the use of crampons needed for the glacial/snow section? I know your conditions were pretty good by the looks of things. Looking to summit this summer 2016.
Hey Lane. When I did it, the glacier has fair amount of bare ice near the toe so crampons were used and needed. It might be possible to skirt around on climber’s left but I wouldn’t count on it. If you really want to save weight then Aluminum crampons or micro spikes should probably do the job.
Liked your description. Had a couple chances to go up this peak but never did so enjoyed the vicarious experience. FYI Assiniboine visible from at least three roads. The one you prob know is from Smith-Dorien which is not a major road as you said. The other less known view is from Hwy 93 where you get a glimpse just a few km south of Kootenay Park Lodge (often obscured in clouds) and the third is a perspective I discovered and never heard anyone speak of. It’s a few km north of Cochrane on Hwy 22 on hill just before Shell gas stn. If you look back southwest just to right of Mt Lougheed in spring you can see sun shining on glacier studded face. June best when other peaks melted off and taller Assiniboine still white. Cheers.
Hey Bob, nice to know. Thanks for adding the info.
Hey Steven,
Looks like an awesome trip. My group is looking to do Assiniboine later this summer/Fall and I was wondering what you guys carried as part of your racks for the climbing portion. Anything you learnt from the climb that you would have changed and anything you guys were glad you had? Thanks for the help. Love the journey.
For rock rack we for sure used 2-3 mid-sized cams and 1 or 2 nuts but not more than that. Really, only 1 band was 5th class climbing and else were just “difficult scramble”. The rap/belay stations were “fixed”. We carried more gears than necessary. Depends on how confident you guys on exposed scrambling it’s easy to “over gear” on this route. In fact, most friends of mine did this route free-solo. BTW, you need crampons for the glacier portion (approach).
Hey Steven,
Awesome report of your trip. Just wondering what you and Dan were using for anchors when he was top-belaying you. Were you using the fixed rappel stations or was Dan building anchors with slings and gear before belaying you from above?
Thanks!
David.
There were at least one pitch that Dan had to make his own anchor (which we were a bit off-route). Currently you should have at least 4 fixed stations. And with the increased traffics these years I can say that if you have to built your own anchor that means you’re definitely off-route.
Awesome, thanks!
Hi Steven ~
I am Sanghoon and I admire your mountaineering adventures.
Also I am your Blog Fan,
My friend and I am planning to climb Mt. Assiniboine on late August 2017.
I usually scramble alone. I have finished Mt Temple(twice), Eiffel Peak, Castle Mt, Mt Niblock (twice), Nigel Peak, Cascade Mt, Ptarmigan Peak, Mt Richardson, Mt Yukeness, etc.
For Mt. Assiniboine I will be climbing with my friend (Lim) who has good skills in rock and ice climbing.
Lim will be a leader. I have questions and will be really appreciate for your kind answers.
Could you list all the gears that we have to carry : (as detail as possible)
Thanks
Sanghoon
Hey Sanghoon,
To your question I can’t answer the exact list as it was Dan who designed the trip. I played my role in the ascent but it was definitely more of a “Dan’s trip”. Right now you have fixed rappel stations (4 or more). It all depends on what Lim decides as it’ll be his lead. If he’s comfortable more-or-less soloing the route then you really shouldn’t need much gears. I would go for cams up to size 3 and maybe a couple stoppers, slings, rappelling gears but not much fancier than that. Rock shoes might help for the crux pitch but climbers shouldn’t need them. For the approach there’s a small glacier so for the least, crampons and since you’d need rope anyway so basic rescue devices. But then you do decide carefully as some common mistake people make on these 11,000ers is “too overgeared” which will sacrifice your efficienty.
Is easier SW scramble thru lunette col?
This was a pleasure to read. Thank you for the great report. My only question is, How do you reckon that they were able to establish that cabin all the way up there?
There is a BC Provincial Ranger training camp near Sunburst lake as well as the lodge on lake Magog with constant helicopter servicing them. So I imagine they flew it all up there as no one would haul one of those propane tanks on their backs… 🥾