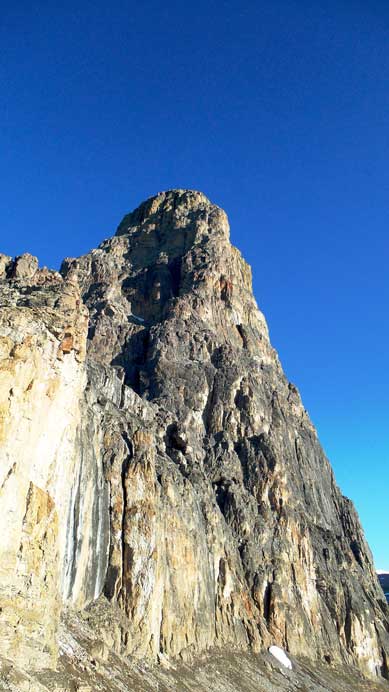
Eisenhower Tower
June 21-22, 2015
2720m
Banff, AB
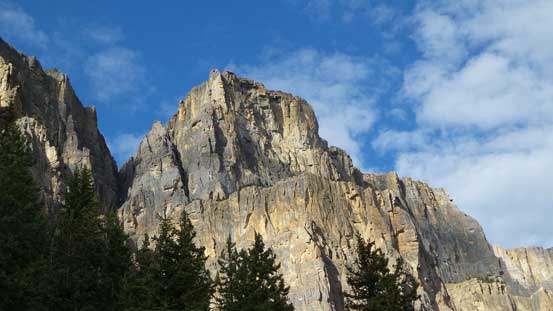
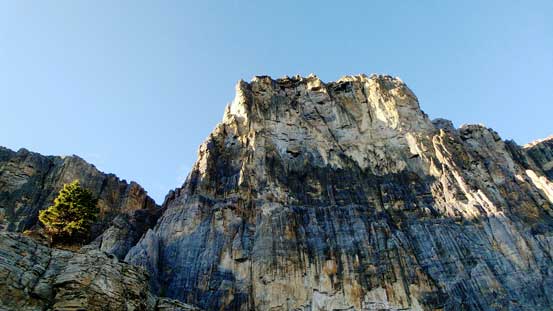
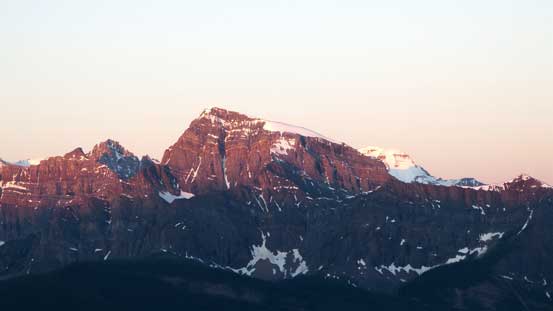
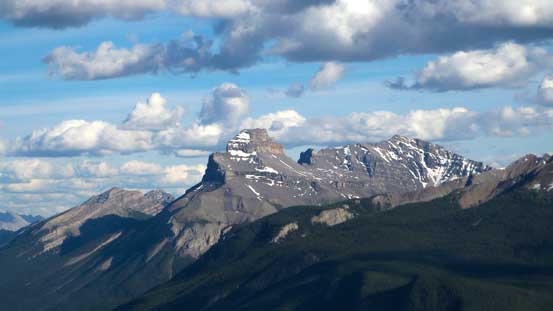
Eisenhower Tower is a prominent pinnacle on the Castle Mountain massive – one of the Canadian Rockies’ most unique features that appears regularly in tourist’s centers. Though not as high as the adjacent peaks on Castle Mountain, the tower is separated from the main massive by a deep notch making it one of the most striking peaks in the Bow Valley guarded by vertical cliffs from all sides. The way it’s built naturally draws significant attention from climbers and nowadays the standard route has become one of the classics in Banff’s alpine rock climbing (Alpine II, 5.5). For obvious reasons I’d been eyeing on this objective for a while and with a guaranteed sunny day in the forecast Ben and I figured it’s the time to give it a try. Strangely this would be my first trip on Castle Mountain massive.
There’re two approach routes for this peak – one via Rockbound Lake trail from south and the other via Castle Lookout trail (a more direct access to the various climbing routes on Castle Mountain). It seemed like most folks had approached using the former option but after studying in details we found the latter choice would be more interesting. The bonus was Castle Mountain Hut – a perfect place to spend a night since we weren’t 100% confidence on our rope work efficiency so better to do a “planned” bivy than a “forced” one. After driving through some thunderstorms we arrived at the trail-head at roughly 6 pm on Sunday evening. Weather was slowly improving as we gradually worked our way up the well-maintained trail. It’s not an exciting hike but dispatched 500 vertical meters of height gain.
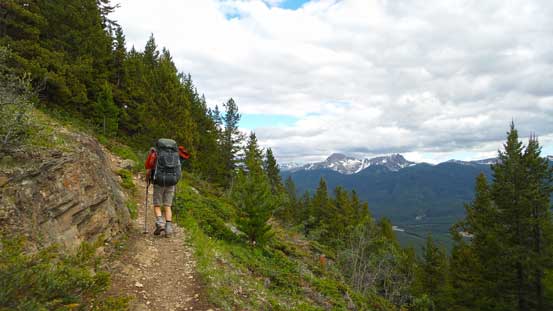
Ben hiking along Castle Lookout trail
The trail crosses a drainage (with running water in it). Looking up…

Already great view of the Bow Valley
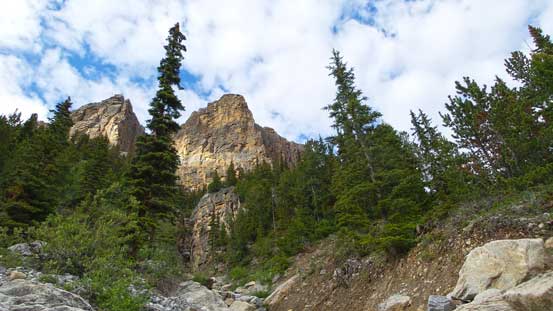
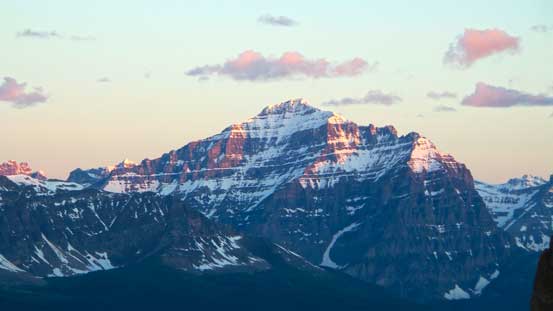
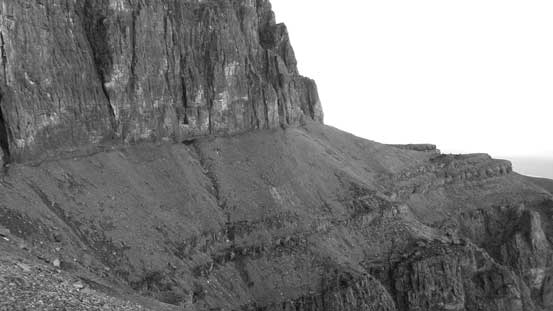
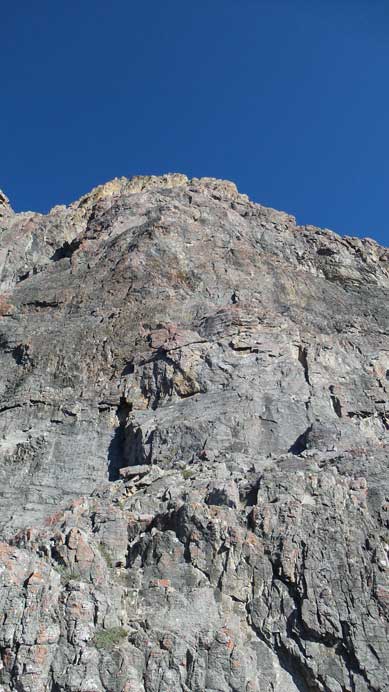
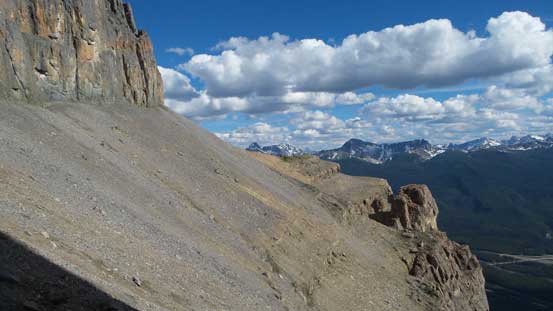
Looking upwards we could see Castle Mountain’s impressive cliffs
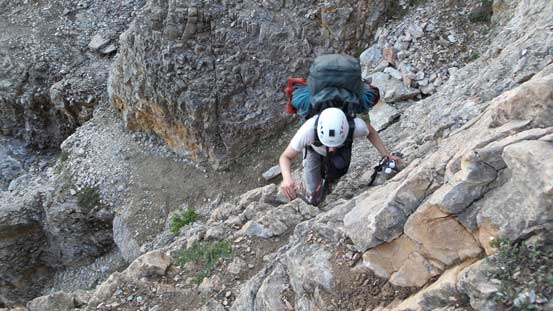
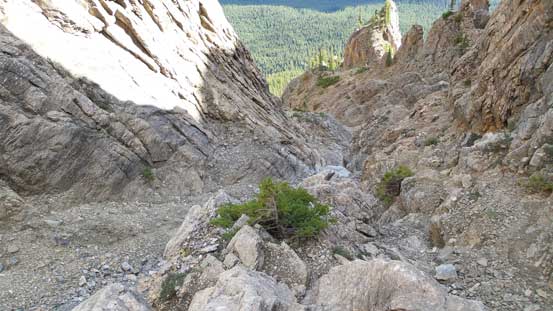
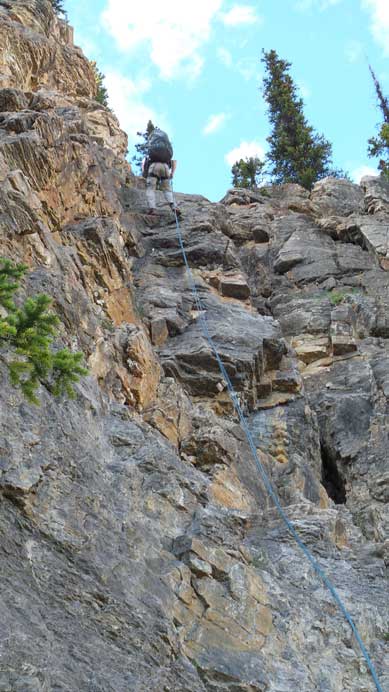
From the fire lookout we took the climber’s trail which ascended steeply up. We got lost briefly but correctly ourselves higher up by some brief bushwhacking. The climber’s trail brought us to the base of the cliff face and the first section would be the crux for this approach. The guidebook says it’s 4th class but with a heavier pack a few moves felt a bit more awkward. After this pitch we agreed that on the descent we’d use the 2-bolt anchor for a rappel rather than down-climbing. A well-beaten path led us diagonally up traversing across a scree bowl followed by ascending some 3rd/4th class terrain with some route-finding on the ledges and chimneys. Once above the scrambling bits we were officially on the Goat Plateau – the large ledge system between the Castle Mountain’s upper and lower cliff faces. Another scree bowl traverse towards climber’s right we arrived at the hut. It’s the smallest hut I’ve ever been to but did have some basic facilities including stoves and drinking water.

A view from the start of the scrambling section

Ben ascending the “key diagonal traverse” – the only break in the first cliff
Ben finishing the diagonal traverse. Bit exposed and awkward at places

One of the few scree bowl traverses
More typical terrain on the approach through lower cliff bands
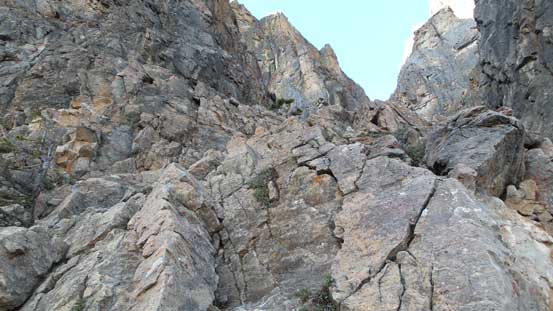
Looking upwards
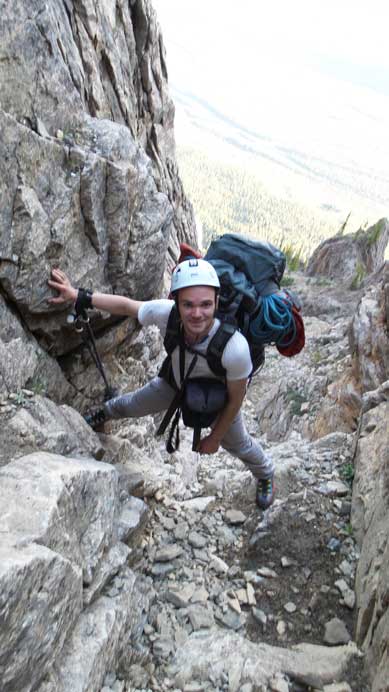
Scrambling up a chimney. An easier option exists just to the climber’s right

Arriving at Castle Mountain Hut
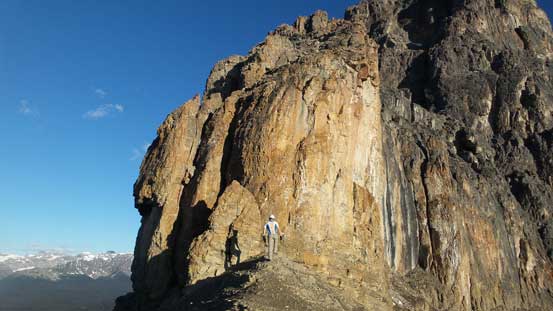
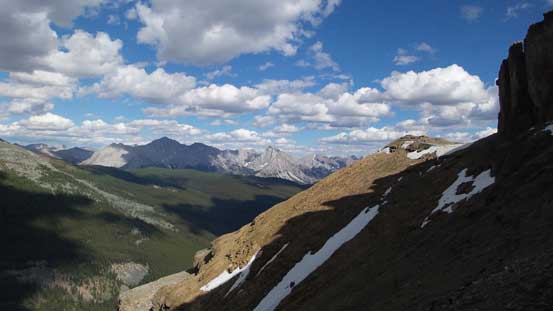
Another bonus of this approach was the incredible views. Sandwiched between the upper and lower cliff faces we got to see some of the most unique rock features in this part of the Rockies. And for the most important, the sunset views would be amazing half an hour later. After taking roughly 100 pictures we went to bed. There’s no need to rush in the morning since we already shaved 2.5 hours off, but we still set the alarms at 5 am just to make sure we had enough daylight time to finish the climb, despite the fact it’d be the longest daylight time of a year.

A view towards the long scree bowl traverses to Eisenhower Tower
Directly above us was the Brewer Buttress – out of my league at least for now
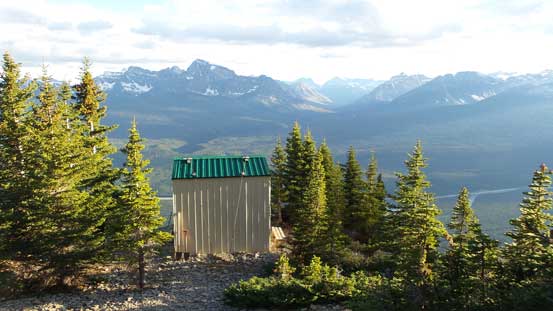
Another view of the Hut

The Hut is located ridiculously close to the edge
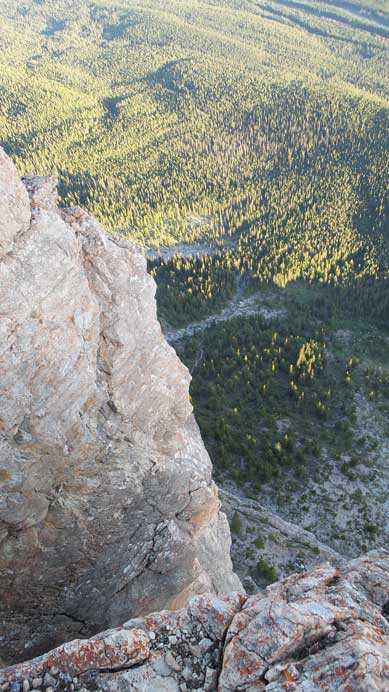
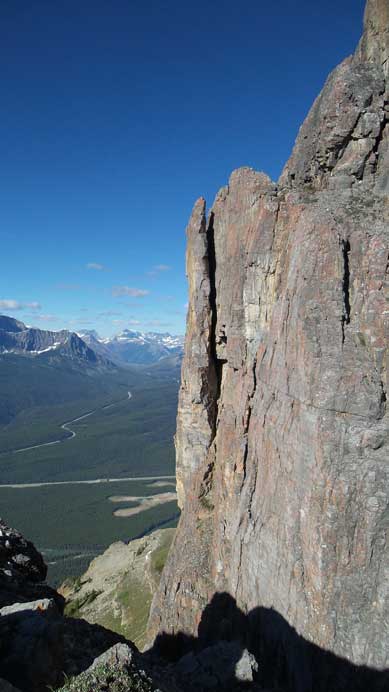
Another look down the cliffs… It’s almost overhanging.
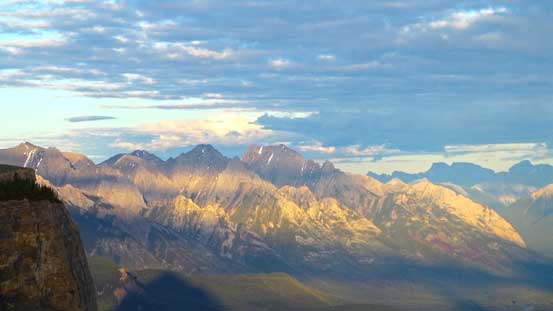
Sawback Range gets some evening sunbeam
Looking over Vermilion Pass into Kootenay N. Park.
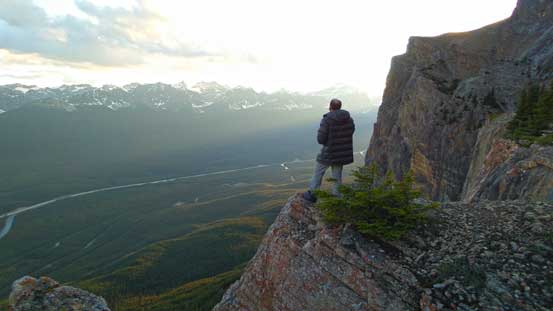
Ben on the edge checking the views
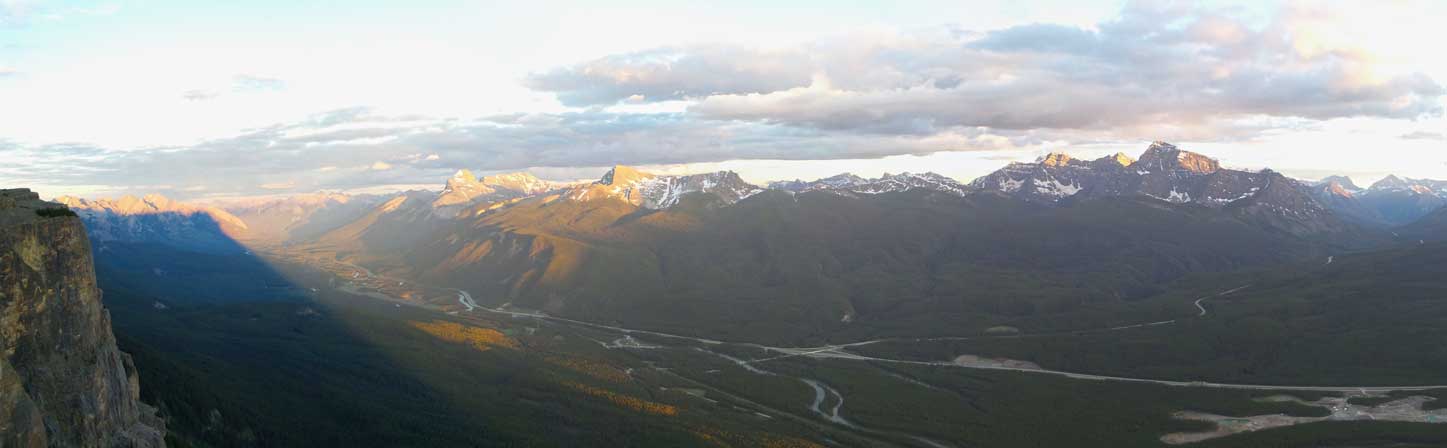
Panorama of Bow Valley at sunset time. Click to view large size.
Pilot and Brett
Copper Mountain

Cool to see the shadow of Castle Mountain
The morning was a bit slow going probably due to the incredible alpenglow views, but we did manage to get going shortly after 6 am. Our first business was traversing to the base of Eisenhower Tower’s Dragon’s Back. It didn’t look very far away but since I’d studied the map I knew it’s roughly 2 km of side-hilling on scree. Thankfully there’s a beaten path along the base of the upper cliff eliminating most, if not all of the side-hilling for us. There’s still a few awkward spots including a snow gully to cross over, but within an hour we made to the base.
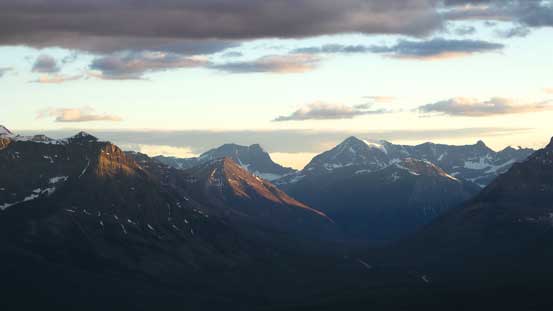
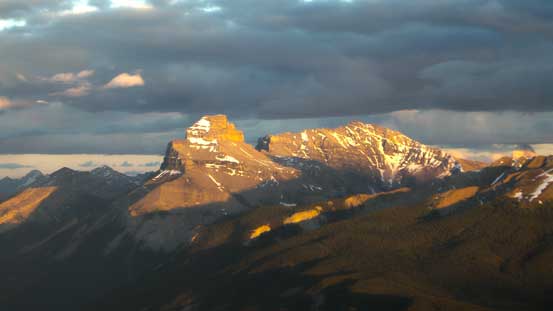
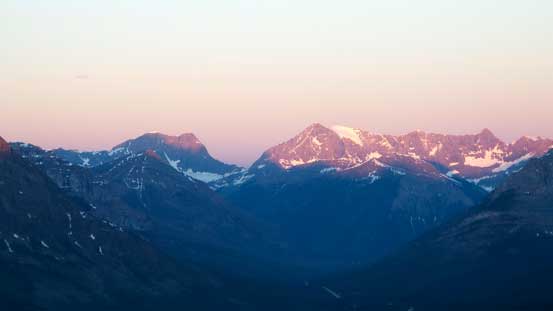
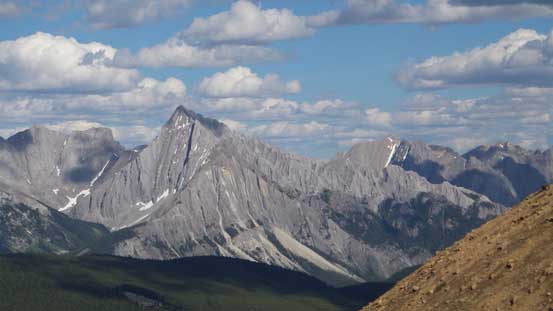
Alpenglow on the mighty Mt. Temple
Alpenglow on Storm Mountain
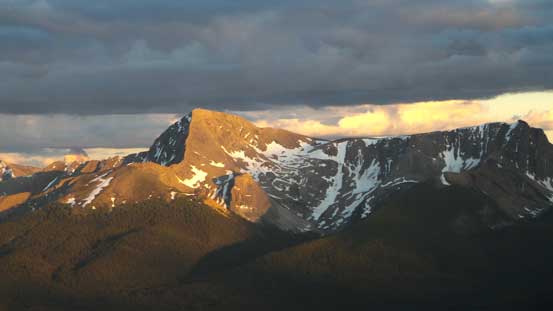
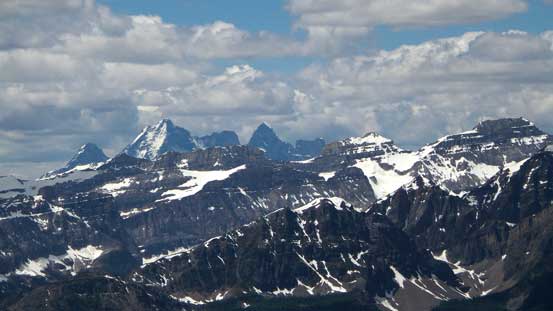
The distant Mt. Assiniboine pokes through
And, alpenglow on the Rockwall
There were 4 scree bowls to traverse over. In total it’s just short of 2 km.
From the base of the Dragon’s Back, looking upwards
Ben studying the Dragon’s Back.
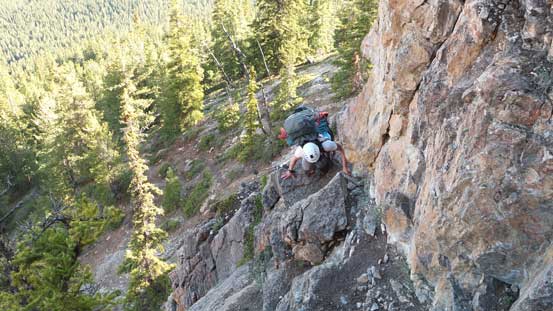
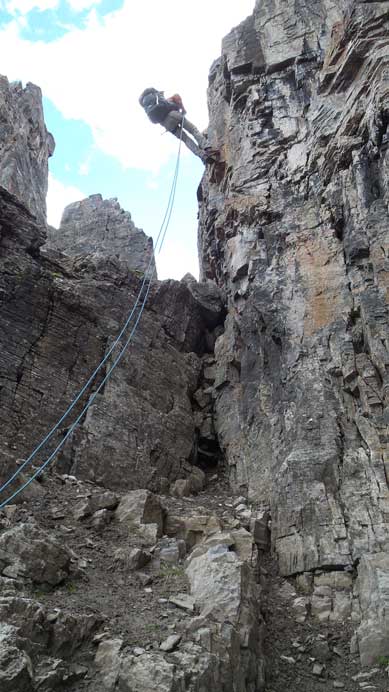
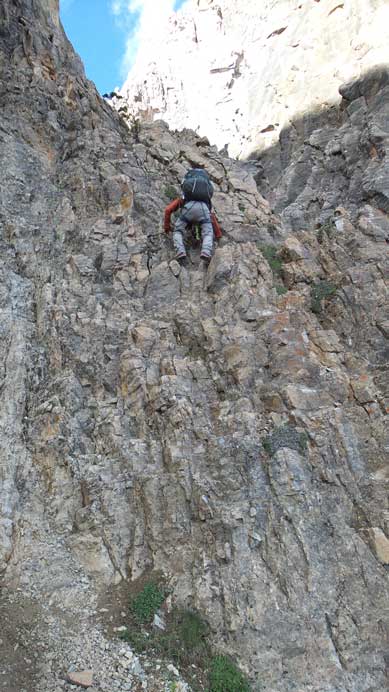
The Dragon’s Back is considered as the “warming up” of the climb, but itself was by no mean easy. To gain the crest we had to ascend a chimney just on the climber’s left side of the prow. It’s roughly 10 meters high and rated 5.4 and I have to agree with this rating. Just when we thought the hard stuffs would be temporarily over we were immediately facing against a series of challenges including a short, but very awkward notch that required a long-reach down-climbing followed by a near vertical wall on the opposite side, all with crazy exposure. We kept soloing at this point but expecting this was just the “warm-up” we started to realize this might turn out to be a harder day than anticipated. Towards the rear end we came to the infamous “bigger notch” with a tight chimney leading us down. The opposite side (5.6, strenuous, no protection) looked to be as hard as it’s advertised. We tried several methods including the harder, but protectable crack but all failed. Eventually I led up climber’s left of the crack on the vertical face without carrying the pack. After a few dedicated moves on very small holds (with no/poor protection) I managed to make through and then hauled both of our packs up using the rope and a guiding belay. Shortly after Ben also got up this crux, and now we finally could focus on the “official start” of this climb…
Ben climbing up the 5.4 chimney to gain the Dragon’s Back
More about the 5.4 chimney
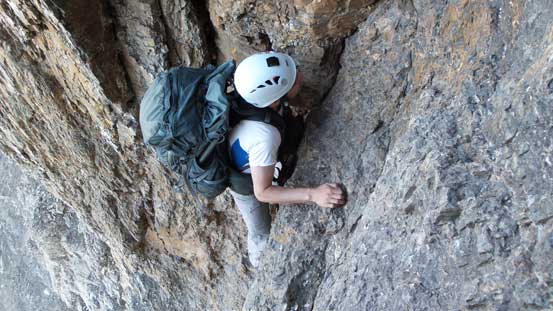
This is the first notch. Very awkward down-climb to get into

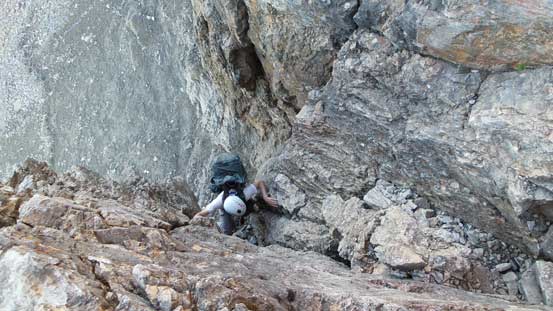
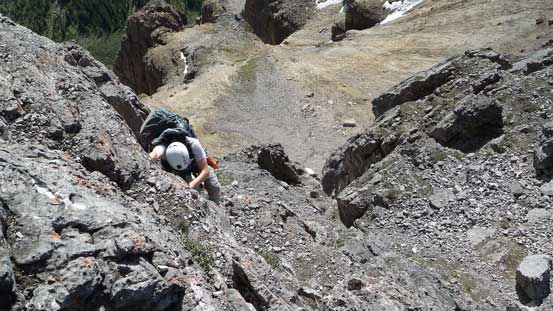
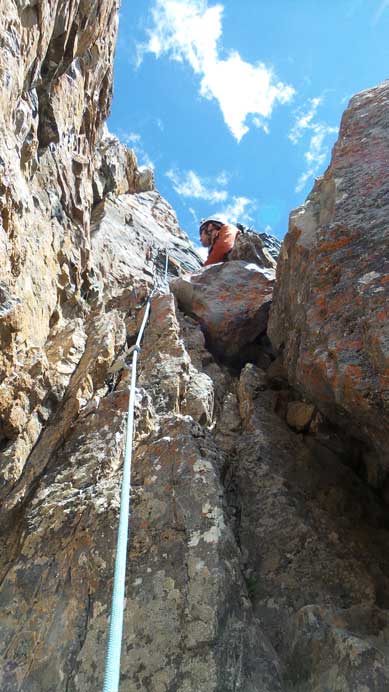
Ben in the notch, ready to climb up the Tower’s side
Not many people mentions this section but we found it’s just as challenging as some of the actual climbs
Now we were on the flat crest of Dragon’s Back
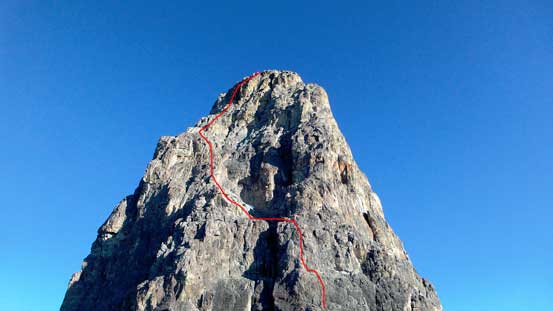
Our approximate route is shown
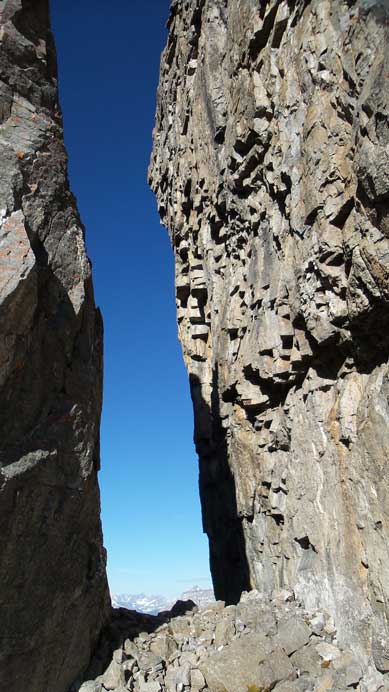
Down into the deep notch. This photo shows the slope angle on the wall
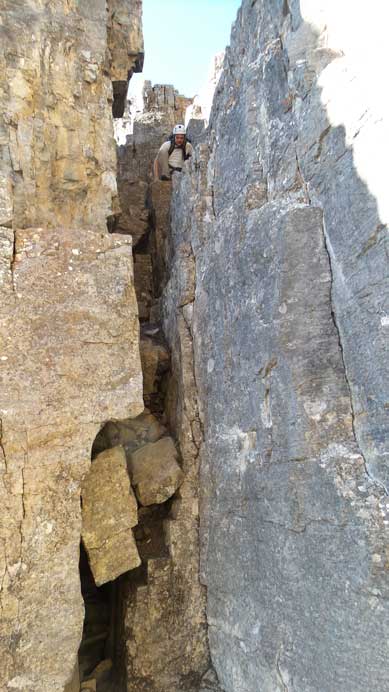
Ben down-climbing into the notch
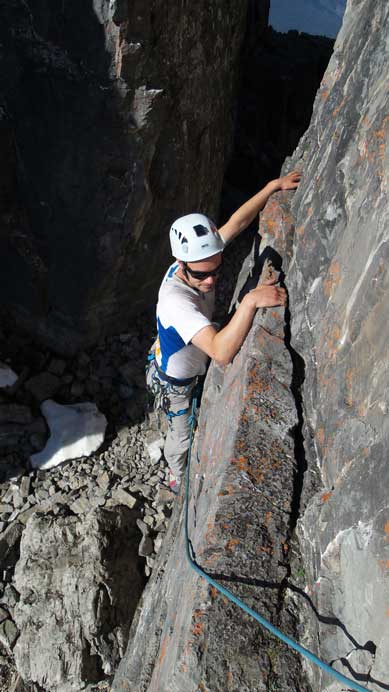
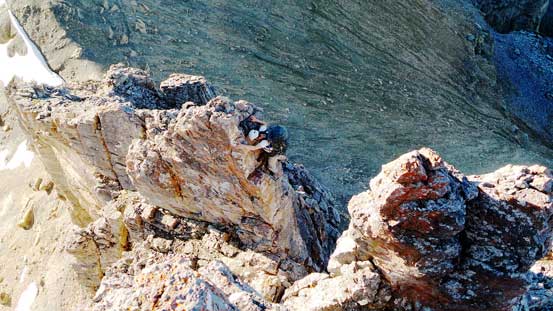
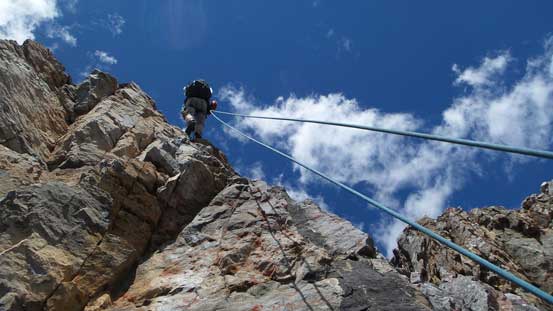
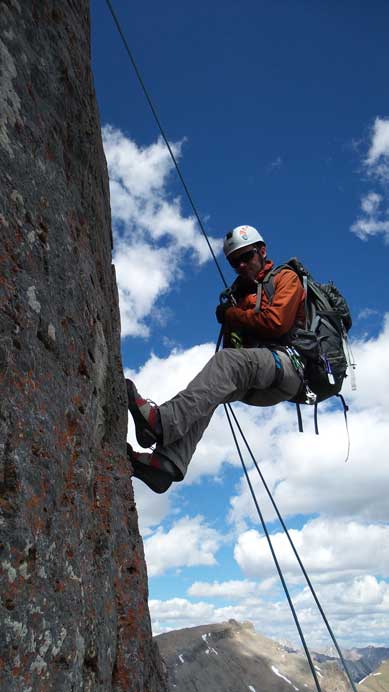
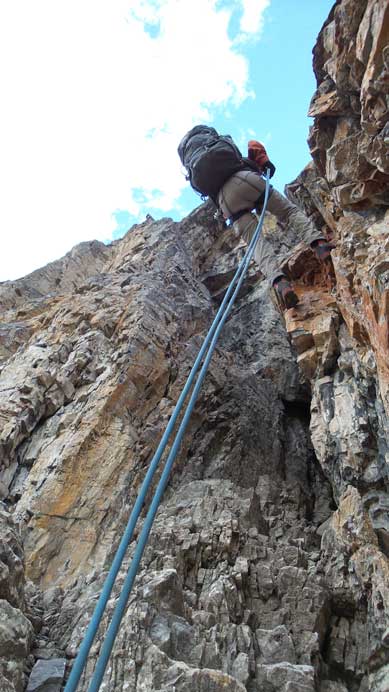
Ben climbing up the 5.6 crux pitch out of the notch.
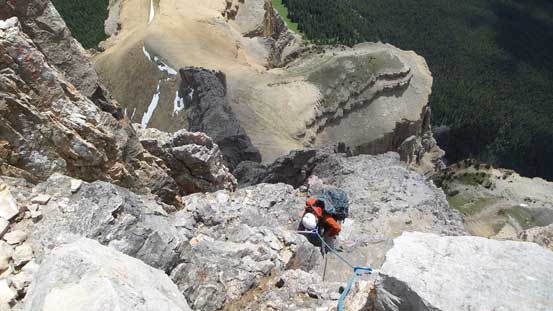
The first pitch looked “easy” to us so we all solo’d it in order to speed things up a bit. There’s still a few low 5th class moves making it a bit harder than appeared. The second pitch looked vertical so we roped up again. Ben led excellently up (the hardest pitch on the main body of the climb in my opinion), and then I took over the lead for the 3rd pitch. The 3rd pitch was considerably easier so shortly after we all made to the scree bowl (a depression point on the center of this face). Because we were quite behind schedule we decided to take the faster, but lazier “left hand variation” which also serves as climber’s descent route. The right hand variation would involve more sustained 5th class climbing and more practices on building trad anchors but at this point we had to speed things up. Another group (guided by Cyril Shokoples ACMG/IFMGA) was catching us up but took the right hand variation.
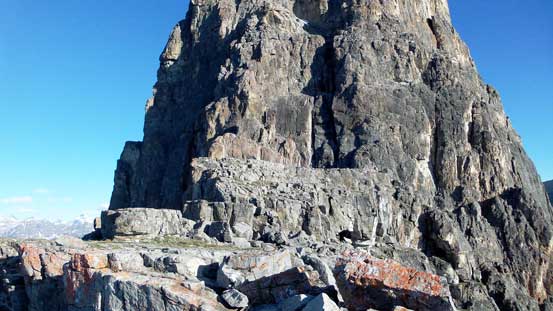
Ahead is the 3 pitches of climbing on the lower wall
Cool rock pinnacle
We solo’d the first pitch since it looked “easy”
The left hand variation essentially followed the left hand skyline/rib up. After soloing roughly 30 meters up the easier terrain we came to a 1-bolt-1-piton anchor. We roped up again even though the next short while also appeared soloable. We couldn’t see too far up so didn’t know if the terrain would get harder higher up (always better to rope up at a bolted anchor than in the middle of a route).. After half a rope length Ben announced that he made to another set of bolts. The next pitch involved only ~ 10 meters of climbing and soon we topped out on a large plateau, and ahead would be the final 3 pitches on the upper mountain.

Ascending the typical terrain on the “left hand variation”.
This view looking down the bowl shows the key (exposed) ledge traverse linking the bowl and the lower face
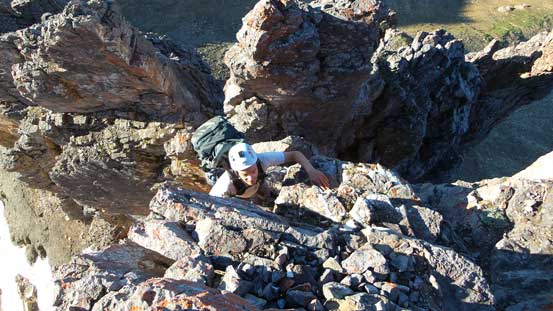
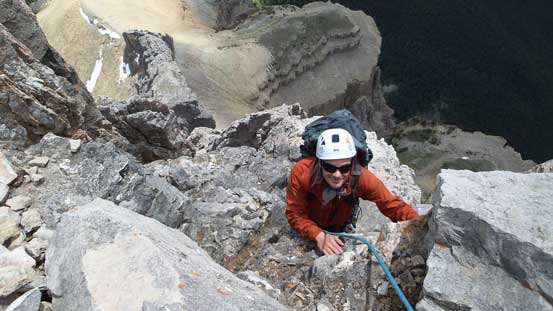
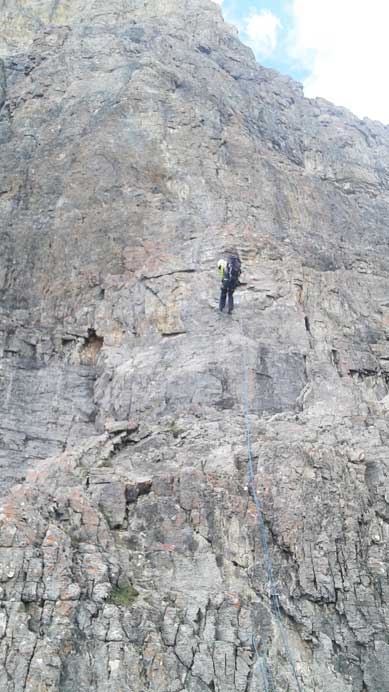
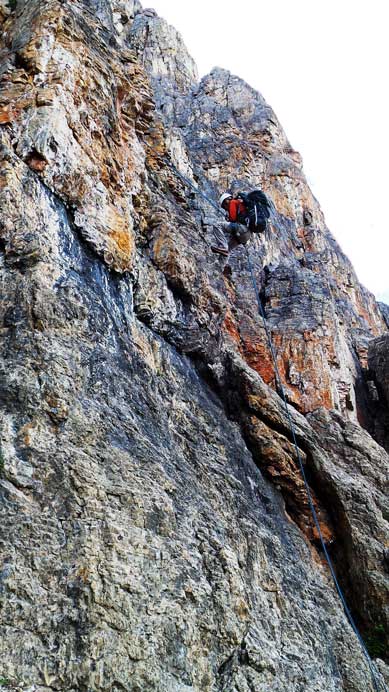
The first pitch on the upper mountain had some fun low 5th class moves that I led easily through. The second pitch looked more like a scramble to us so we just recoiled the rope and solo’d it. The last pitch was more interesting. Ben initially led a line straight up but came to a dead-end (vertical/overhanging chimney). After trying for a while he backtracked and traversed over 1 chimney towards climber’s left and found easier terrain. Half a rope length later he made to another set of bolts and brought me up. It appeared we almost made to the top but the terrain immediately above us also looked 5th class. So we pitched it out again (even though it’s even less than 10 meters).

Ben ready to tackle the upper face
Coming up a chimney to the second-to-last belay station
Ben climbing the final pitch
Almost cresting the summit plateau!
Cyril and his client, Sandra were patiently waiting for us on the summit plateau. After some congratulations they started the descent via the normal rappelling route while we wondered around the plateau for some views. Since it’s my first time in this area the view looking down towards Rockbound and Tower Lakes was amazing. Due to the time of a day we didn’t linger too long neither and quickly joined the other group for the rappel. They were roughly 2 raps ahead of us so by watching them we knew exactly where to go…
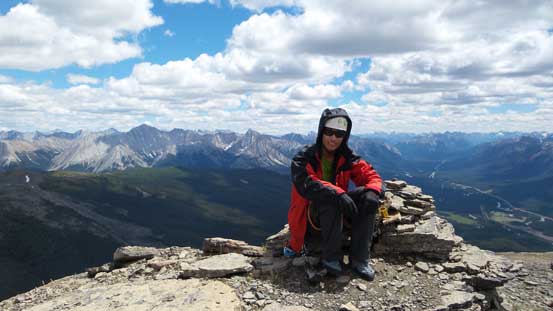
Me on the summit of Eisenhower Tower

Summit Panorama. Click to view large size.
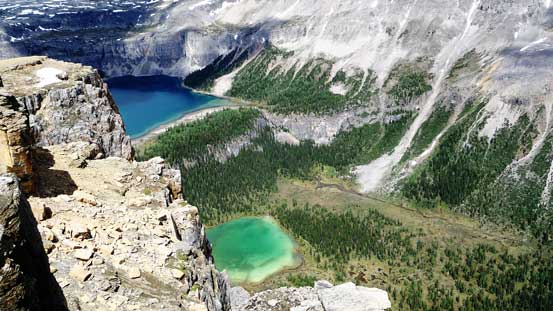
The double-lake shot towards Rockbound and Tower Lakes
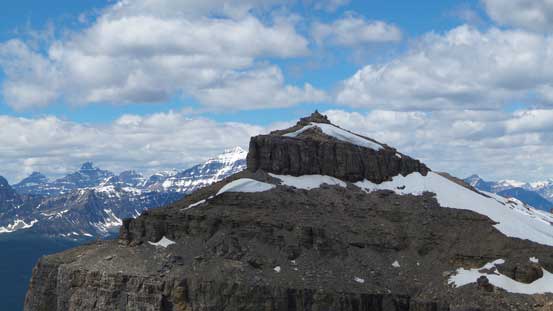
The “Kane’s scramble” summit of Castle Mountain. Looks close but unattainable from here
Other summits on Castle Mountain including Stuart Knob and Television Peak

Mt. Ishbel which I bagged last year
An unnamed but quite prominent summit on Sawback Range
The Goodsirs poking behind
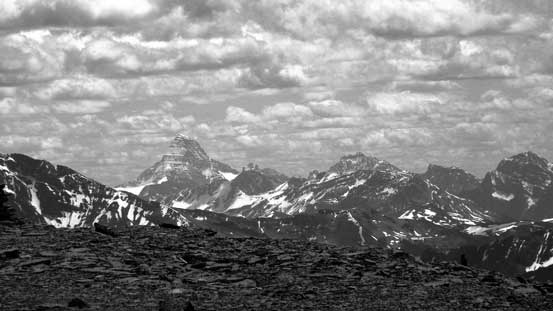
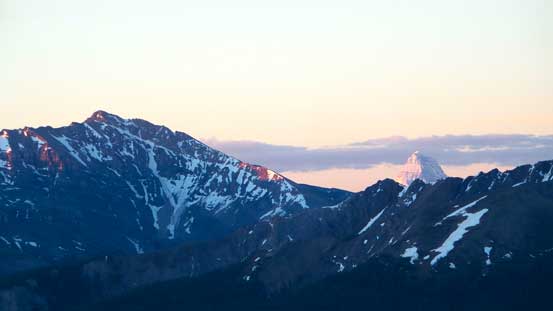
Mt. Assiniboine is always the eye-catching giant
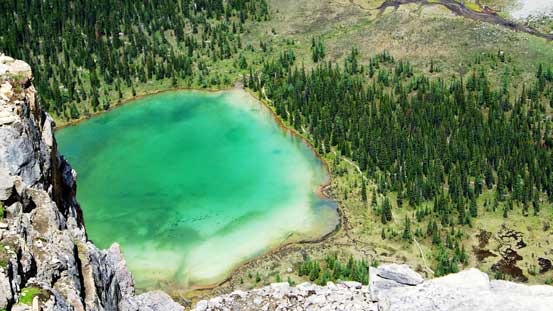
Tower Lake
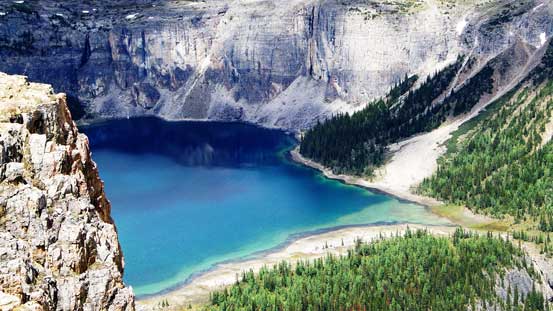
Rockbound Lake
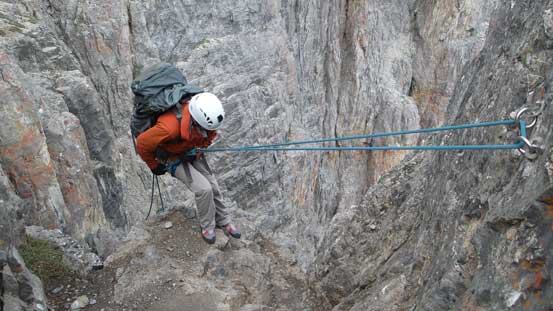
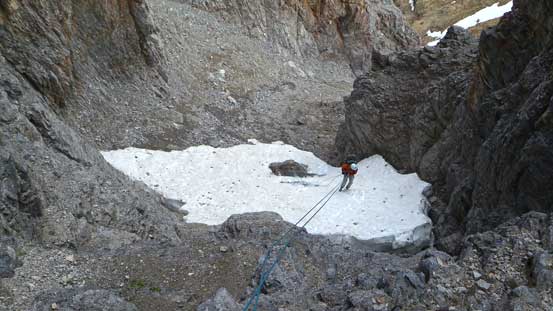
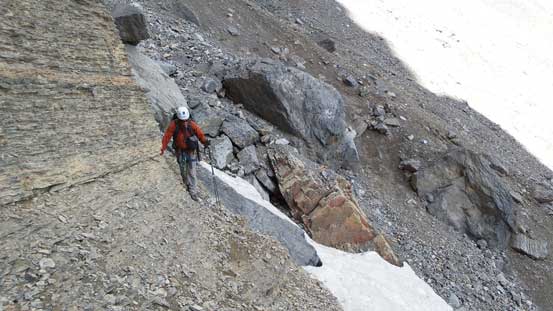
The first 3 rappels in series brought us down the upper tower via exactly the same route we came up. The 4th and 5th rappels brought us down into the depression bowl rather than retracing our rib route. Since these two raps both had 2-bolt anchors and Cyril’s group had just done them we decided to follow. There’s a small snow patch (would be tricky to negotiate on rock shoes) towards the end but with a 70-meter rope we managed to extend the rappel over it. And then we descended some awkward scree and traversed an exposed ledge to the lower face.
Ben rappelling the upper face

The upper face rappel
Rappelling into the bowl
The second rappel in the bowl
Since we had a 70-meter rope we extended the rap over this snow patch
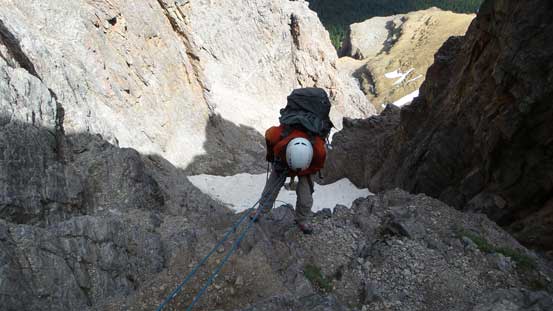
The 6th to 8th rappels brought us down the vertical lower face, station to station, and we got by fairly quickly. It’s quite a relief for my feet as we finally made down to where we ditched mountaineering boots. Wearing the tight rock shoes was far from “comfortable” on such a long route… The 9th rappel brought us down the crux 5.6 pitch and into the deep gully between Dragon’s Back and the main tower. Following the guidebook description we continued descending the loose gully and came to another set of bolted anchor. The 10th and 11th rappels brought down straight down the east side of the Dragon’s Back on vertical terrain, and after that it’s the end of the climb, but oh wait we still had the depproach…
This picture shows clearly the slope angle on the lower face.
The 8th rappel brought us down the main body of Eisenhower Tower
Me on the last rappel of the main body. Photo by Ben
Ben rappelling the 5.6 crux into the deep notch.
Here’s the 1st rappel down the Dragon’s Back

Me getting ready for the Dragon’s Back rappel. Photo by Ben
Neat view from the east side of Dragon’s Back
Another view of Mt. Ishbel
Ben on the last Dragon’s Back rappel
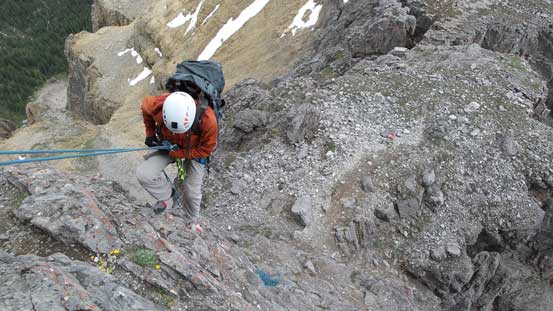
Since we were down to the east side of Dragon’s Back we had to circumvent it for 270 degrees and then traverse the 2 km scree bench back to Castle Hut. It’s a tedious process but at least not too terribly long. The descent down from the hut through the lower cliff band was fun though. Toward the end we did the 12th rappel of the day, and then the rest would be a mundane hike back to the car. It started to get very tedious towards the end as the trail just kept going down and down…
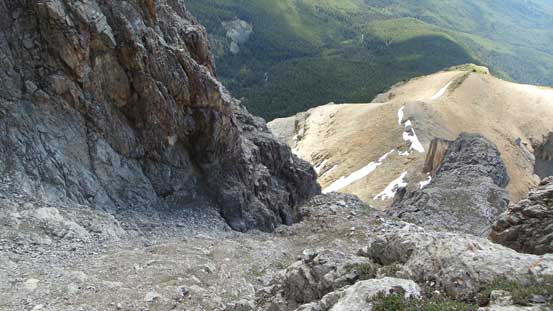
Traversing along the Goat Plateau back towards the hut
One of the awkward spots

Looking back towards the summit of Eisenhower Tower
Descending the lower cliff bands
Some 3rd/4th class scrambling involved
The 12th rappel of the day, also the last one
A view towards Pilot Mountain and Mt. Brett
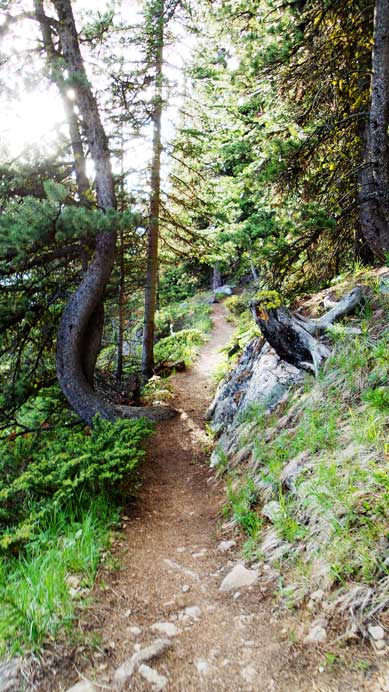
The trail…
Counting the 2.5 hours on the approach day we spent almost 18 hours which was much longer than anticipated. I think we still have a long way to go to improve our rope work efficiency, but good to slowly get these classic climbs ticked off. The Eisenhower Tower was as expected, a very enjoyable climb, but not one to be taken “lightly” neither. I personally also think it’s a harder climb than another classic we did last year – the NW Ridge of Mt. Sir Donald so that gives a bit of perspective. The weather forecast for Tuesday had turned shitty so Mt. Tupper had to wait. Plus we were both very tired anyway so “happy” to see the bad weather forecast to give a good excuse for going home. The driving back to Edmonton was exhausting though but we did make back by 3 am in the morning…

Great description!
Very good description! Thanks!
Totally humbling that you guys peaked the Tower — good job! I particularly liked the pic of the shadow that Castle projected onto the mountains to the east.
[…] Alternate Route – you can also summit Castle Mountain/Eisenhower Peak! This hike is not for the faint of heart, but it is a beauty. Here’s the Castle Mountain summit route on Alltrails and one hiker’s experience on the trail. […]
Do you potentially have a GPX track for the approach to the Dragon’s Back? Looking to go this year and wondering how the approach is.
Unfortunately I didn’t record a track on that trip…