Atwell Peak
March 28-29, 2016
2655m
Garibaldi Provincial Park / Squamish, BC
Though not the highest peak on Mt. Garibaldi massif, Atwell Peak is by no doubt the most aesthetic, the most difficult and the biggest prize out there. For extreme skiers the infamous “Siberian Express” and “Armenian Express” on the west face of Atwell Peak defines what’s so called “Alaska in Squamish”. From mountaineering perspective, this pyramid-shaped volcanic feature is insanely steep from all sides and does not have an “easy” way up. The rocks are primarily conglomerate glued by volcanic ash and will make the Rockies as solid as granite, so the chance of summitting this peak is “winter only” when it’s (hopefully) filled in by the deep coastal snow.
The “standard route” up its SE Face involves about 500 m of 45+ degree snow climbing, a long and exposed traverse with massive cornices to deal with, followed by a Patagonian styled finish on the infamous “summit mushroom”. All three sections have to be in the perfect shape and adding to a long approach there’s no doubt why some of the most experienced mountaineers ended up having to wait for several attempts before eventually standing on her apex. Alex and I had been discussing this for a few months already and with a high pressure settling up we took a last minute decision to book Monday and Tuesday off. Two ice tools (per person), rope, 4 pickets, 3 screws plus the standard winter camping gears… Our packs were heavy but we were ready to go.

Atwell Peak approach and ascent route. GPX DL
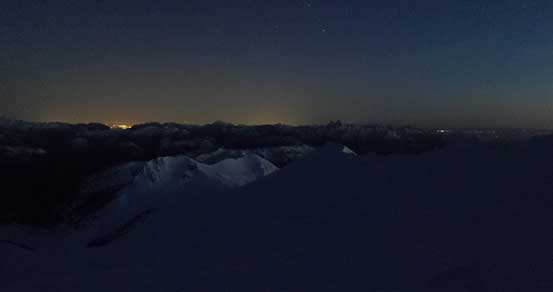
All packed we met in Alex’s home at 5:00 am in the morning and then drove up the winding Sea-to-Sky highway followed by the Diamond Head access road. This road was gravel for about 16 km and quite rough (for someone like me coming from Alberta) and by the time we got there two other groups were gearing up, both going for the Neve traverse. Those were some fast guys and got ahead of us in no time as we slowly plodding up the initial Jeep road. There’s continuous snow from right at the start saving us from carrying the skis, and 5 km later we arrived at Red Heather campground where we took the first break. And then we followed the marked and well-traffic’d winter access over the undulating Paul Ridge and the next stop was by Elfin Shelter at kilometer 11.
Skinning up towards treeline in a crystal clear morning

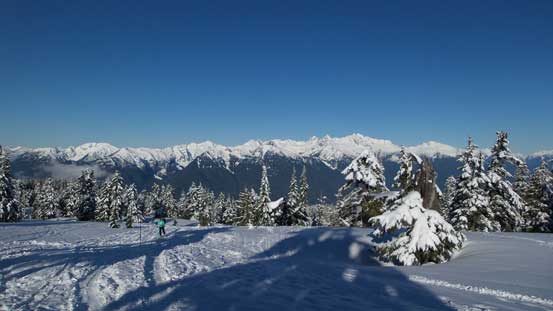
Continuing up along Paul Ridge’s winter route
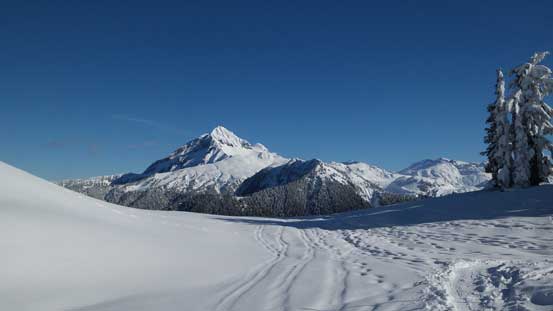
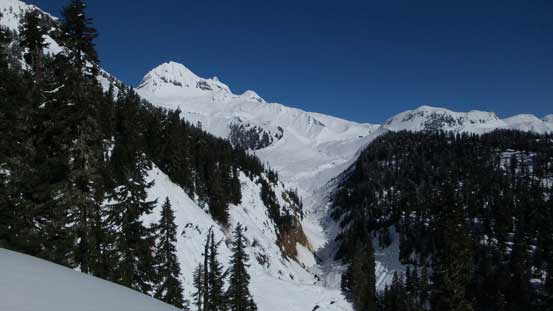
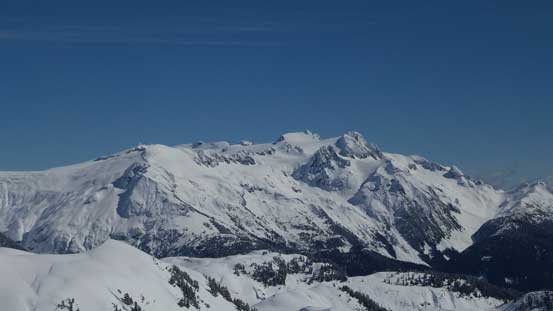
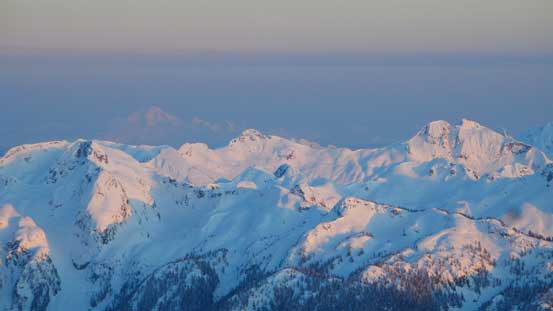
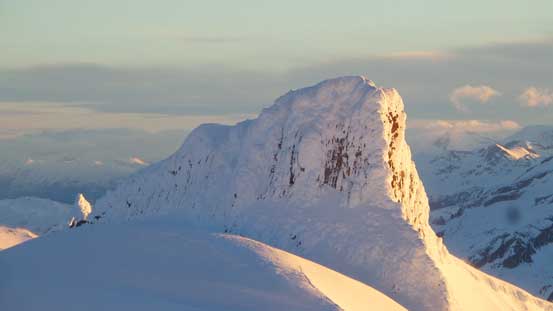
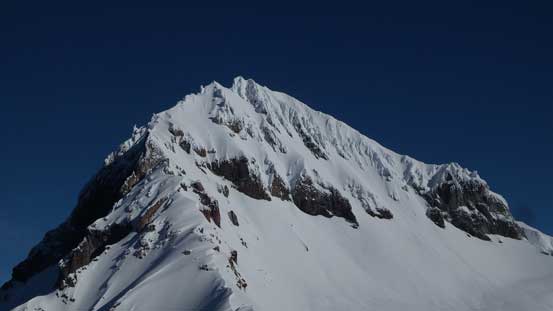
There she is…. Our first view of Atwell Peak
A closer look at our objective

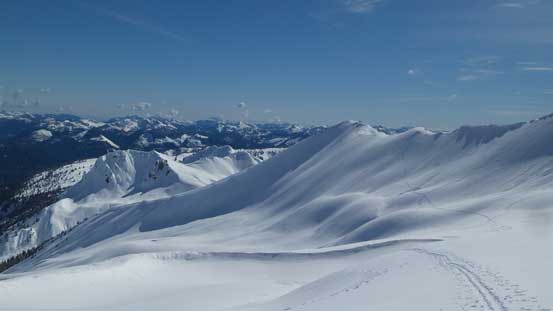
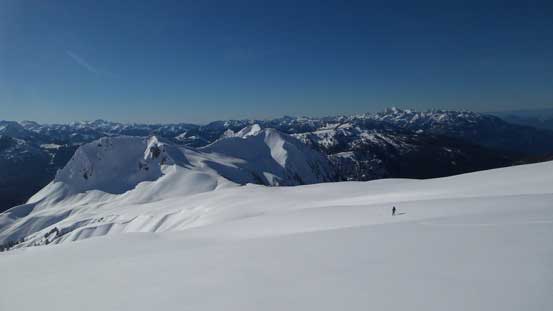
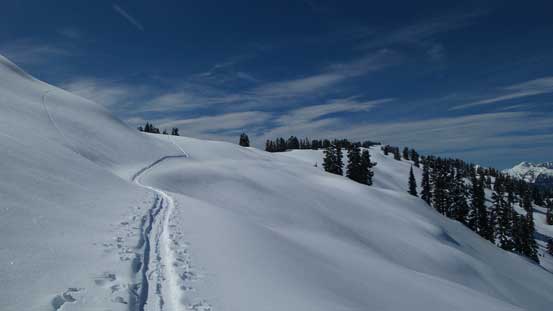
Continuing along Paul Ridge. It was very undulating
Looking back at Mt. Tantalus. This mountain has been teasing me for quite a while.

The classic shot of Elfin Lakes, except for in winter conditions…

Descending quite a bit down towards Elfin Shelter
There’re two ways to approach – one by going up and over Columnar/Gargoyles col and the other goes down and up from Ring Creek. On the way in we opted for the latter which was proved to be a worse choice. Firstly none of us had done this section on skis and right away we got misled by a set of tracks going too low in the forest. It came to a dead end and after some searching we did (thankfully) manage to find the correct set of skin tracks leading upwards. And then there came that section descending to Ring Creek which was a horrible mess over avalanche debris. There’s no short-cut (as we discovered by wasting another half an hour) and we had to descend all the way down following the Neve traverse route, followed by crossing the creek twice on snow bridges.
Following a set of wrong skin tracks led us to this dead end. The Ring Creek was deep…

Cool view of Opal Cone – something that I’ve hiked more than 6 years ago.
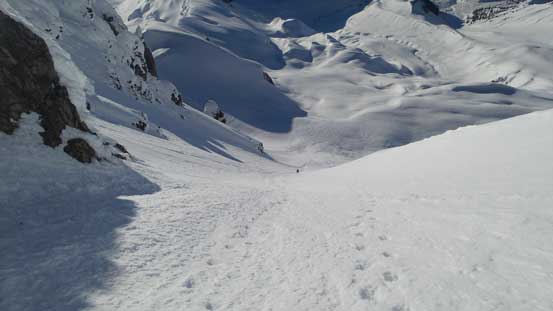
Terrain started to get shitty…
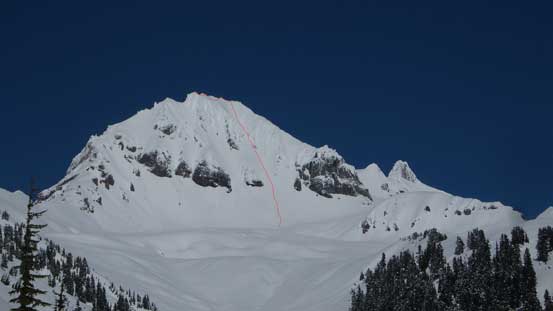
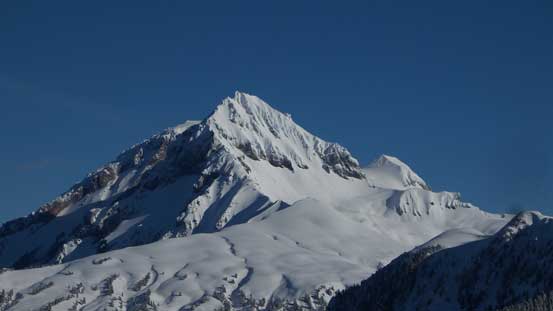
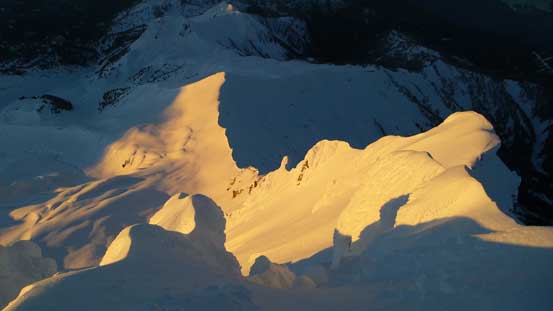
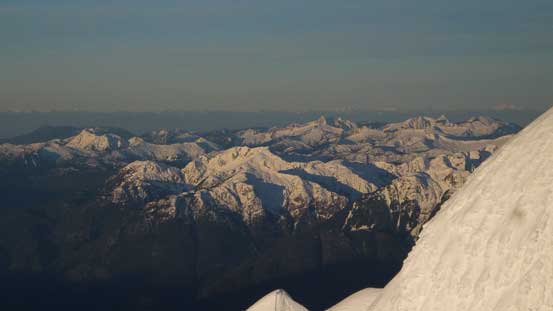
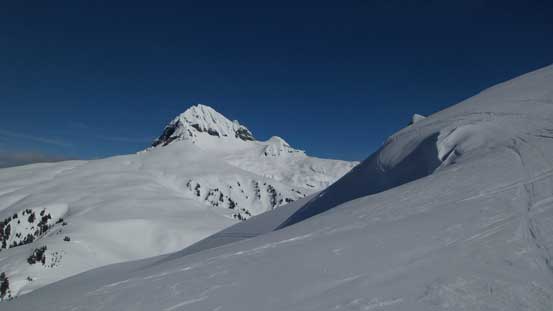
Cool spot to study our route though. The SE Face of Atwell Peak properly displaced

Finally down to the bottom of Ring Creek

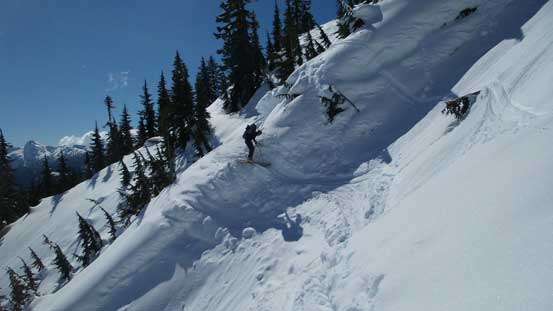
Alex skiing down the last roll.
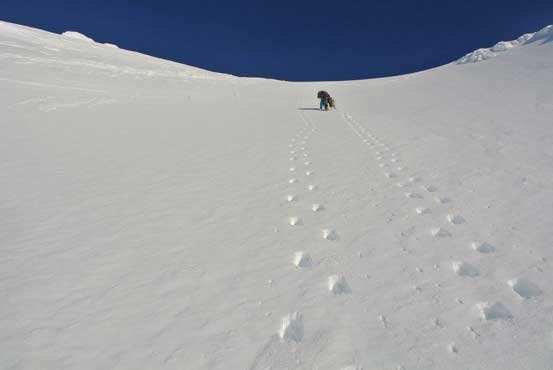
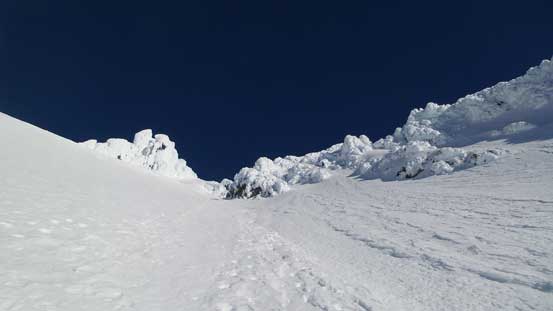
Ahead looked simple, but actually was a very foreshortening slog to hit Diamond Glacier. We had to ascend a valley feature from elevation of roughly 1300 m all the way to 2000 m. The sun had been beating down on full force and it was a tough going in the furnace. We took numerous breaks trying to regather some strength but all didn’t seem to work, but with some good attitude we were slowly getting there. Once exiting the valley feature we transitioned to the ridge feature on climber’s right, and then followed it upwards over come undulating terrain and then we were right underneath the slopes of Diamond Head.
It’s a very long plod up the very foreshortened valley

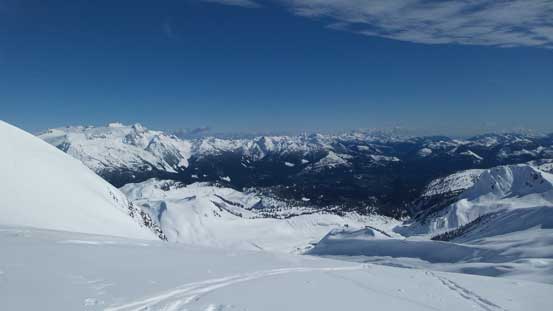
Looking back at the Neve Traverse route
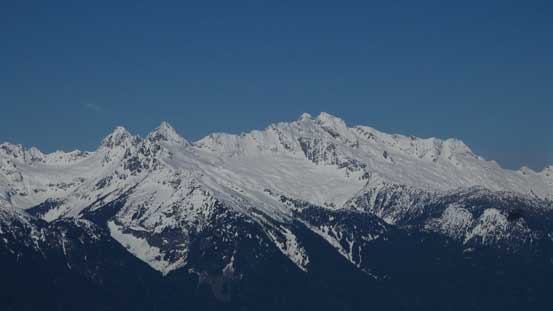
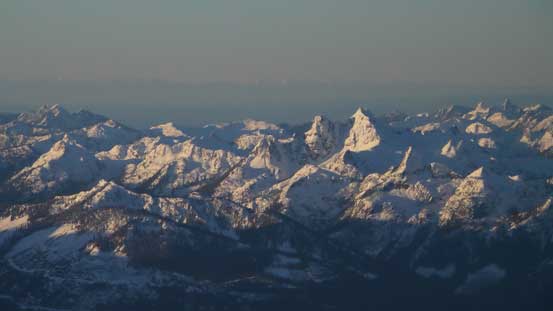
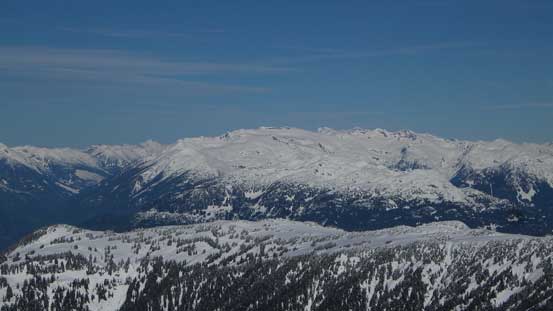
Great view of Mamquam Mountain

The Gargoyles

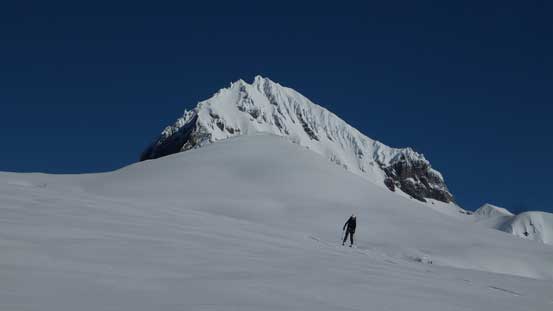
Getting closer and closer.
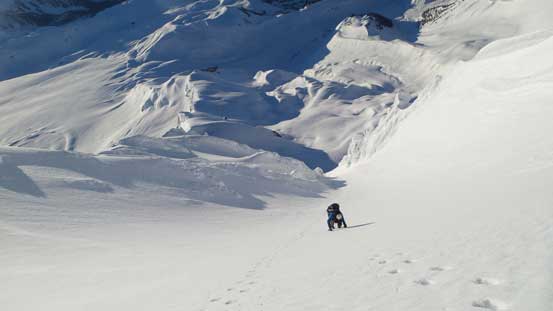
The Diamond Glacier was very filled in with no obvious open crevasse. I was ready to call it a day but Alex’s idea was to camp as close to Atwell Peak’s SE Face as possible and I had no oppose on that so we kept plodding. There’s also considerable amount of elevation gain on this glacier despite the look of it. We eventually decided to set up camp at elevation of roughly 2100 m before getting “too close” to the slopes. There were rock falls beating down by the sun and we didn’t want to get hit by those. The camp set-up was fairly relaxing and despite that, we still had about 2 hours of daylight time left (which were used for a short nap).

Alex plodding up Diamond Glacier. Still fair amount of elevation gain..
Looking back that tiny bump of Diamond Head
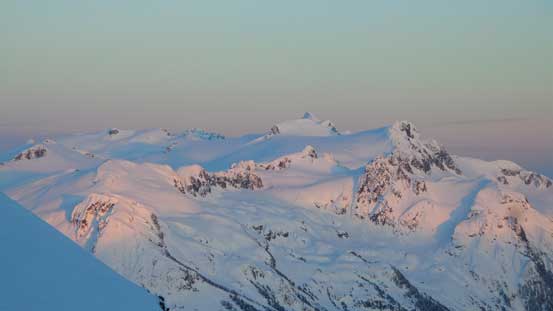
Expansive vistas from our high camp.
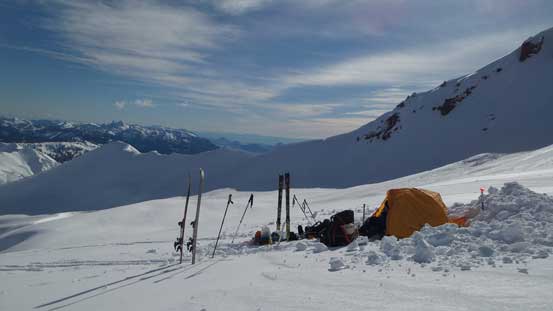
Our campsite high on Diamond Glacier

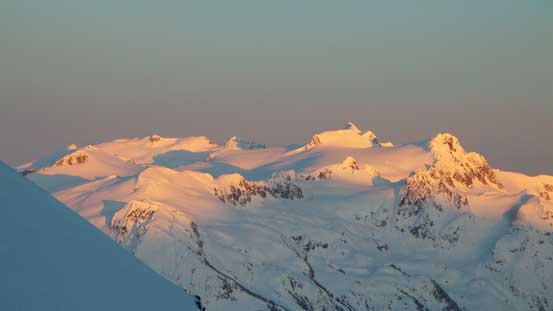
The Gargoyles is now way below us!
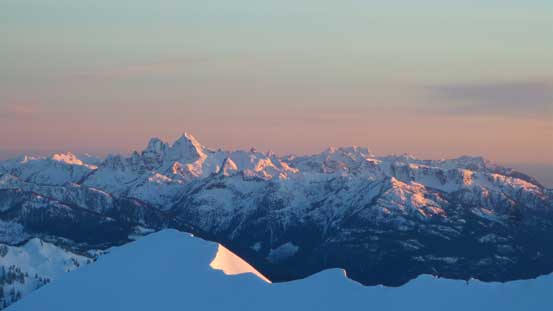
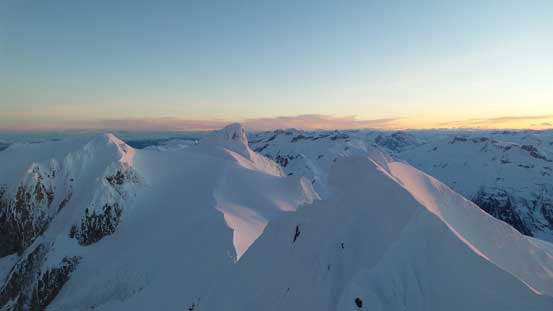
Evening alpenglow on peaks by Watersprite Lake, with the faint outline of Mt. Baker behind
Evening glow on Mamquam Mountain
The sunlight changed drastically within seconds. Here’s another picture of Mamquam Mountain
Sky Pilot Mountain et al. at evening glow
I tried some night photography to show the light pollution from Vancouver without a tripod..
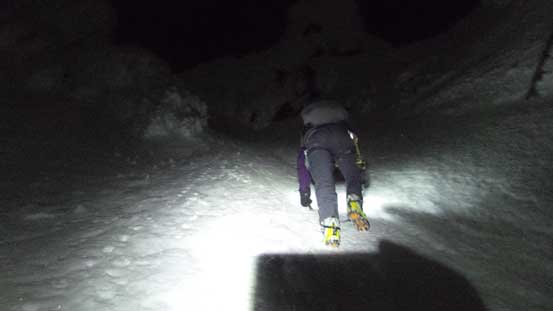
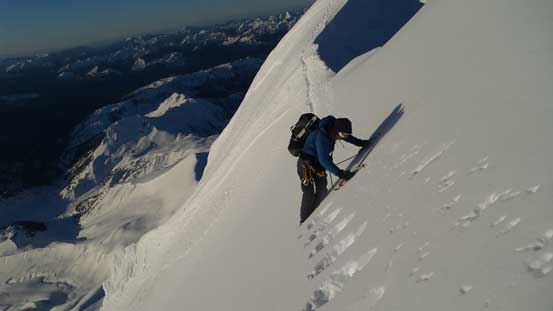
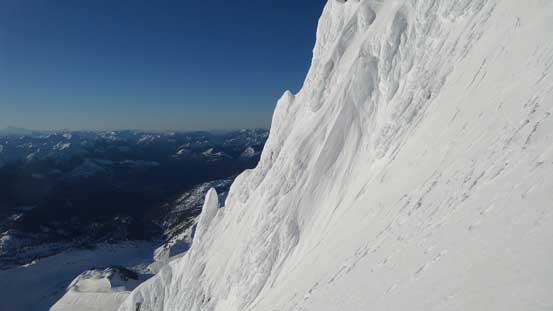
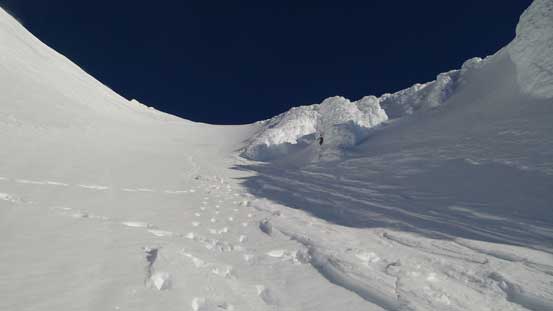
The alarm was set at 2:30 am and the plan was to climb at least the entire face by headlamp. Unfortunately the wind had gone crazy overnight so when the alarm went off nobody was keen to get out. The wind did die down and we subsequently woke up at roughly 3 am. An hour was spent melting snow, cooking breakfast and gearing up, and then it’s time to climb… Much of the face was about 45 degrees and the snow was mostly in the perfect shape for kicking steps. In other words, it’s a “mountain highway” by my definition. The first hundred meter or so involved some moderate duty of post-holing and lots of avalanche debris but after that it became perfect. We took turn breaking trail and in short time we arrived at that “hidden couloir”. Through the couloir we went straight up the “funnel” and the terrain eventually steepened to about 55 degrees near the ridge top (it WAS steep up there).
Climbing into the couloir.

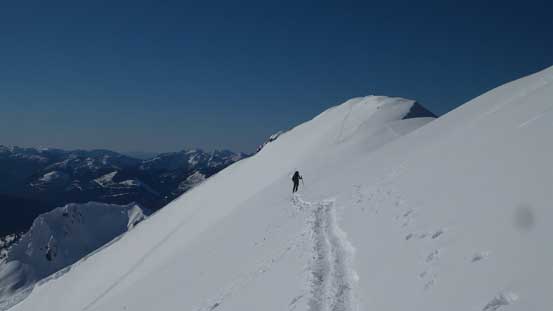
Almost onto the summit ridge now.
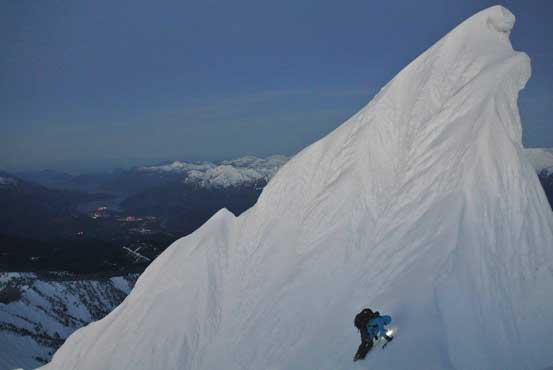
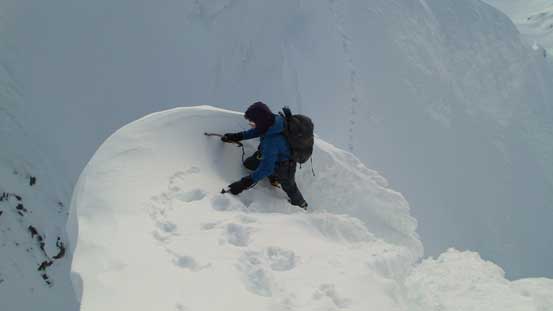
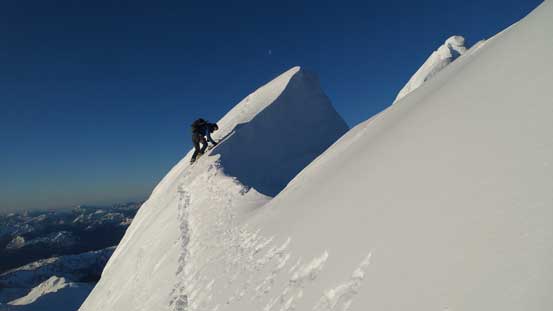
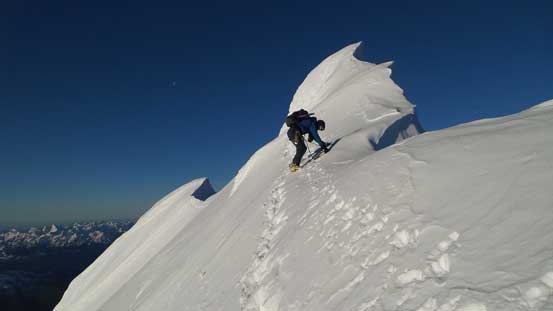
At just below the ridge crest I led a rising traverse line to the climber’s left over some pockets of loose snow. I couldn’t judge whether the actual ridge top was on a massive cornice or not so kept traversing underneath it. Of course by doing so we’d have to climb facing inwards and “shuffling”. There was at least two false summits to traverse. The second false summit was actually on a huge cornice (as what we could see from distance) and to get there we had no choice but to get very close, if not actually on that cornice thank to a tight spot with some hugely steep slope on the left side, and the entrance of Siberian Express on the other. I gingerly led the way kicking some steps up there and after this bit of excitement we came face to face to the summit mushroom.

Me leading across the summit ridge traverse. Note the gigantic cornices. Photo by Alex
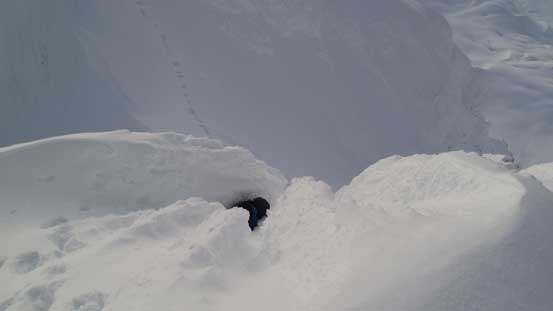
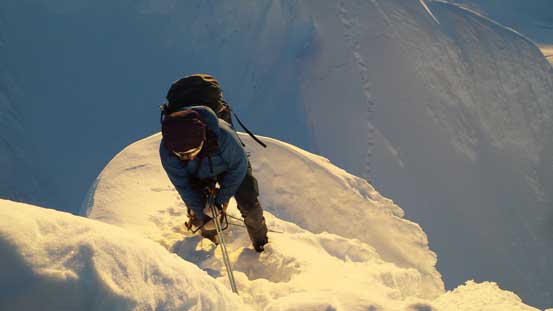
By the look of it we both agreed to climb solo as there appeared to have more snow coverage than “normal”. After resting a few minutes on the false summit and tightening my crampons I went to go first. Descending to the saddle was easy and then there came a dedicated downward diagonal traverse to the left on some very steep (50-60 degrees) slope to the entrance of a hidden rime ice chimney. I tried a few route options but all those rime ice was loose and offered no solid purchase with my ice tools. Had I kicked multiple times the rime would fall off revealing rocks underneath. Given the fact I’m not really a mixed climber the only solution would be squeezing through and stemming up that ice chimney, but to do so I had to firstly clean off a channel to allow me (and my backpack) to fit through. That work took about 10 minutes with lots of rime ice fallen on myself. Stemming up the chimney with two ice tools was a tad sketchy and “interesting” to say the least, but I did make it through, and then the last few meters to the true summit was not trivial neither (the final step was near vertical) with some insane exposure.
Me going for the summit. Photo by Alex
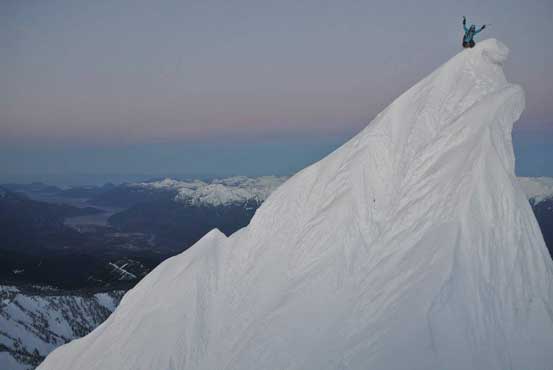
After a while I was happy to be standing on the top. Photo by Alex

Here’s Alex down-climbing into the notch separating the false summit with the true summit

Summit Panorama from Atwell Peak. Click to view large size.
It didn’t take Alex too long to follow my steps up to the true summit and we both agreed that some sort of rope work would be required to get off this thing. But right now let’s focus on the views. We timed ourselves perfectly for the alpenglow and then sunrise. Lots of pictures were taken but at the same time we started to prepare a t-slot anchor that’d be used to rappel. We made the decision to leave one of Alex’s pickets on the summit and after testing the anchor a few times Alex went down first. I followed and had no problem rappelling, but then the rope got stuck. I almost decided to abandon it there but after a few more tries I managed to loosen it (hence, no fixed rope for the next party). Back to the false summit we took another short break updating Facebook accounts (strong cell reception up there) before resuming the descent.
Alex stemming up through the rime ice channel – crux of the trip
Alex climbing out of the channel
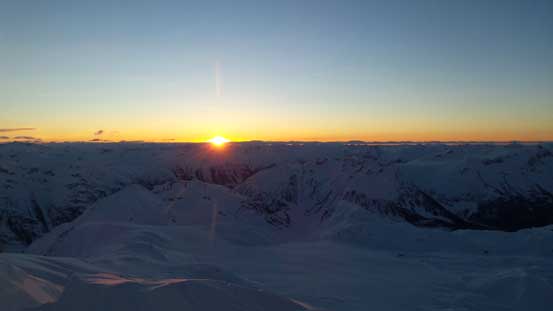
It’s sunrise time!!

The south arete of Atwell Peak catching the first sunbeam

Howe Sound and the pick horizon at morning alpenglow
Looking back towards the false summit (R) and other peaks on Mt. Garibaldi massif
Looking down the south arete towards the tiny summit of Diamond Head
A zoomed-in view of Mt. Garibaldi summit

This one is Dalton Dome.
Alex ready to rappel
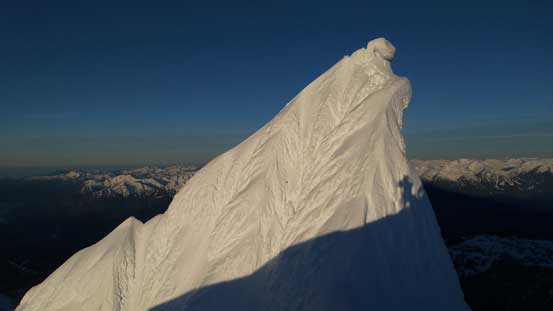
A review shot of the summit mushroom.
Peaks by Sunshine Coast are all below us now
The Sky Pilot Group was also far below us.
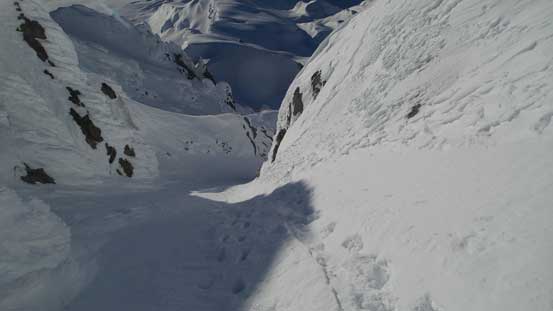
The most difficult part of the summit ridge traverse was right before the entrance of Siberian Express. Now with daytime light I could see that we weren’t actually standing on that cornice which was good to know, but the looseness of the snow combing with the steepness of the grade (60 degrees or so for a few steps) did require some careful work. I rarely had to kick more than one time for one step, but for these couple ones I kicked at least 3 times. The rest of the traverse back to the SE Face was fairly straightforward with lots of pictures taken. And now it’s time to down-climb the face. After slowly down-climbing the first section the grade eased and then it’s a fast plunge (facing inwards) to get down the “funnel” and then into the couloir. The twisting couloir was then easily descended and now came the lower face. There’s still lots of care required but by now we’d gone into a robotic mode. Kick, kick, kick, and done..
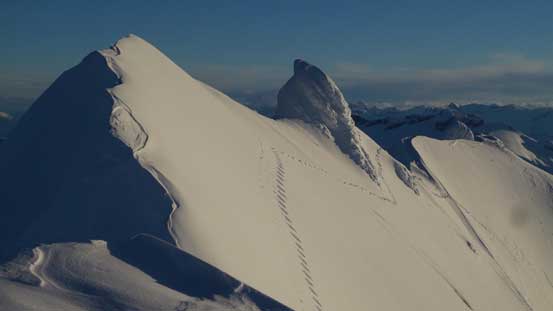
This picture shows clearly our tracks traversing across the first two false summits

That narrow spot is the hardest part along the summit ridge traverse
Alex traversing
More traversing…
It’s not over yet….
Now it’s the face time. 500 m of down-climbing facing inwards. Fun time…
Me down-climbing the face. Photo by Alex

Alex continuing down the “funnel” and into the couloir
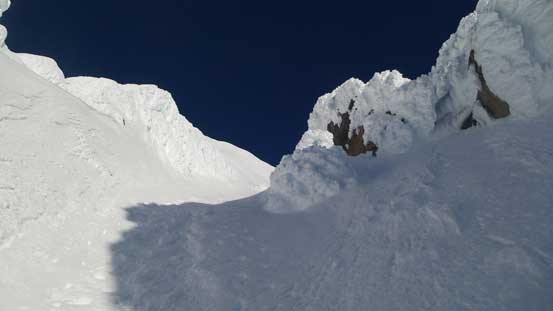
Impressive rime ice scenery
A review shot of the upper face/funnel.
Into the twisting couloir
From the couloir, looking upwards
Exiting the couloir, now time to down-climb the lower face
Partway down the lower face, looking back

Looking across the face to show that it’s still very steep

Looking across the lower face towards the other direction
We spent the next while relaxing (a little bit) and packing (yeah, that’s what we did). The decision was easily made to return via Columnar/Gargoyles col as none of us was looking forward to the shit mess around Ring Creek. To minimize elevation loss/regain Alex led a line traversing high on Atwell’s slopes but still, we had to put skins on near Diamond Head. I hadn’t done this little peak yet so we went up there just for completeness. It’s a great viewpoint on its own though so don’t get me wrong. If you don’t have the skills to climb Atwell Peak then Diamond Head itself is definitely worth a visit. The slope down to the low point below Columnar/Gargoyles appeared super inviting but once committing it wasn’t that nice. The top part was fine but the lower half was nothing but horrible crust. Even Alex couldn’t comfortably make a turn let along me. We snow-powed all the way down to the low point before putting skins on for the uphill plod to Columnar/Gargoyles col.
Skinning up to tag the summit of Diamond Head

Summit Panorama from Diamond Head. Click to view large size.

Howe Sound and the city of Squamish
Peaks along Ashlu – Elaho Divide
Looking back at Atwell Peak
Skiing off the south slopes of Diamond Head
Despite the look, the skiing was horrible here

Upward plod to gain Gargoyles/Columnar col
At the col, looking back..
Ascending to the col wasn’t as tiring as I was expecting but still, there’s considerable amount of elevation gain and the last step was by breaking (sort of) a cornice. Thankfully we had some fresh skin tracks to follow so no route-finding required. I had previously hiked The Gargoyles more than 6 years ago with my dad but never done Columnar Peak yet. It was very tempting but at this point my motivation had gone to zero, so down we went. Thankfully this time the snow was in a much better shape for skiing likely due to the sun power slowing beating down the surface crust. Down to the second low point of the day it’s time to put skins back on for the long plod up to Elfin Shelter.

Me skiing down from Columnar/Gargoyles col. Photo by Alex
Another break was spent near the shelter (and I actually went inside to beg some fresh water), and then it’s time to plod up and over Paul Ridge. I made a bad decision to not eat food during the Elfin break so after skinning over a few bumps my energy level went straight down. I had no chance to catch up with Alex who’s still a machine at this stage of a trip, so took another break on my own. I did regain some strength and no further issue skinning back across the rest of that undulating terrain. Now time to rip off the skins for some fun. The afternoon condition was the perfect for the final 5 km road skiing and I cruised down in no time.
We took a short-cut here to bypass one of the many bumps along Paul Ridge

At the highpoint of Paul Ridge, looking back. Mamquam on the horizon
All in all this was a very, very successful trip and I bet not many people had made the true summit of Atwell Peak, and certainly not many managed to make there in their first try. The snow climbing is by no doubt the most difficult I’ve ever done to date and likely not going to get beaten soon. By size this peak cannot compete with the Rockies’ giants but its geological significance over Squamish, the aesthetic factor of this route and the difficulty in snow climbing combined does make it one of my top 5 all time. If you’re curious what’s the other 4, then they’re the world class alpine gem Bugaboo Spire, the classic Mt. Sir Donald, the prettiest on Columbia Icefield – Twins Tower, and finally, the mighty Mt. Bryce. And now, the high pressure system was still in, so you know what I gonna do…
