Mount Northover
August 18, 2012
3003m
Kananaskis – Kananaskis Lakes, AB/BC
This summer has been awesome for me ticking off the “multi-peak scramble traverses as day-trips”. I had thought about combing Mt. Northover, Mt. McHarg and Mt. Worthington along with the classic Northover Ridge hiking traverse in one day and I was glad that Grant (Granticulus) was interested in. I’d heard that the south ridge of Mt. Northover is the scariest in Alan Kane’s book and there’s a specific spot where you have to force a friction move (5th class) to get over a slightly overhanging slab corner. This really made me nervous but on the other hand, it made me excited. The problem was? I just did three peaks in the previous three days and I was damn tired. But the weather held up nicely and I didn’t want to chicken out for reason of “being lazy”.
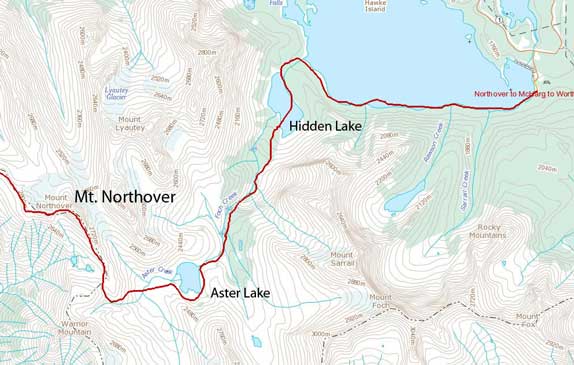
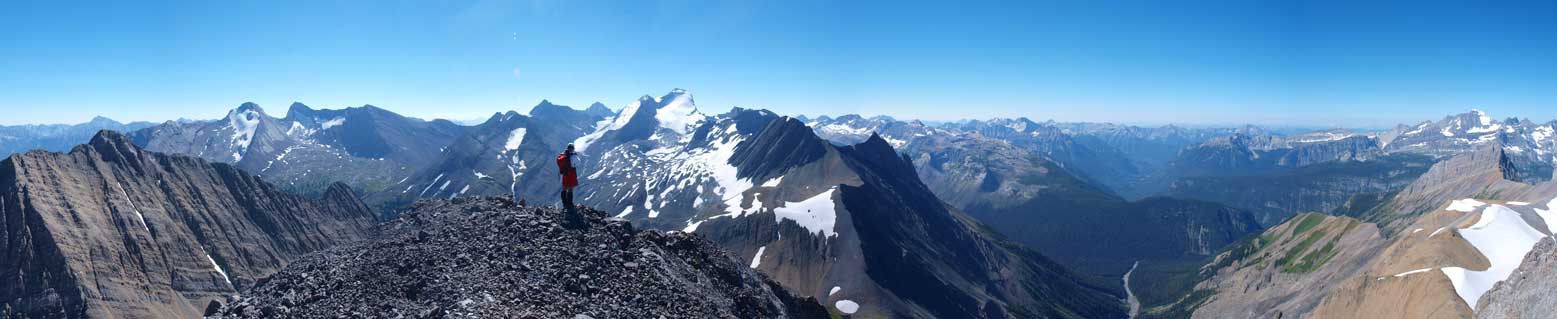
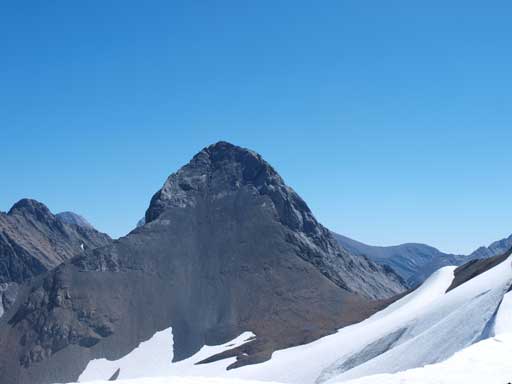
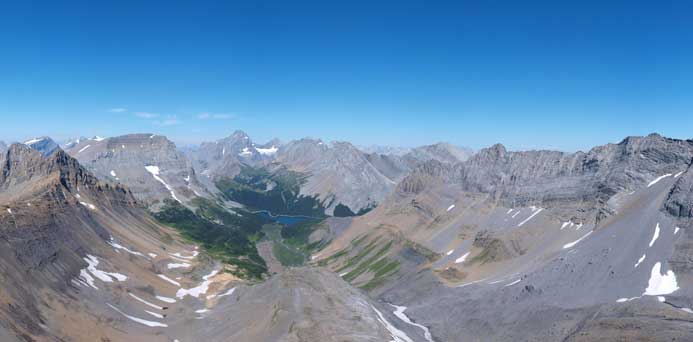
Mt. Northover approach and scramble route
And probably because I was too excited I only got less than 2 hours of sleep in the previous night. I woke up at 3:30 AM, and grouped with Grant at North Interlakes Parking Lot two hours later. We carpooled to the Upper Lake Day Use area and started at 5:30 AM. The initial walk around Upper Kananaskis Lake went by quickly. It was mostly dark so we couldn’t get distracted by the views. We made to the Hidden Lake turnoff in 1 hour, which itself was not obvious and very easy to miss if you don’t know where to look for. Thankfully Grant had done the Northover Ridge hiking traverse, and oddly enough, exactly 5 years ago on the same date (Aug. 18)…

Morning view of Upper Kananaskis Lake
The Hidden Lake trail was in a really bad shape. I would say it’s rather just a path through forest. You have to hop over hundreds of deadfalls and it’s almost bushwhacking… The only difference was, you had a path to follow so there’s no route-finding involved. In about 20 minutes we arrived at Hidden Lake. Normally people go around the lake shore if water level is low, but for us, we had to use the poor trail skirting around the lake in the forest (more dead-falls)…

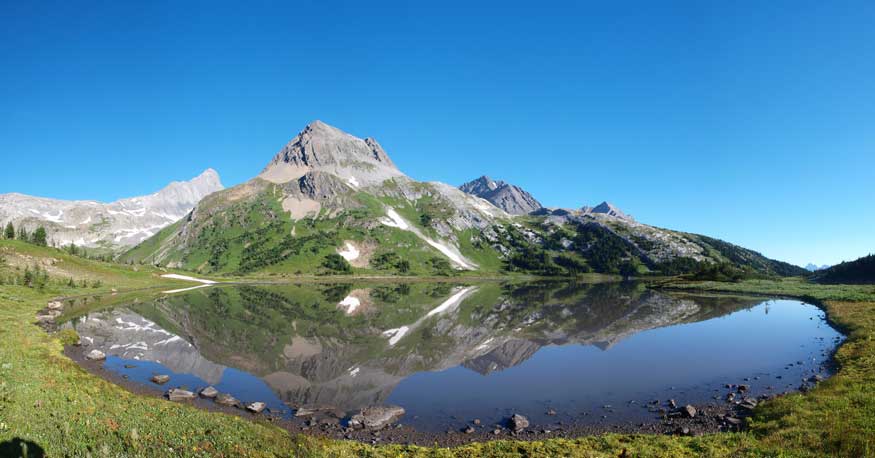
Hidden Lake
After Hidden Lake, the trail gets better and better. It rises steeply uphill over a headwall, then starts to ascend the left side of the valley. The terrain soon becomes rocky and exposed (for hiker’s standard). At one point, we had to cross a very awkward snow slope that was almost ice… And then the trail became fairly confusing but thankfully we had Grant’s memories from 5 years ago, otherwise I could have easily wasted hours searching around.
One of the many sub-peaks of Mt. Lyautey

Grant coming up the scree path above Hidden Lake

Me leading across the icy snowpatch. Photo by Grant
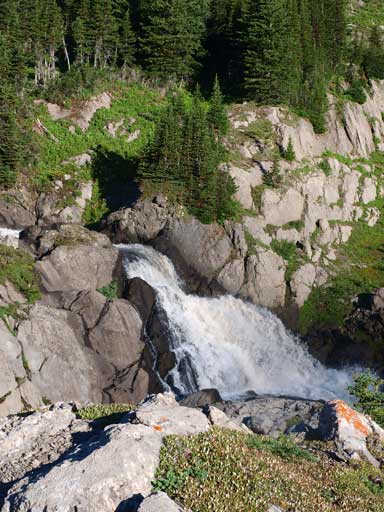
A mini waterfall along the way
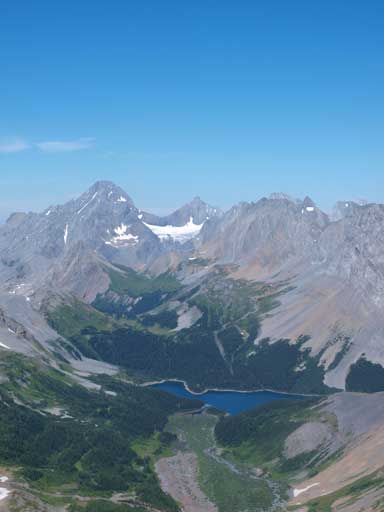
Somehow we made through the maze of trails to Aster Lake, 3 hours 20 min after leaving car. The morning light was perfect for photographing. The reflections of the surrounding mountains is probably one of the best I’ve ever seen. Instead of fording the ourflow, we decided to circumvent the lake on the south side. The path/trail was dangerously close to the lake at places, and obviously, it’s not an easy hike. Now I understand why this area is not suit for newbie backpackers.
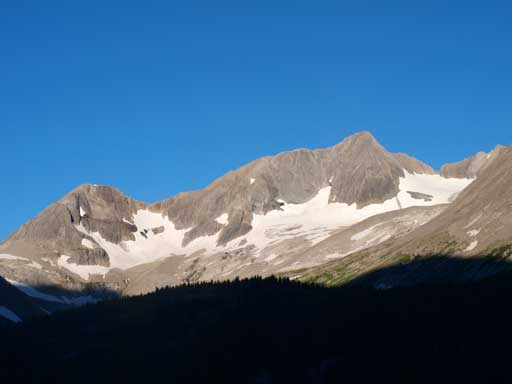
A close look at Warrior Mountain

Almost arrived at Aster Lake.
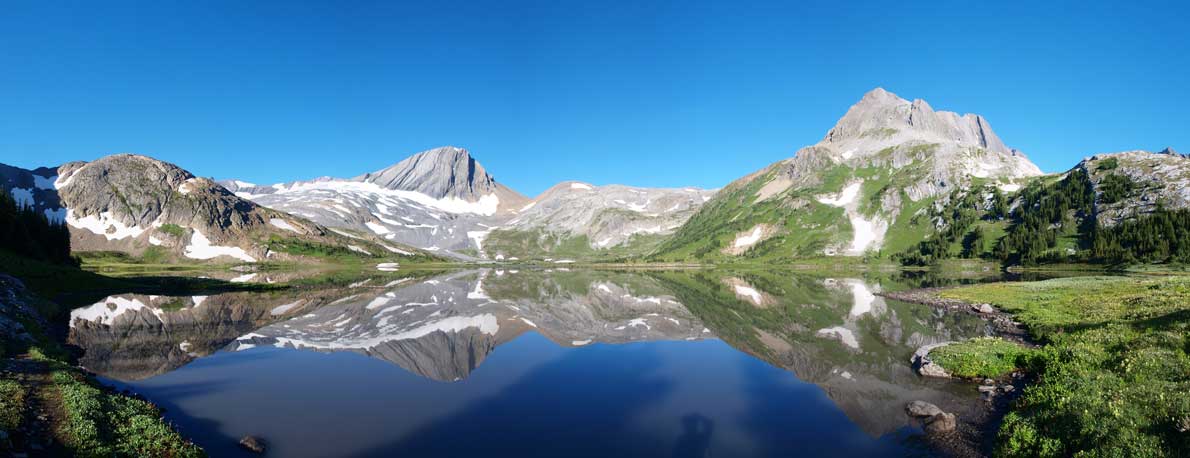
Panorama of Aster Lake in the morning.

The path gets very close to water at some points
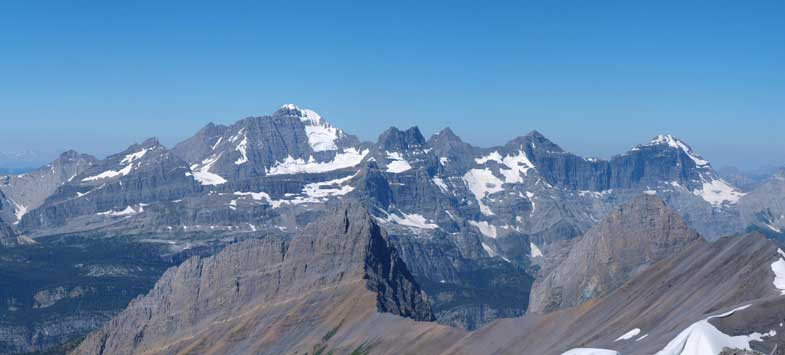
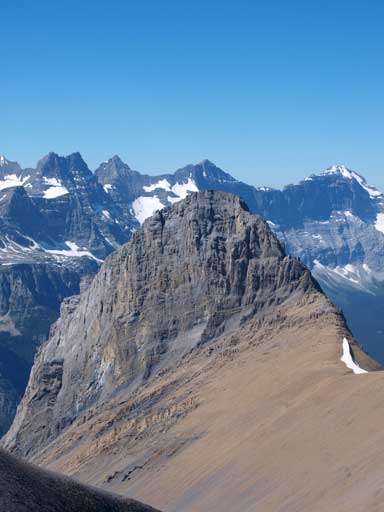
I was glad we did the south loop as it was perfect for taking pictures, given the morning sun. As we moving further along the lake shore, the impressive south ridge of Mount Northover started to show up. It’s intimidating but also exciting. The next while was spent to “gain the ridge” according to Alan Kane, but that’s fairly vague description. Grant went straight up the ridge, while I followed the cairns and paths up to the south end of the south ridge before leaving the official trail and ascending the south ridge. We re-grouped together somewhere on the ridge.
Another shot of Aster Lake, from its south side
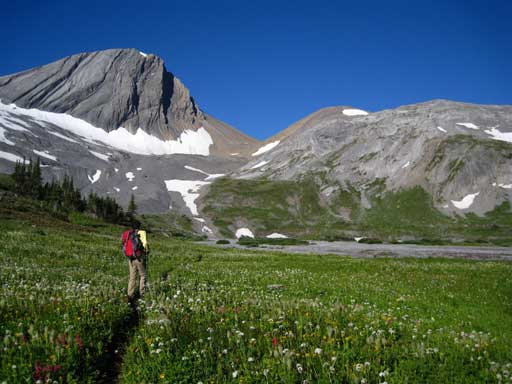
Me walking the alpine meadows just beyond Aster Lake

The intimidating S. Ridge of Mount Northover

Grant with Mt. Joffre behind
Now the real part began!

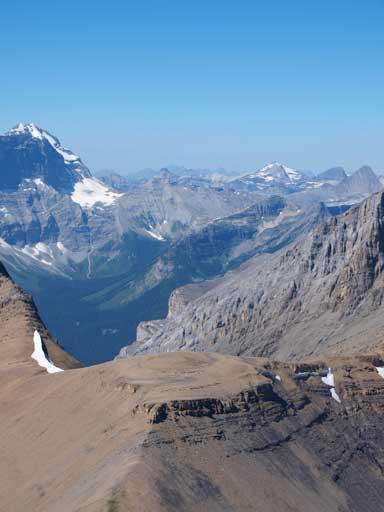
A look into BC and Northover Lakes (foreground)
In short time we were facing against the first significant exposed section. I would compare this with Mt. Lady MacDonald’s crux, but with longer drop-off distance towards each side. The terrain difficulty eased a bit after this initial bit of excitement, but more stuffs were yet to come. We also on-purposely ascended a crack for warm-up.
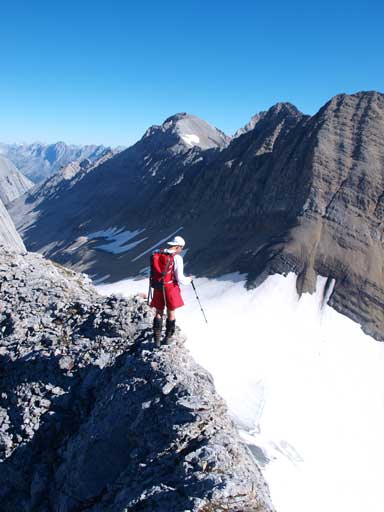
Grant balancing over this super exposed section
More stuffs are coming

A slip means jumping straight down to Northover Glacier, 500m below

Me scrambling along the edge

Grant coming up the same step
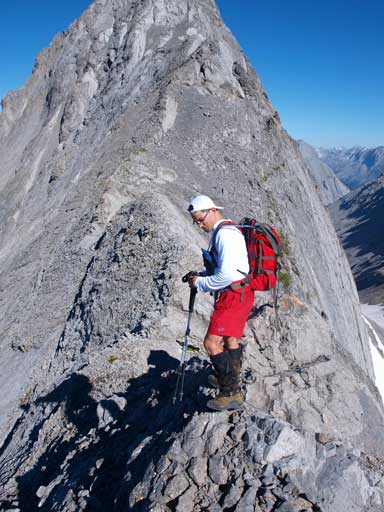
A corner slab with shear drop-off on both sides marked the first crux of this route. I thought there’s an easier ledge on climber’s left so I went that way, but it turned out much harder than appeared given the down-sloping and slabby nature… I somehow managed to backtrack to the start of that corner slab utilizing several awkward moves… Now the only possibility would be attacking the slab head-on. As you can see on the pictures below, it was too narrow and we had to place our foot on both sides and use friction.

Me attacking the corner slab. Photo by Grant

My point of view, from just below this slab

Grant coming up this very exposed section
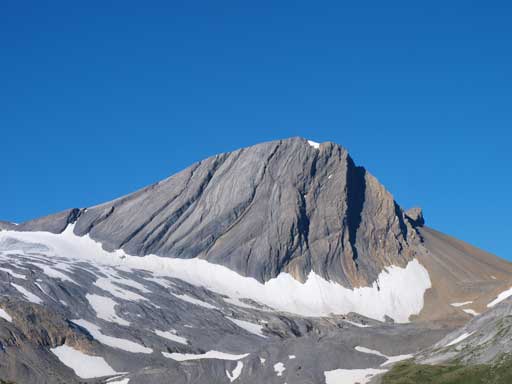
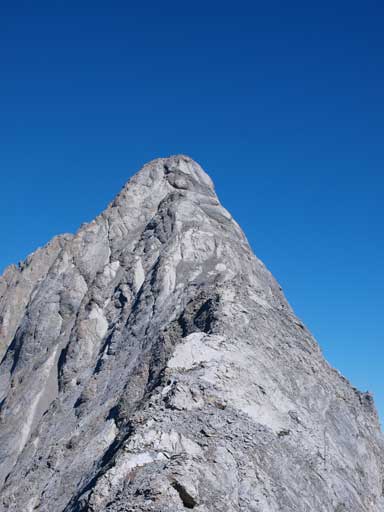
Not far after this, we were staring at the summit block – the real crux. It’s much bigger when you see it from right below, compared to seeing it from Northover Ridge Trail… We took a break while studying the route. I took out my Kane’s book and compared the route photo with the view, and I quickly spotted the correct line. The entire line is steep and slabby without an obvious “rest spot” so pretty much we had to give it a single shot. I took out my secret weapon, climbing shoes, and put everything else inside my pack, including poles and camera. The slab climbing started pretty fun initially but soon got airy. When I encountered that “5.6 slab move”, the detail was like this. Firstly I had to force a friction move to get into a position where my left hand, left foot, right foot all on friction pressuring down against the slab, with a slightly overhanging corner above. My right hand could grab a vertical hold somewhere but that really was just for balance and couldn’t hold much weight. But since I had climbing shoes I didn’t find it too sketchy nor scary as described by others. Without hesitation, I pushed my left hand, lifted my left foot, leaned towards right side, pushed left feet, then I was over the corner. From here on it was still sketchy but starting to get easier and easier and soon enough I topped out on the ridge.

The red line shows the route and the crux
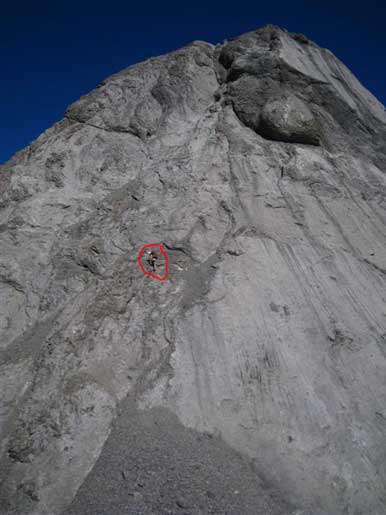
The summit block is huge.


Grant (a tiny dot) ascending the summit block

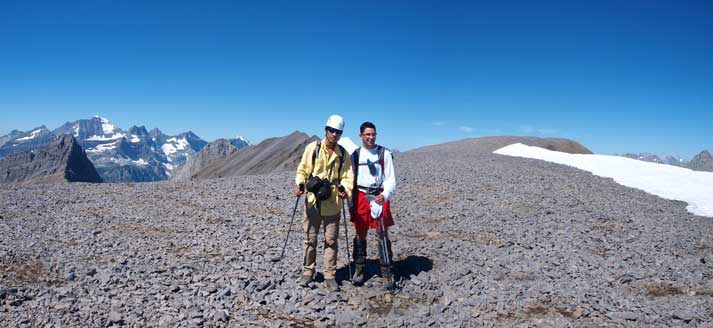
Partial Summit Panorama
Partial Summit Panorama
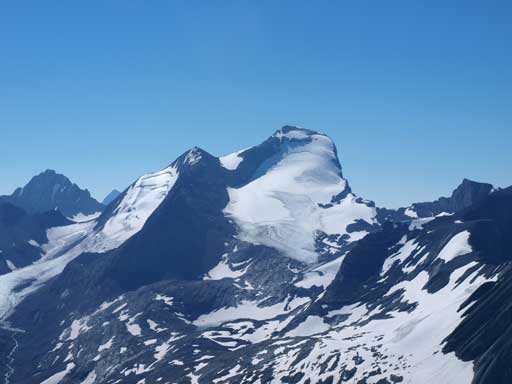
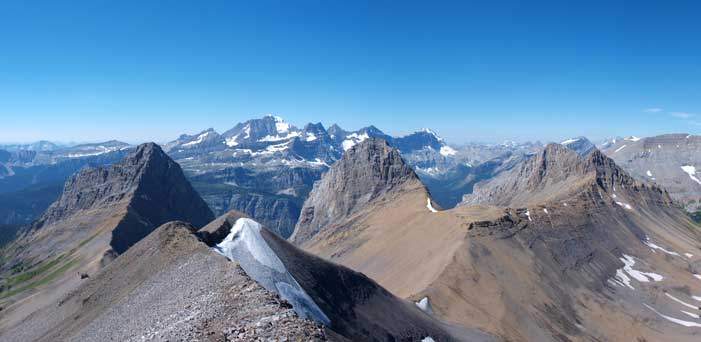
Mount Joffre
Mount Lyautey
Mt. Sarrail and Mt. Foch

Zoomed-in view towards BC Rockies
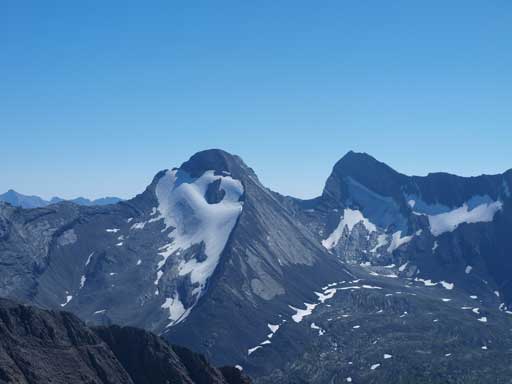
The Royal Group. Highest peak is Mount King George

British Military Group. Highest peak is Mt. Sir Douglas
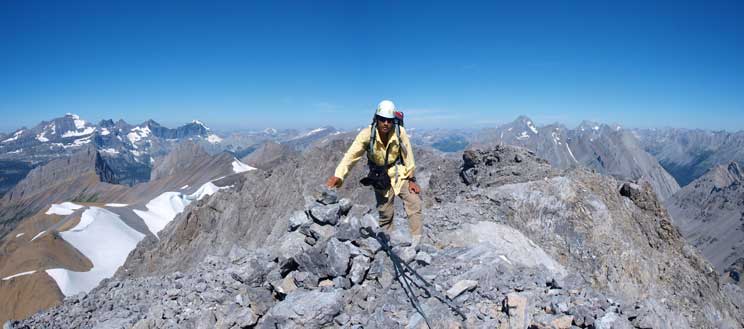
Me on the summit
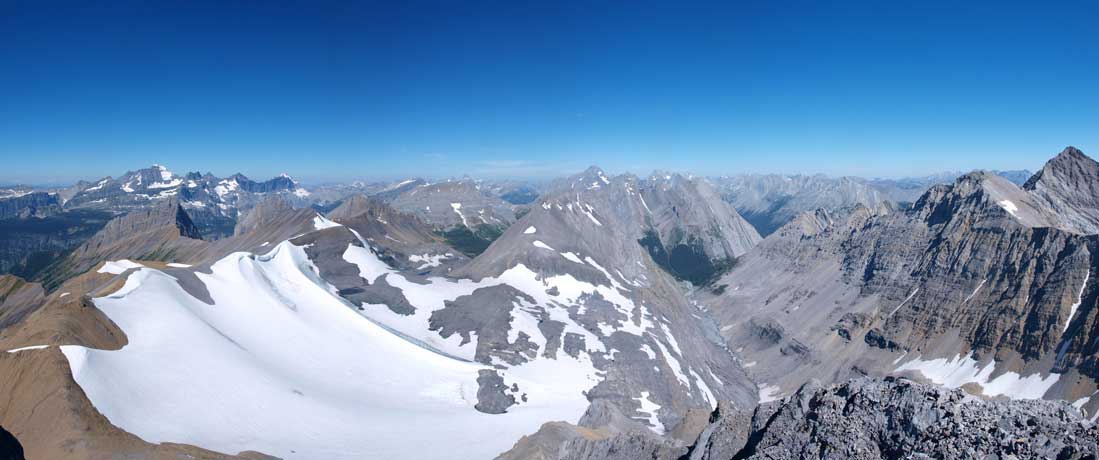
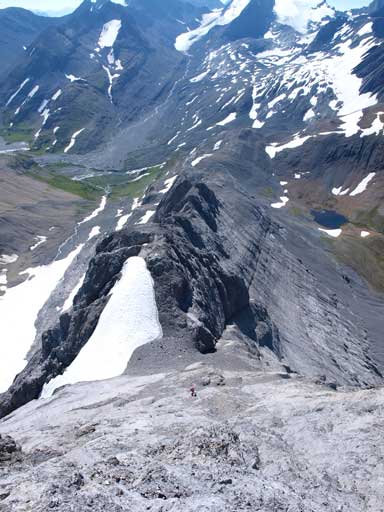
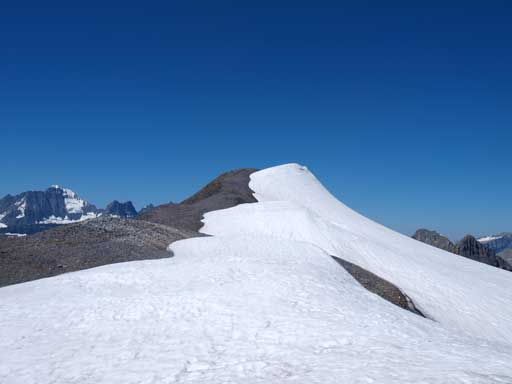
Panorama of the North side from the lower north summit. Northover Ridge and Northover Glacier below
The descent route is rated as upper moderate to lower difficult. Because it’s that “easy”, we decided to find our own way down, as I was too lazy to take out my scramble book again.. Anyway, we followed the north ridge down for 10m or so, where we encountered a very exposed section. Grant was ahead of me and he went straight down that section. It feels like the corner slab section on the south ridge, only with looser rock, so I thought this shouldn’t be the correct way. I dropped down a very loose gully on skier’s left and butt-shuffled down. I traversed further skier’s left, balance over a ledge and found climbing devices. I shouted at Grant and told him to backtrack to my position. Form there on, it was only moderate down to the scree slope, followed by a very enjoyable scree run down the the high col. Now we were back to civilization… haha.
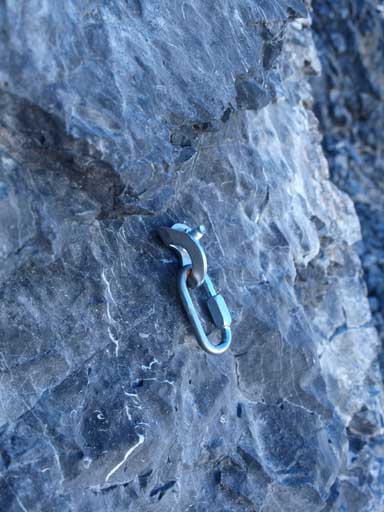
A bolt on the descent route

Grant had to back-track as he went down too far on the ridge

Descending the NW Face

Back to Northover Ridge, looking back
Okay now, let’s enjoy the scenic Northover Ridge traverse then. The summit view of Mount Northover pretty much includes everything but once you’re down to the ridge, you’ll be amazed by the snow and rock formation. Looking back at Northover, the NW face is impressive as well. We met groups of tourists and they were amazed by our decision to traverse in one day, not to say we also added 3 mountains.

Northover Glacier
The NW Face of Mount Northover
Grant and I on Northover Ridge
More snow formation
Unique rocks in this area, looking towards The Royal Group
Looking towards Three Isle Lake. The backpacking route goes down this valley
Zoom-in towards Sir Douglas and Three Isle Lake
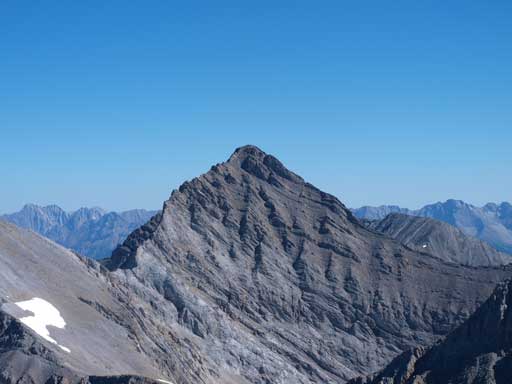
Defender Mountain
Interesting rock formation on this ridge

Time to descend into the valley, right of this photo
We followed the Northover Ridge trail down to the valley north. Now I’ve done the alpine part of traverse, and this is definitely not a good choice for beginner hikers and backpackers. This involves scree, exposure, rubble, and some scrambling elements. It’s like an easy scramble on a poorly defined trail. If you go for Cascade Mountain you’ll find it’s similar… Okay, once we got down, we had to pick up a line towards Mt. McHarg and then Mount Worthington.

Thanks for the images of Mount Northover!
My name is AJ Northover
I am a watercolour artist from Australia!