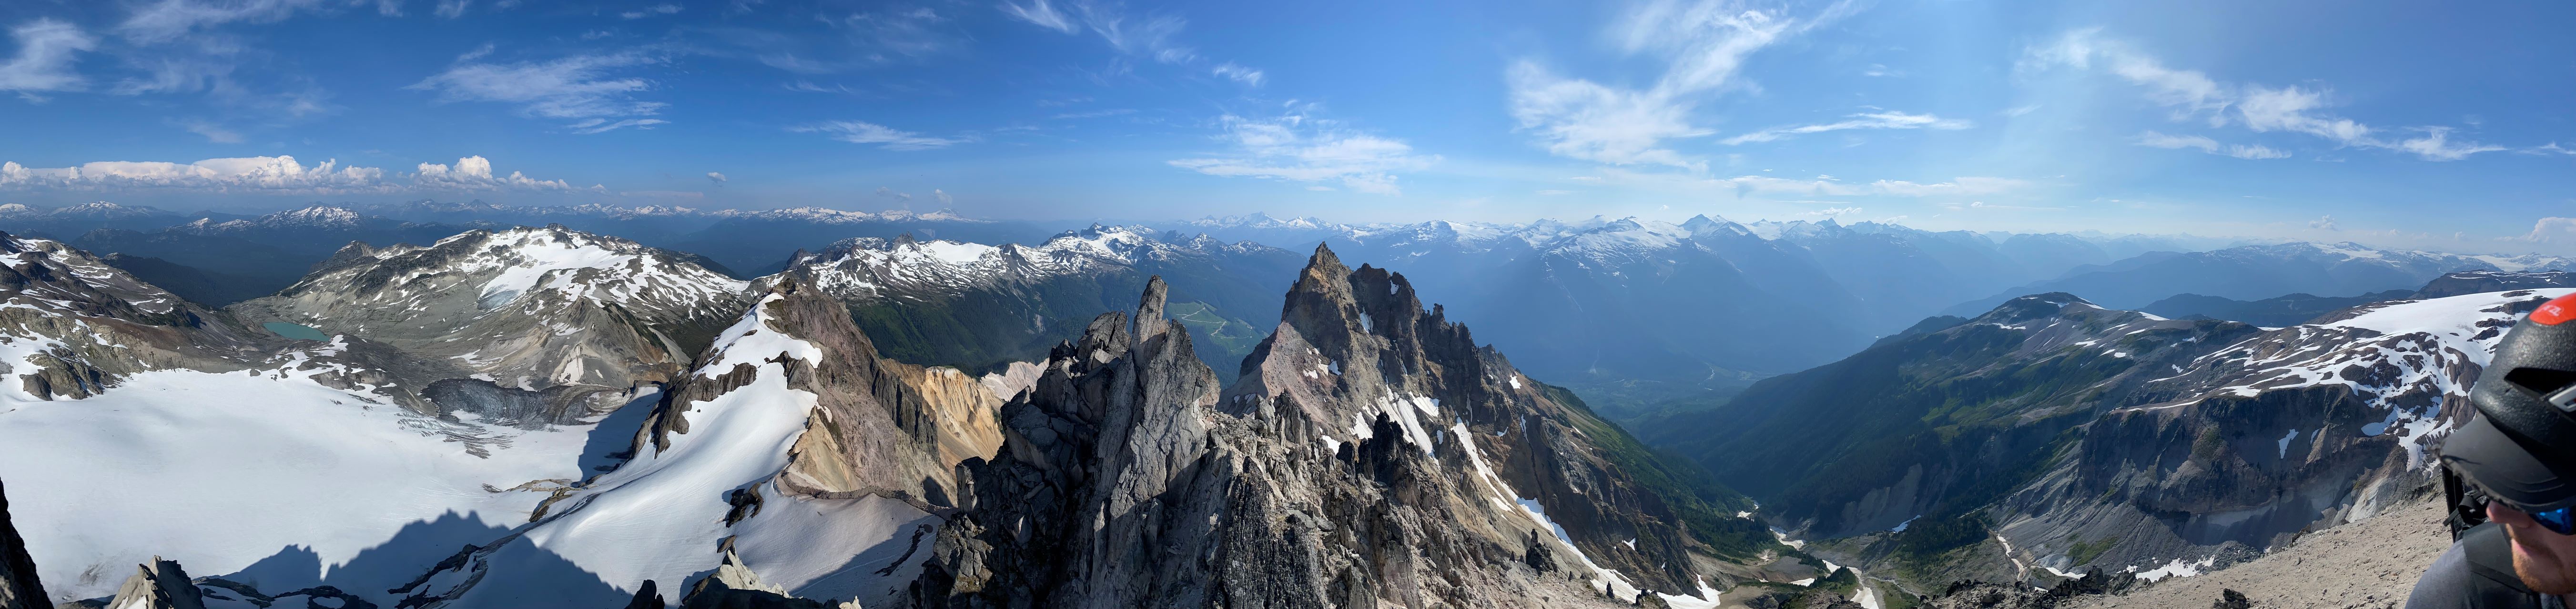
Mount Cayley (True Summit)
July 8-9, 2023
2385m
Whistler, BC
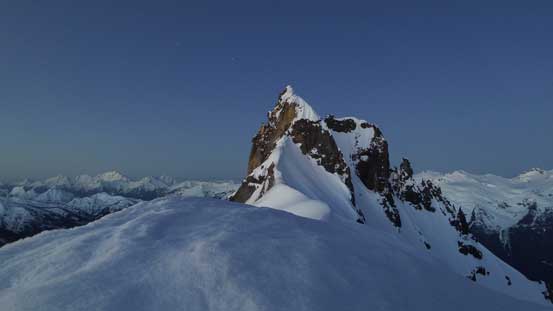
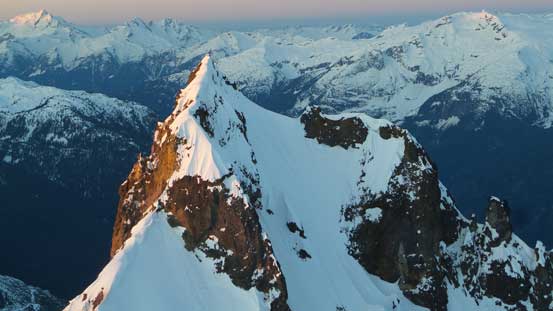
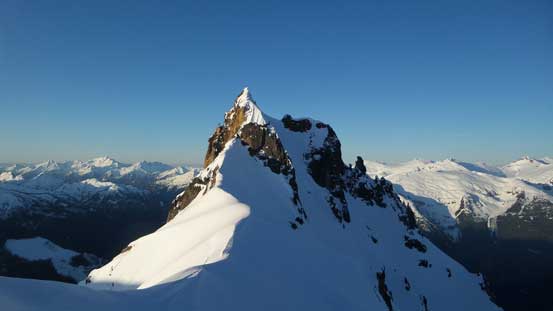
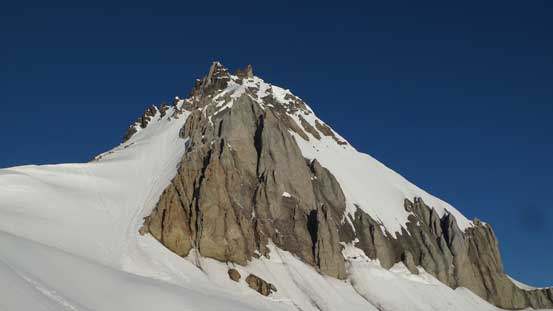
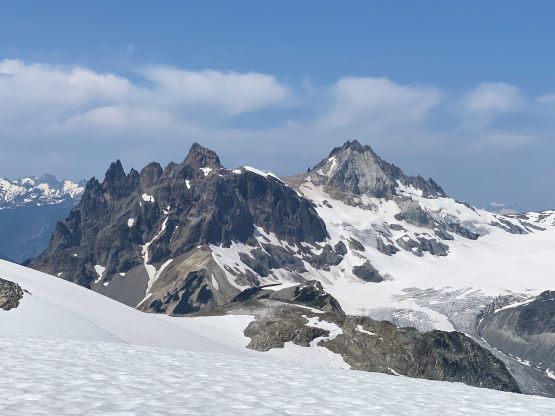
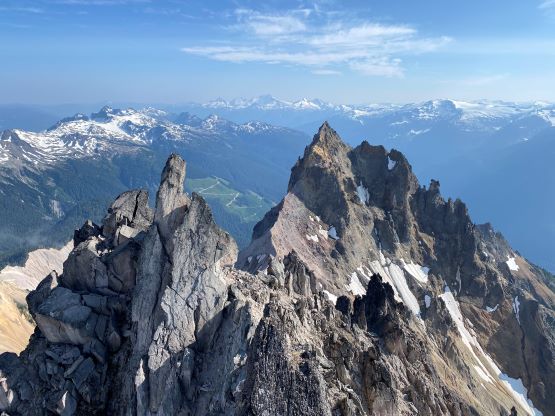
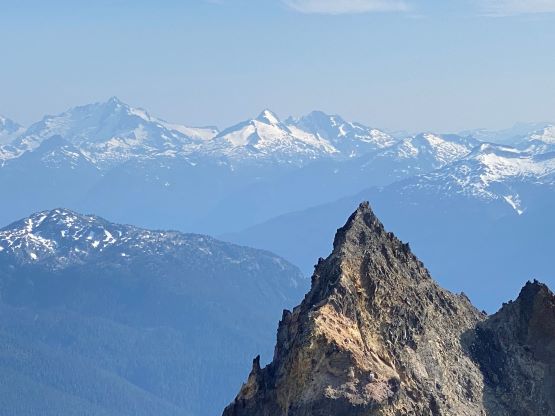
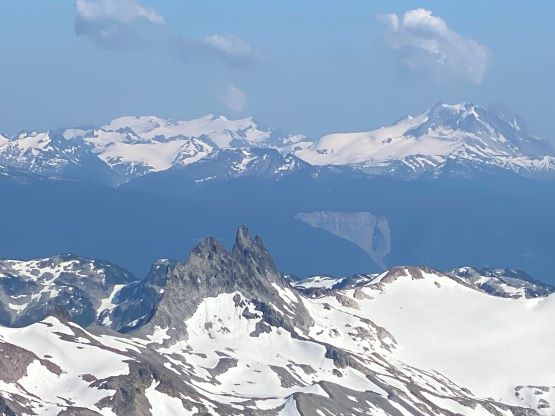
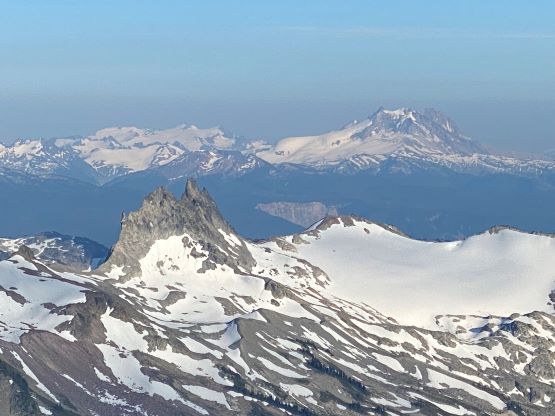
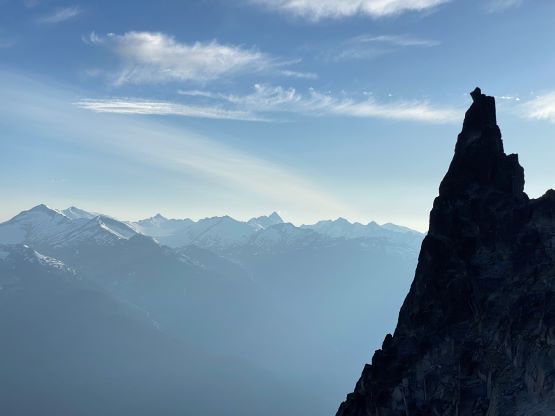
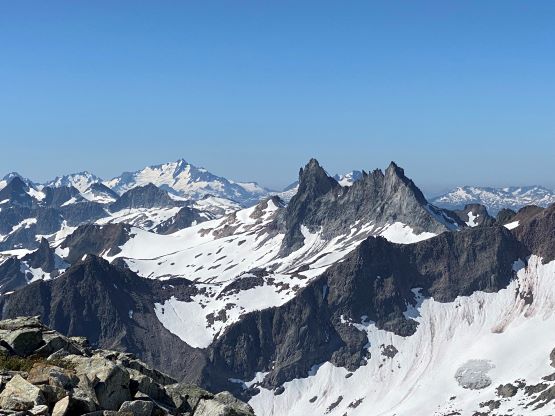
By volcanos standard Mt. Cayley is rather small, but is extremely rotten and broken. The attached Pyroclastic Peak has probably only received two ascents in the entire history, while the striking Vulcan’s Thumb is still unclimbed. The highest in this massif is Mt. Cayley itself which is also the easiest among the three peaks, but is still a serious climb. Two routes had been used – the N. Ridge and the S. Face. I’m actually not sure which of the two is easier but the selected few records on the internet in this modern era all took the south face so I consider that as the “standard route”. It might seem that the ascent can be done fairly easily on snow in winter or spring, but there’s a sting in the tail, a “Culbert’s 4th class” summit pinnacle. That kind of old school grade tells nothing except that the first ascensionists likely soloed it but also likely needed a rope for the descent. There was virtually no “beta” about the true summit pinnacle until 2022 where two accounts showed up. Winnie M. climbed in winter, did not write a trip report anywhere but told me in person that it felt like M4+ which I had no clue about other than knowing that’s equivalent to 5.8 on rock. Another group approached on skis in spring, climbed it on dry rock and reported “mid 5th class” with no pro. This group posted the trip report on bivouac.com (with no social media feed) so I had no clue until the day before I went for the climb.
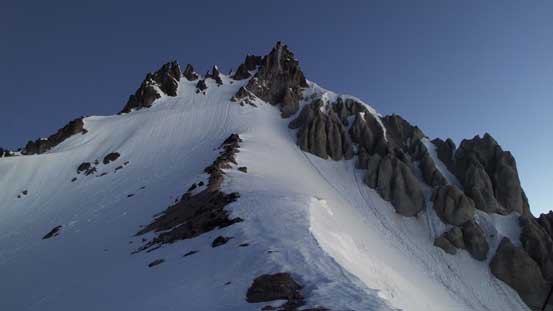
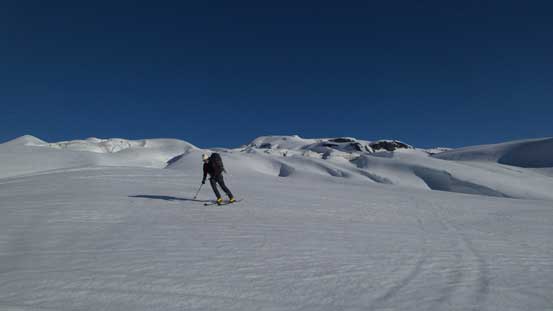
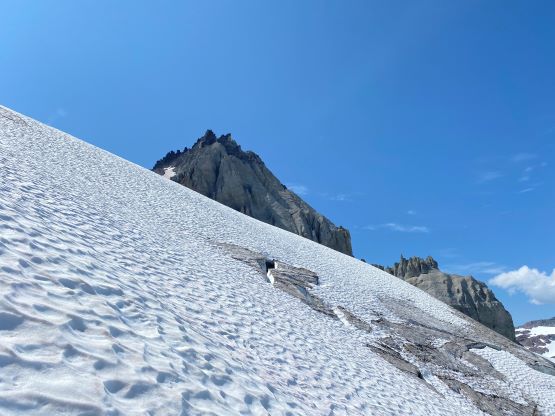
Most ski mountaineers would not bother to ascend the pinnacle and that include Alex and myself back in 2016 when I went to climb it on skis. Not doing the true summit of Mt. Cayley was considered the “norm” back in the days so I somehow convinced myself that’s acceptable, but not until people started to climb the pinnacle and post their accounts. I still don’t understand why climbers/peak-baggers accepted just making to the base of the pinnacle as “success”, probably because of simplicity as to climb the true summit would upgrade this mountain to a totally different challenge level. This is very similar to what’s happening on Manaslu in the Himalayas. Everyone including some fabled alpinists all stopped at the “ridge point” but ever since a picture and an actual ascent (with account and proof) showed up in 2021 the new-standard had become that one must climb the true summit to claim the peak. Back in 2016 there was absolutely no “beta” about the true summit and the few online pictures made Alex and I believe the pinnacle was completely out of our league, so we did not even come prepared with rock climbing equipment. The plan was to not climb the pinnacle, so of course we came home without the summit. The climb to the base of the pinnacle was however, very straightforward on 40-45 degrees snow. With two ice tools it wasn’t much of a challenge at all.
Fast forward to the summer of 2023 I finally made the decision to properly finish the business with Mt. Caley, this time with Francis. I needed a strong rock climber capable leading a mid 5th class pitch on this kind of volcanic “chossneering”. This trip report is about the ascent to the true summit in July 2023, but I’m also leaving some pictures from the April 2016 ascent to the base of the pinnacle at the bottom of the page, just for reference or for those ski mountaineers only wishing to ascend to that point.
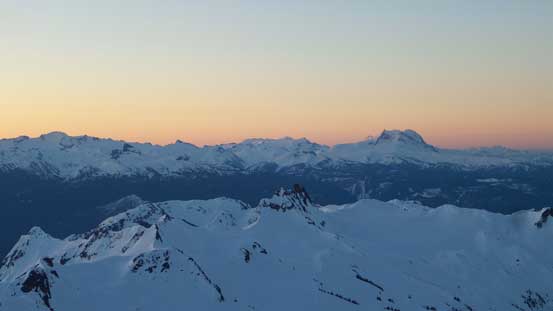
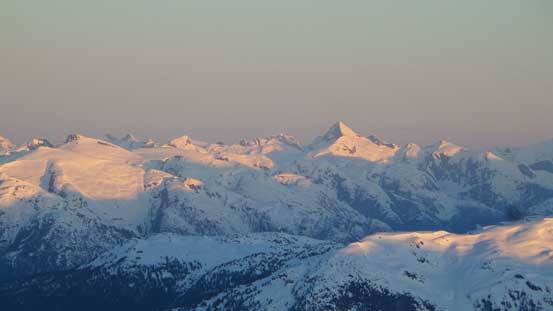
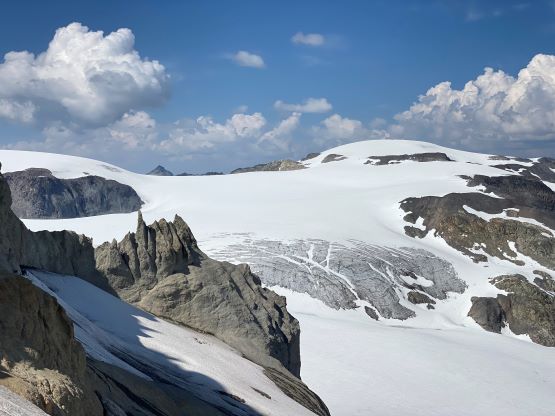
We decided to take a more leisurely 2-day approach. I thought it’d be doable in one day, but we wanted extra time for contingency, and the weather wasn’t 100% stable neither. There is a way to approach from Squamish River side, but I had no clue about the road’s status. I proposed that we should start at the Brandywine upper trail-head and ascend up and over Brandywine Mountain. This involved over 400 m elevation loss that must be regained on the way back, but I needed certainty. In SW BC the biggest unknown is usually the road access and I did not want that. The road to Brandywine’s trail-head is very rough, but is well known. In terms of gears we brought a single rack up to size 2 (overkill), a 60 m rope, extra cords and webbings, and I also made us to bring steel crampons and an extra ice tool, which proved to be overkill as well. I used two axes on my April ascent but this time the chute was completely melted out leaving nothing but some of the worst choss I’ve ever seen.
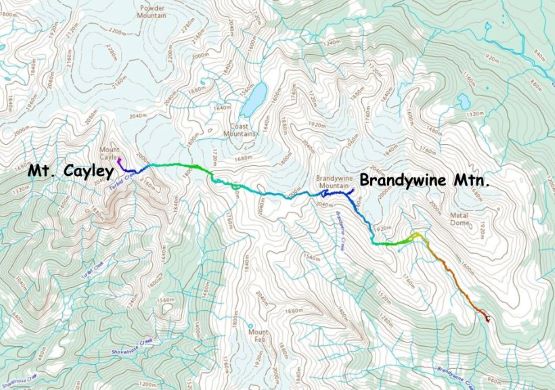
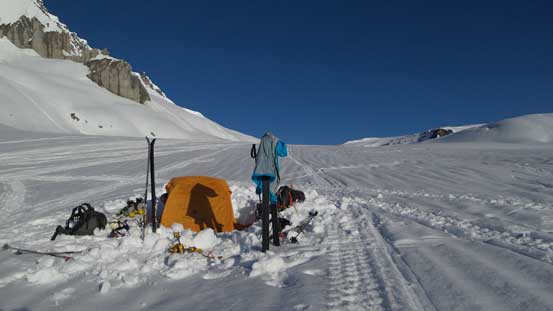
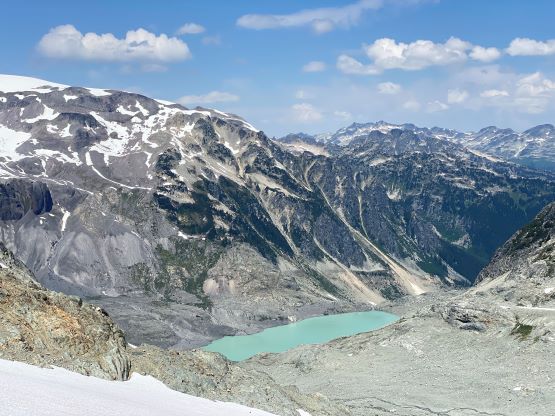
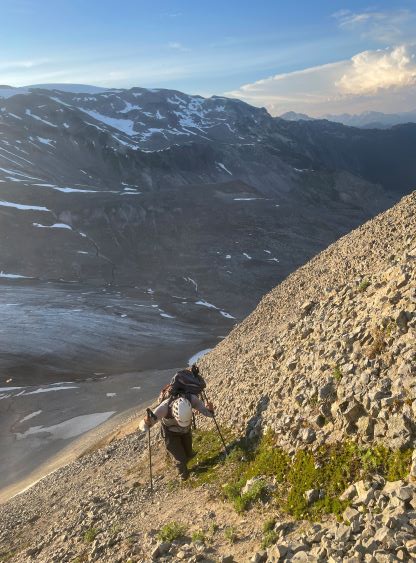
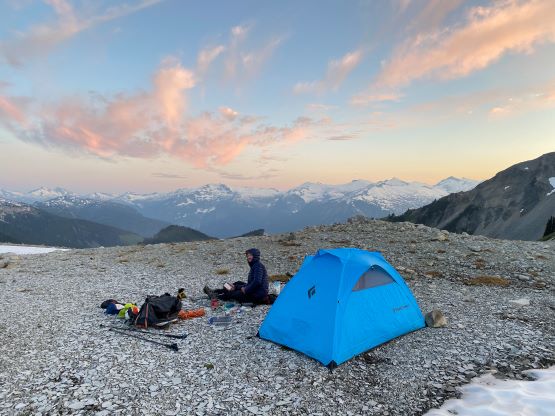
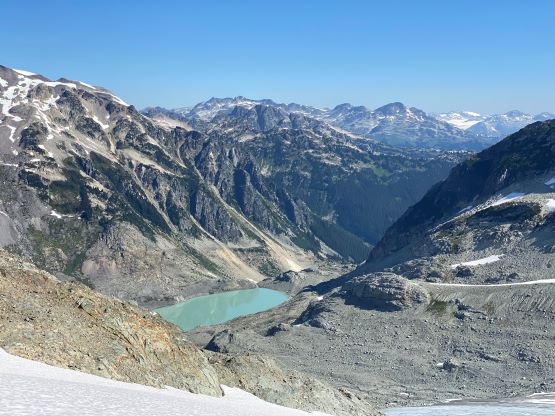
Another reason to do this approach was to grab Brandywine Mountain for me. People do not believe that I hadn’t done Brandywine Mtn. yet but that’s because it’s too easy to be bothered with and the access would also never go away. I usually reserve these kind of peaks for bringing newer hikers, but tagging it en route to a bigger objective could also work. From the west ridge of Brandywine Mtn. we traversed over some broad but undulating terrain until facing a steep drop-off. We traversed right (north) to find a way to descend into the broad gully and then descended for another 100 m. We ascended and traversed across the next obvious col, and then I led a long side-hill traverse across a small north-facing glacier, trying hard to avoid unnecessary elevation loss/regain. Over the next col we descended another 100 m down to a perfect campsite where we ended up spending the night at. Due to the lack of “beta” we decided to camp at the next col and that was a foolish decision. The bump separating this perfect camping spot with the next col was the first challenge of the day. We bashed up some scree to the top of it, only to discover the other side was not suitable for camping. All I could see was black ice, moraines and murky water. The in-situ decision was made to ditch camping gears and ascend Mt. Cayley right away in the afternoon.


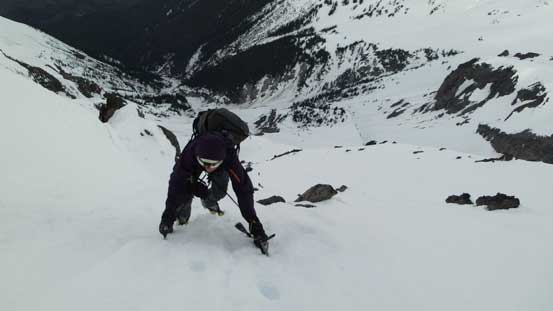
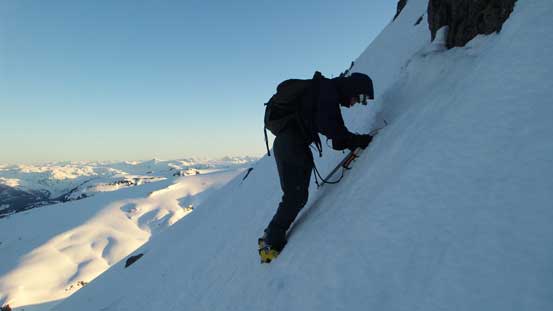
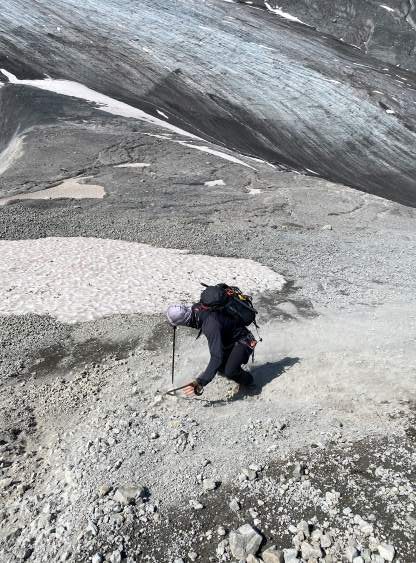
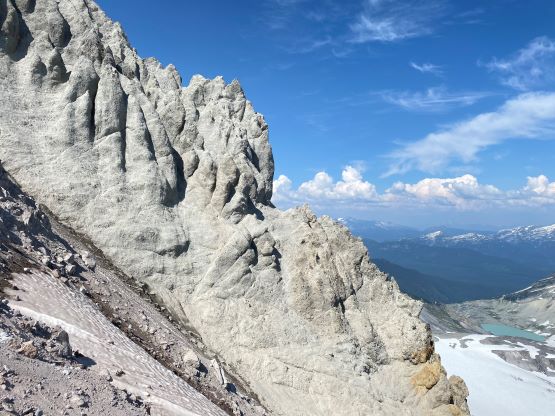
There was thankfully a puddle of muddy water from snow melt that I used to filter enough water for the climb, and then we dashed down the west slopes of that unnamed bump. The descent was much more difficult than anticipated thank to the compact moraine-type of choss. There was also some 3rd class moves with some exposure. All footwork must be triple checked and sometimes it’s impossible. Some ginger moves later we descended a scree bench. There’s one more 5-m moraine band to descent (by sliding) and I didn’t know and worried about how to ascend that a few hours later. We descended more moraine choss down to the black ice and then easily ascended the ice to the firn line.


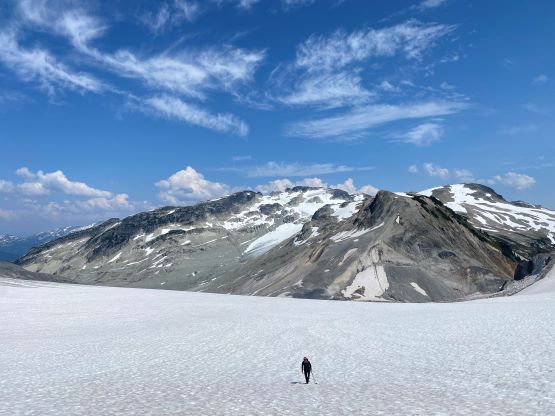
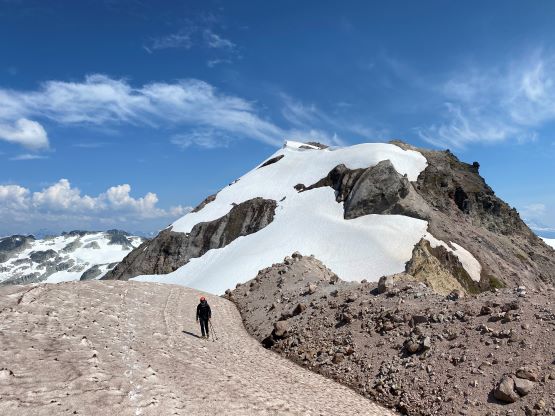
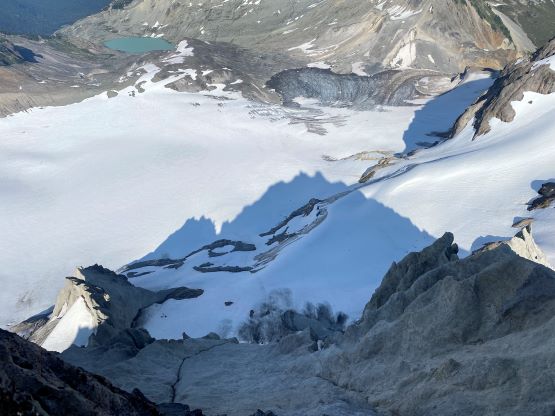
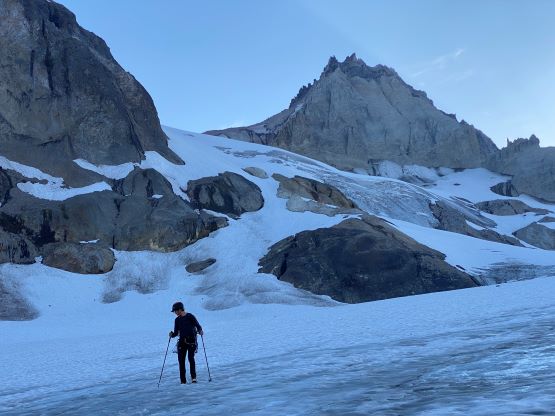
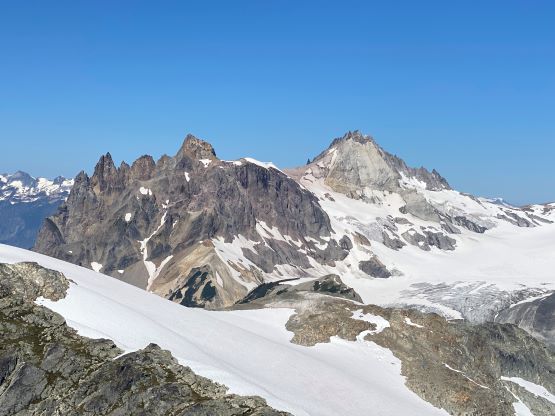
The short glacier crossing seemed simple that we didn’t bother to fuss with rope. I led us cross and there were only some cracks starting to form, but otherwise the route-finding was easy. We just aimed straight towards a snow gully on the left side of the steep face under Cayley/Cayley S1 col. I made us don crampons but it probably wasn’t needed after all. The crampons nonetheless made the ascent easier. The slope was at most 35-40 degrees and in short time we gained several hundred meters to the col, and this was where the real adventure began. The route ahead still looked reasonable but the rocks were much worse than appeared. There’s a choss arete to gain the SE Ridge proper and this arete gave us a taste of the theme of the next few hours. While none of us was on purposely trundling anything we triggered probably several tons of worth of rockfall. Sometimes one orange-sized rock could induce a series of rockfall events down either side. Extreme care was needed as falling off either side would not be survivable. Onto the SE Ridge, the going became easier though still as chossy. The exposure to the west had eased so we cruised up to the base of the small snowfield. Too lazy to don crampons I led us squeezing through the moat into the gully system and it was bad, like 10 times worse than what we thought. Nonetheless we had made this far so we must try. A few meters above the snowfield I stepped onto some dirt and the weight of myself triggered a microwave-sized boulder at least 1 m below which almost took Francis off the mountain. From this point onward I knew we were in some full-on situation. I had climbed some of the worst choss piles in Rockies, SW BC and Washington and I had never seen rocks breaking in such unpredictable fashion.

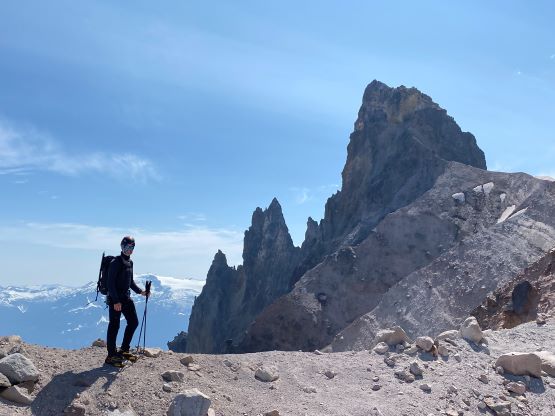


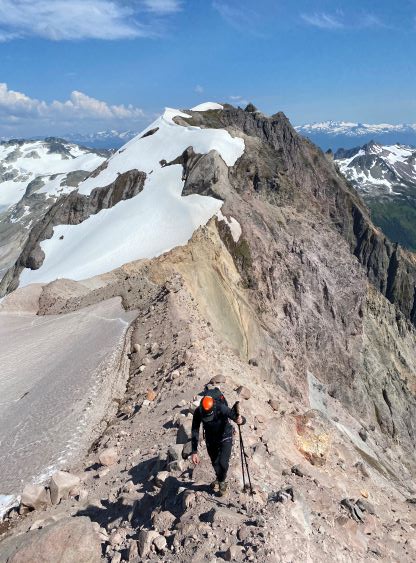
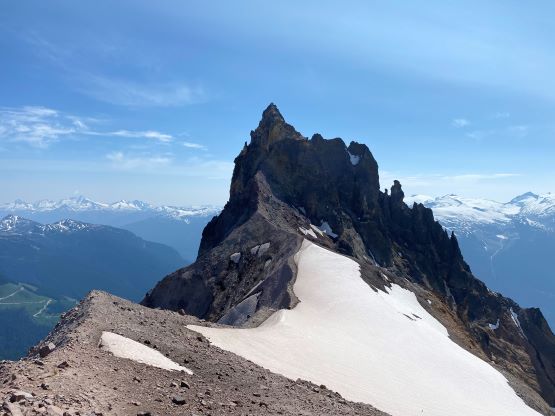


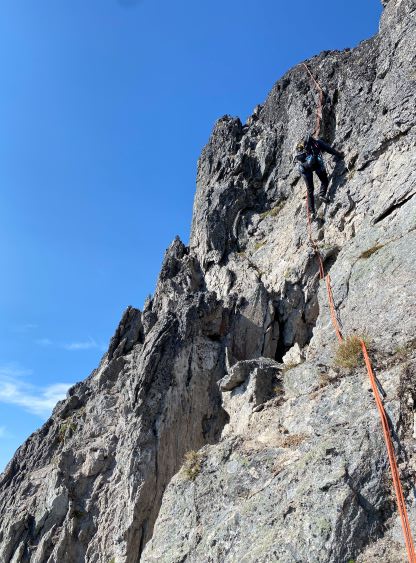
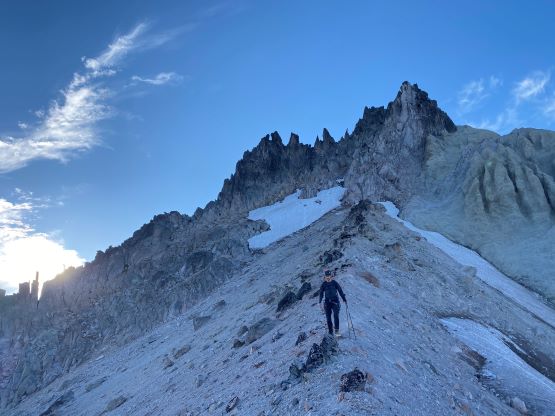
There are several gullies to chosse and back in 2016 I climbed the rightmost (longest, steepest) but that did not seem like the smart choice on this day. Instead, I led us traversing leftwards into the fattest, leftmost gully which would eventually lead us onto the west face, but about 1 pitch lower than the ideal west face traversing line, but more on that later. First of all we had to somehow made our way up this gully. Though only 3rd class, the scrambling was much worse than the grade suggested. 80% of the things we touched, big or small would come loose and the most solid formation was actually the dirt under our feet, but then the dirt could trigger rocks underneath. Again, we had made this far so we pushed on and made to the west ridge notch without incidence. I thought would get a break there but I was wrong. The west face traversing was just as shitty and exposed. The rocks on the west side felt like sand glued by dirt with nothing to be trusted. Nonetheless I dropped in and ginerly made across several gullies to about 2 pitches under the true summit. Building an anchor was impossible here, so we both soloed about 1 pitch worth of 4th class. I was already terrified and mentally done and I saw a boulder ahead that could possibly be used as an anchor. Francis soloed to the boulder and claimed that it “was not solid, but probably as good as we could find on this mountain”, so we slung it around. Francis soloed another few steps that I felt nervous to watch. I did not want to solo what he just did, so tossed the rope’s end and told Francis that I was about to give him a belay from this boulder.
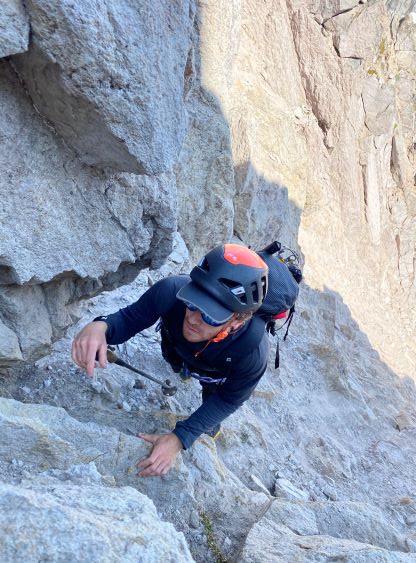

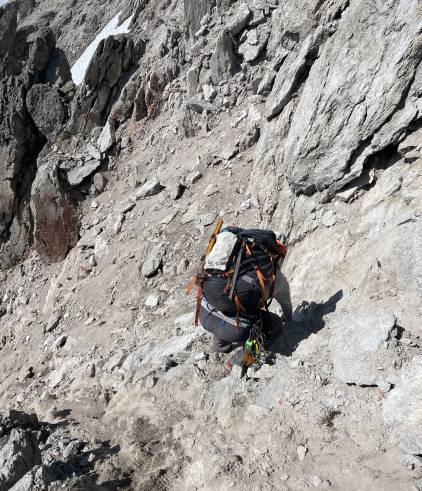


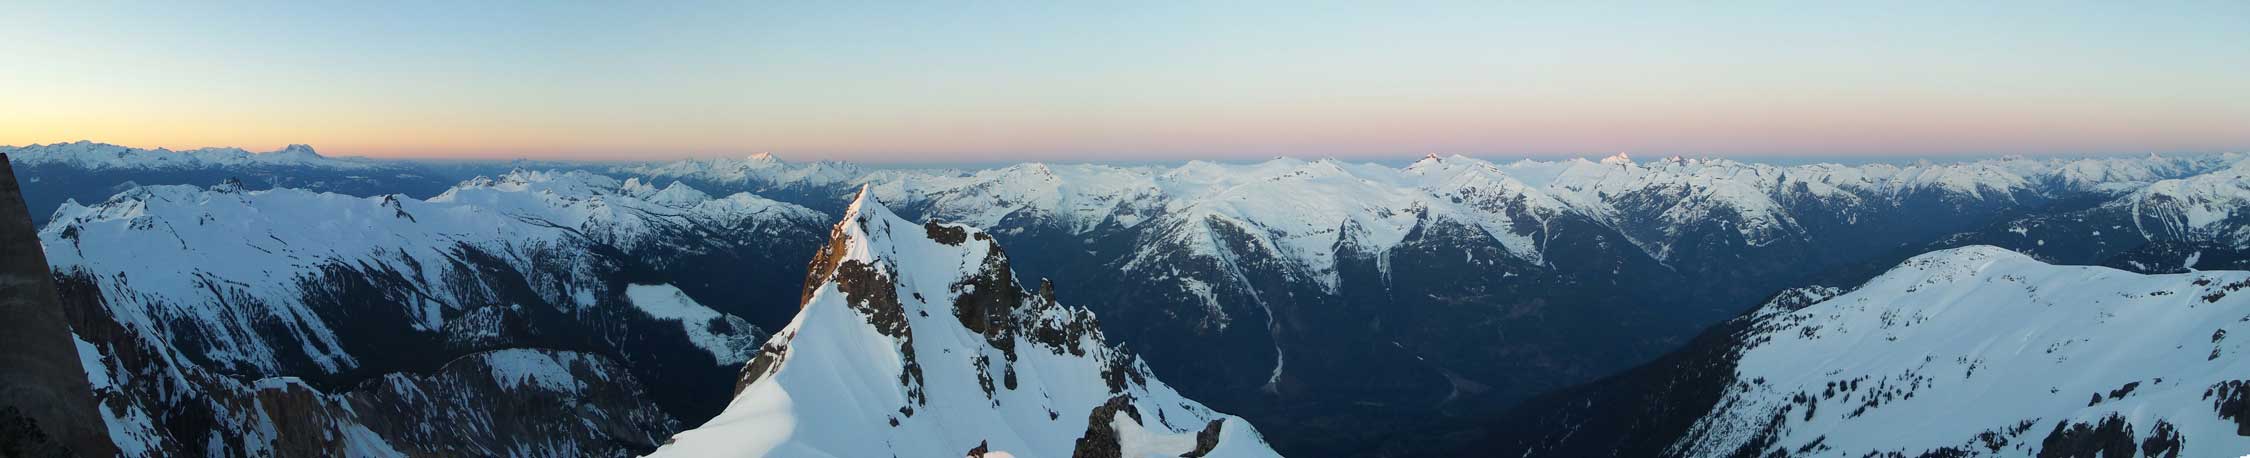
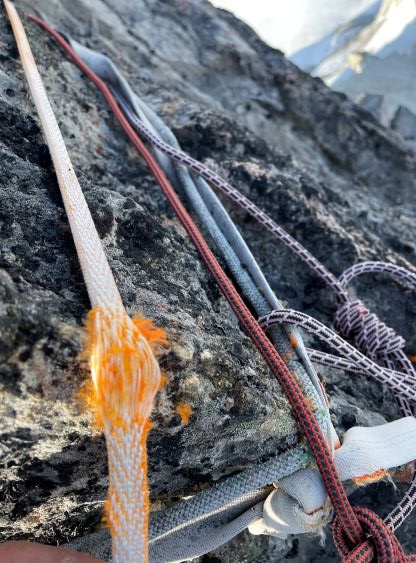
Meanwhile Francis made a very awkward transition to don rock shoes. There was no space for him to carry the boots, so he slid the boots down along the rope and I stuffed them into my already-heavy pack. We had not found a single place to sit, make footwear transition nor to ditch our snow gears so I carried literally everything up, including the approach shoes that I was planning to use for the climb. I didn’t want to risk losing any footwear, so opted to follow the mid 5th class choss in boots, which eventually turned out to be fine. Francis could not put in any pro until a few meters from the top, so it was essentially a free solo especially considering the half-assed anchor I belayed from. Francis finally managed to put in a .75 cam but it seemed like the walls on each side were wobbling, but nonetheless he made the summit. I followed up a more direct line (5.6 ish) since I wanted to minimize rope-induced rockfall. The few flanks that I had to pull on about midway up felt extremely sketchy that even with a top-rope belay I was sketched out.


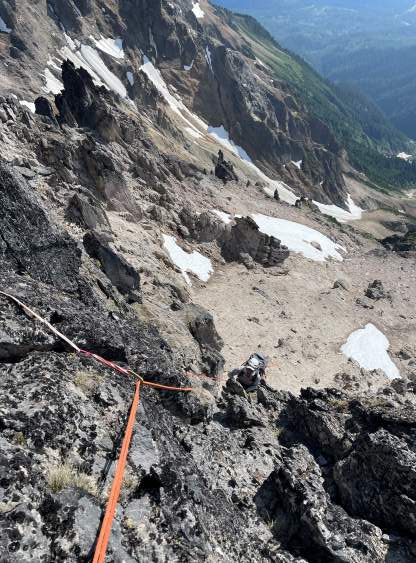


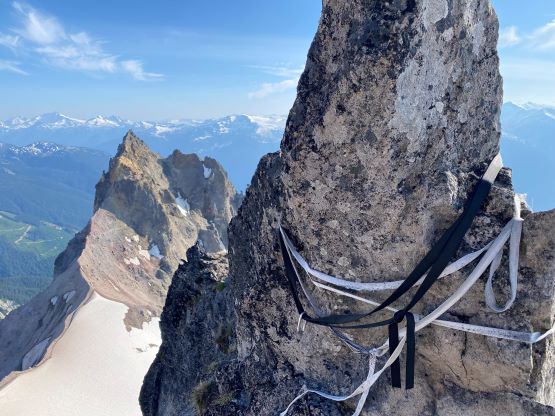
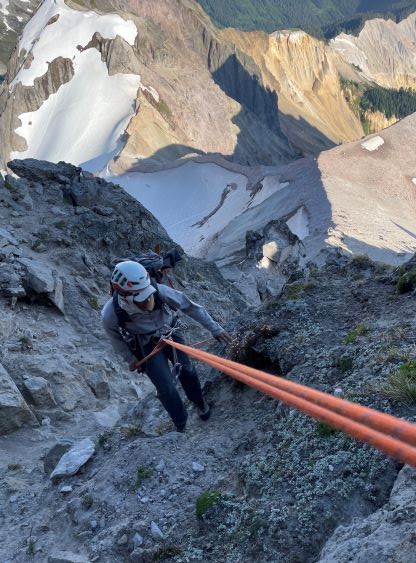
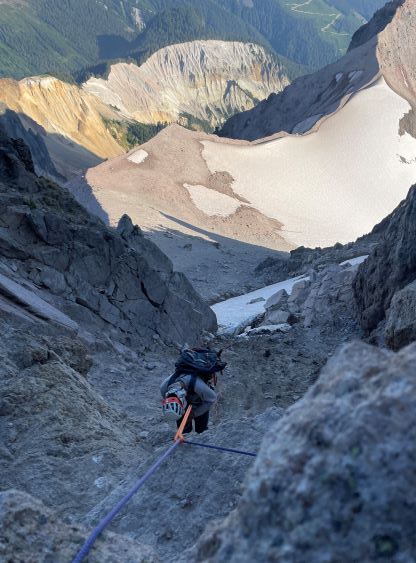
The time was getting on so we couldn’t stay on the very tip of Mt. Cayley for too long. We again, made an in-situ plan about the descent as I just spotted a rappel station above the easternmost (longest) gully. The traverse from the base of the pinnacle to that gully, which was what I did in 2016 on snow, looked to be doable, so I planned a diagonal rappel towards that direction. At least one previous party rappelled off the true summit on an orange sling slung around a microwave sized block, which easily wobbled upon touching. I moved that sling to back-up another set of slings on a different block, and rappelled down. When I got down Francis noticed that the orange sling was already mostly cut, so he backed it up with another sling. The rocks on this mountain were sharp that our rope got stuck upon pulling, but thankfully it was in a position where we could easily scramble up to free. Francis did the work and also swapped his footwear back to mountaineering boots, while I carried the rope across the ledge to the top of the gully to set up the next rappel. Two 30-m rappels using existing stations got us over halfway down. The second station was not very solid, but was as good as we could find, so we used it. I had to build the 3rd station (thankfully, easy with a large block) as the previous party likely climbed it with more snow so they didn’t need the final rappel. This final rappel got us onto the snow so both of us donned crampons before going down. There’s actually a good moat to hide from the rockfall, and the rope amazingly didn’t get stuck again. We were now finally relieved. Using both ice axe and crampons we easily down-climbed the snow, and then walked down the choss arete while triggering another several tons of rockfall, and finally plunged down the steep snow onto the glacier.


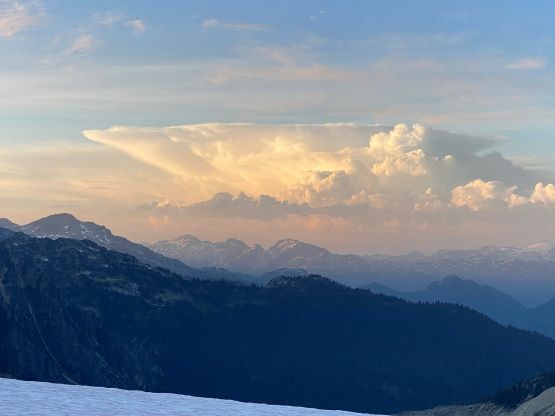
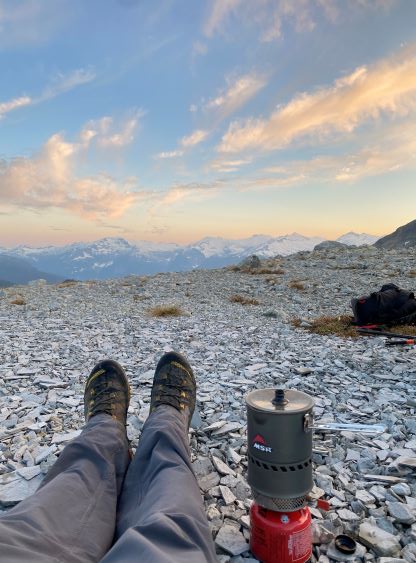
The day was not finished yet as we still had to re-ascend that intermediate bump which is made of compact moraine choss. I had previously spotted an alternative route around the north side but we didn’t feel particular keen about the extra elevation loss and regain, so opted to embrace the choss following the exact same route that we took. That 5-m moraine step was indeed, very bad. Francis led it, almost fell but he kicked about 30 times for a few steps and made my life simpler. I only needed to kick about 10 times to reinforce them, but I also didn’t want to kick too hard to trigger additional slide above and damage them. The upper route was steep and exposed, but not as terrible as I thought. The mosquitoes were horrendous at where we ditched the gears, so we quickly stuffed them in and walked back to the previous pass to set up camp. There was no running water, but the source wasn’t far away and it’s Francis’ turn this time to grab the liquid for us. I got the tent set up and did the cooking. The sunset was amazing but thank to the mosquitoes we didn’t stay long outside.


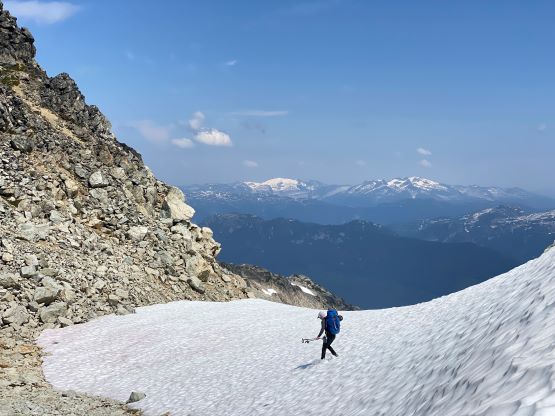
The following morning we slept in till 8:30am until it was too hot to be in the tent anymore. About an hour later we were on the go again, roughly following the exact route that we took in the previous day. For that long traverse across the north side glacier we opted to use crampons to increase traction, even though they weren’t absolutely needed. Higher up I also took a slight variation to avoid the few steep steps that we descended, but didn’t end up finding a better way. Francis followed our original line and got back to Brandywine’s base faster than me. The rest of the descent using Brandywine’s standard route was uneventful and so was the drive-out. It was slow, but doable. I would not recommend doing Mt. Cayley in summer. For those with mixed climbing skills it’s probably best to climb in winter when the entire mountain, including the pinnacle is covered in snow and ice, but we are not mixed climbers. What we should have done is to do the approach and the climb to the base on snow, and climb only the summit pitch on dry rock. This would mean a timing at around “late spring”, from late May to early June. This still will involve one pitch of unprotectable mid 5th class on garbage rock. Otherwise it someone really wants a chossneering test piece then embrace it in late summer, without any snow, but mind you, it’s looser than the Goodsirs or the true summit of Black Tusk.


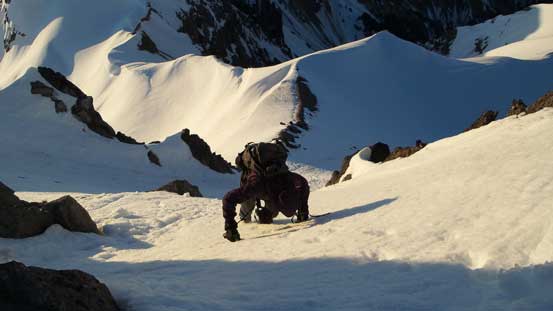
Below are some pictures from the April 2016 trip in which we climbed to the base of the pinnacle pre-dawn from a camp under Mt. Cayley’s east face. Earlier in that trip we climbed the North Tower of Mt. Fee and Powder Mountain.