Picacho Peak (CA)
December 26, 2021
585m
Yuma, CA
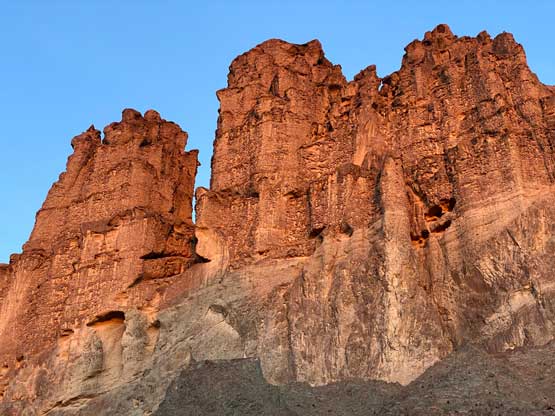
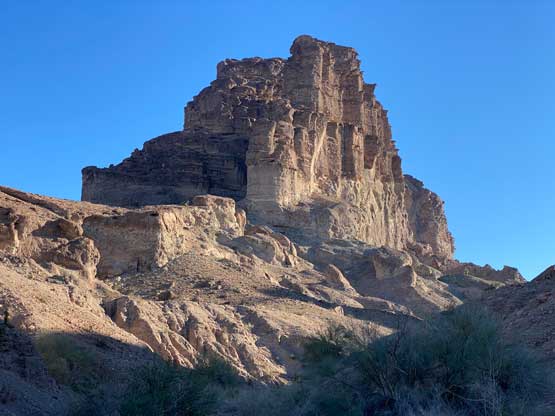
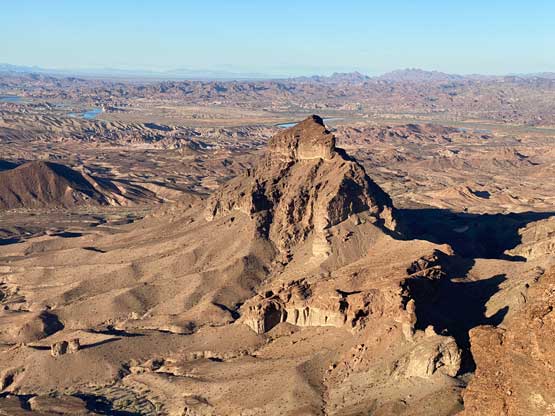
There is another Picacho Peak not far from Tucson, Arizona that I scrambled in March 2017. This one, near the border between California and Arizona a few dozen kilometers north of Yuma is considerably lower in elevation but a much better climb. If fact, everyone who has climbed Picacho Peak would agree that it’s either the best, or one of the best desert peaks. It appears like a monolith sticking out of the desert floor with no easy route to the summit whatsoever. The area is not known for rock climbing or outdoor activities, but the standard route has been well-published because this is such an iconic peak that attracts climbers from all over the country. The best part of this route is that one must rappel into an overhanging gap on the ascent and leave the rope there to jug up on the return. And of course there are a few other difficult spots to overcome in some very aesthetic positions.
Picacho Peak was not on the agenda simply because I wasn’t aware of this peak and Adam had already climbed it years ago, but after seeing this peak in person I asked Adam the feasibility of a solo ascent. The conclusion was that it’s rarely done solo, but feasible. The fact we brought two 30m ropes in this trip meant I could self-belay across the first, “step across” crux, leave one rope there, and use the second rope to deal with the real crux.
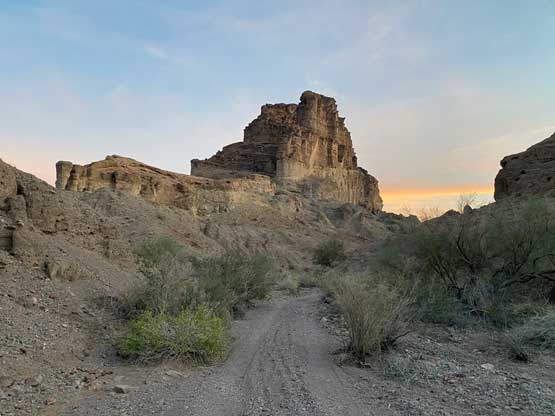
After completing Needles Eye we wasted no time but started the long drive down south towards Yuma. We unfortunately had to make a gas station stop inside the city of Yuma and that consumed about half an hour thank to some horrible traffic. We then drove back across Colorado River back into California and then drove northwards onto the dirt roads system. The main access road for this area was long but not very rough, such that we were able to cruise in Adam’s Subaru. There are two ways to approach Picacho Peak and we picked the shorter northern approach. The downside of this option was the even-longer drive on much rougher roads, but we had to drive there anyway for the next day’s objective, Little Picacho anyway. The spur road that passed the standard approach to wrap around the NE side of Picacho Peak was mostly correctly marked on my Gaia map, but definitely required 4×4 and high clearance. A few spots had even been re-routed likely due to flash floods and that looked to be fairly recent. We did manage to park at the farthest driveable spot in Adam’s Subaru, but generally speaking I would say a Jeep, Taco or 4Runner with all terrain tires is required for the averaged drivers. And that explained why majority ascents of Picacho Peak started from the east side despite that approach being two times longer.
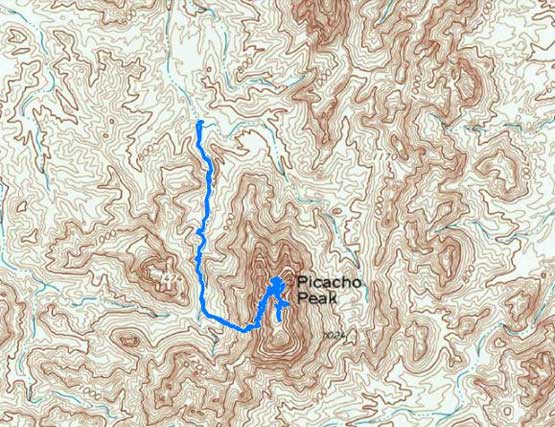
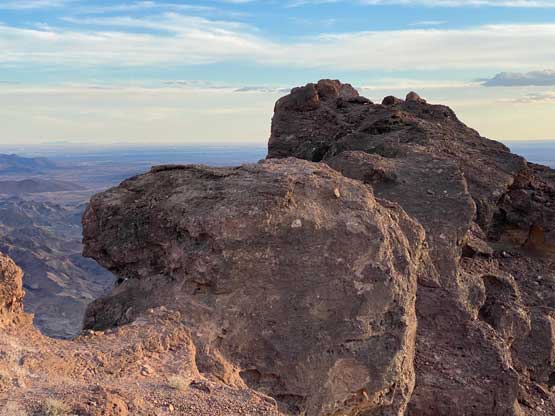
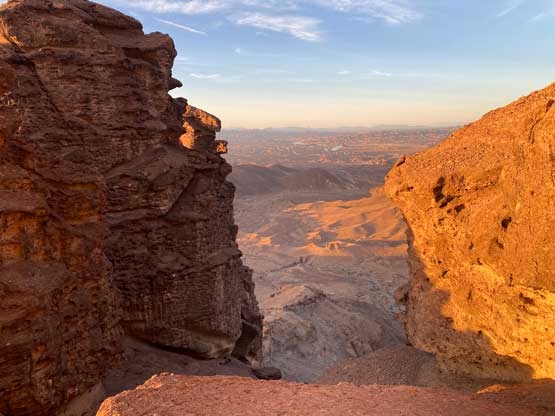
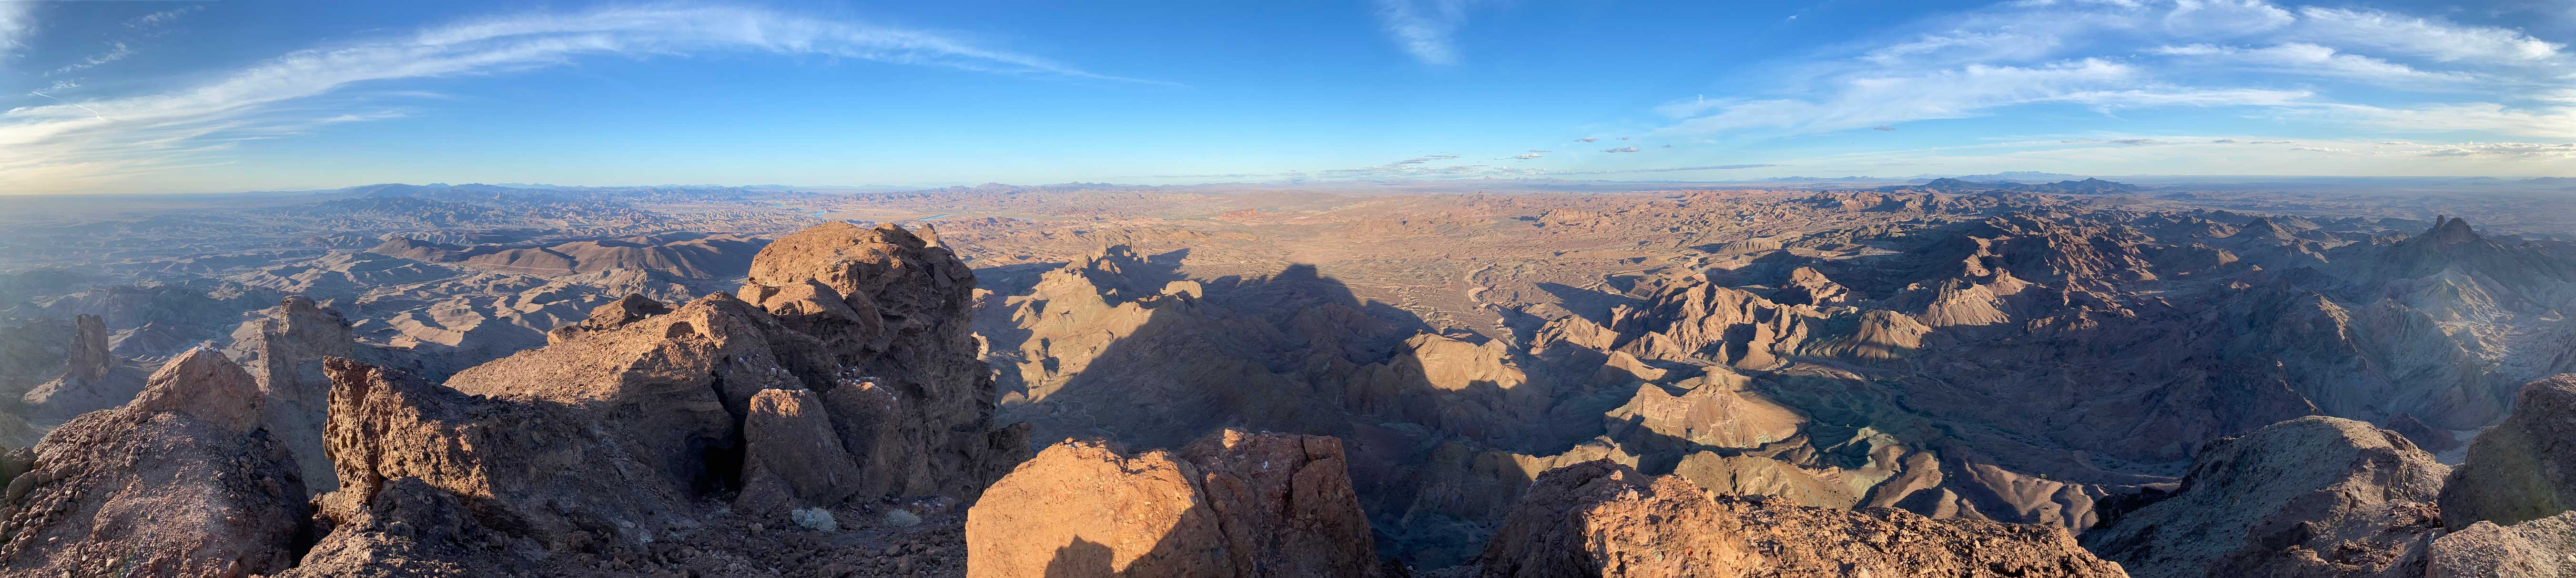
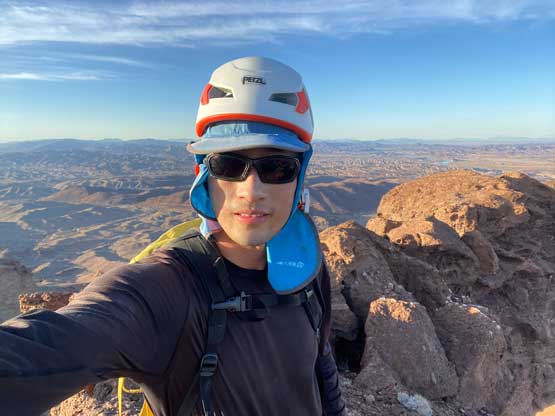
By the time we parked I had less than 3 hours of daylight time so I packed three sets of extra batteries and a spare head-lamp as I fully expected to return in the dark. Of course those turned out to become training weight again. I also packed two ropes, rock shoes and a few cams and used all but the cams. I shouldered the heavy pack and dashed up the approach wash as fast as I humanly could. There were game trails here and there to facilitate, but the hike-in was only a bit over 1 km. Once the grade steepened I slowed down to appreciate the settings around. Two unnamed spires behind me appeared unclimbable so I naturally wondered about them. The standard route of Picacho Peak then ascended a long-ish class-2 gully to the iconic notch/gap between the main peak and the western sub-peak. This notch was very visible from the north and indeed, once I topped out I could see Adam’s vehicle down below.


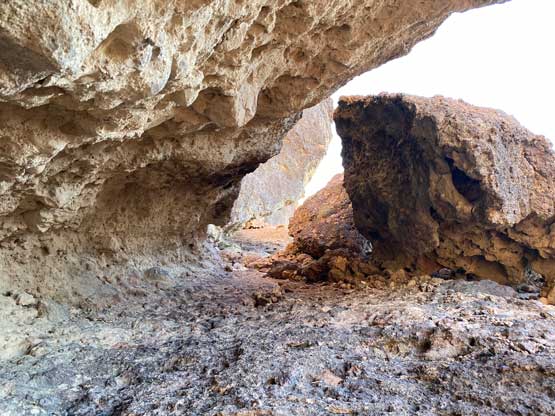
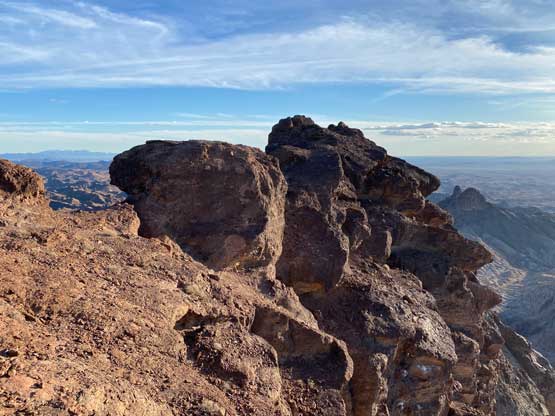
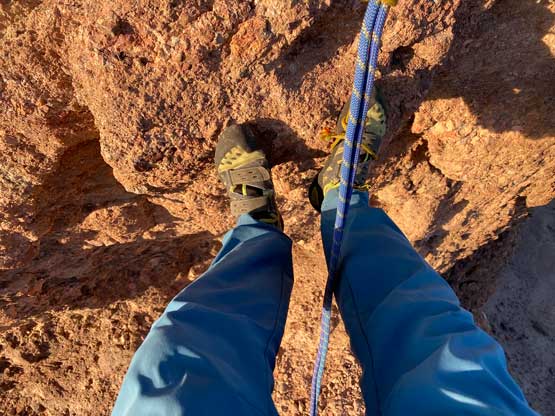
The terrain above appeared much steeper so I ditched the first trekking pole. Immediately above the notch I had to ascend several 3rd class steps and then followed the painted arrows onto the infamous ledge/skywalk system. A couple switchbacks later I came to the first (wooden) ladder, which I remembered from skimming through several trip reports a couple hours ago. Without any hesitation I put my weight onto the ladder and then I realized it was just laid there without any security measurement. I immediately slowed down and made my movements much more carefully. The step-across crux came shortly after the ladder and here I ditched the second trekking pole. The gap appeared worse than anticipated so I didn’t want to just solo across, so I spent a few minutes donning hardness and rock shoes while thinking about the strategy I could use. I remembered reading somewhere that there’s a rock horn. It wasn’t in an obvious position but I eventually found it. Unfortunately I did not think this horn was dead secure, but it’s still better than nothing. After setting up the rope I used a prussik to self-belay the down-climb, which turned out much easier than I thought. There were hidden holds here and there. I made a mistake for leaving the trail shoes on the other side of the gap. The scramble after the first crux was way longer than I thought, such that to do the entire thing (both ways) in rock shoes turned out to be a painful experience.
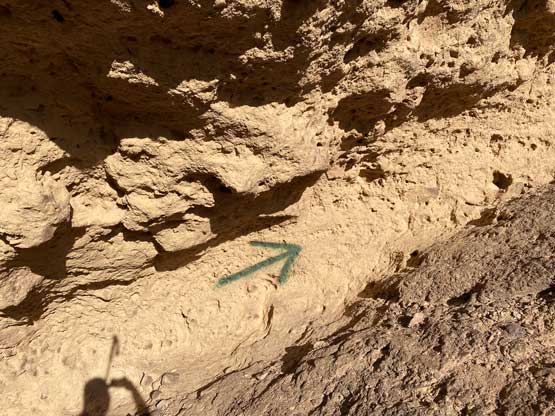


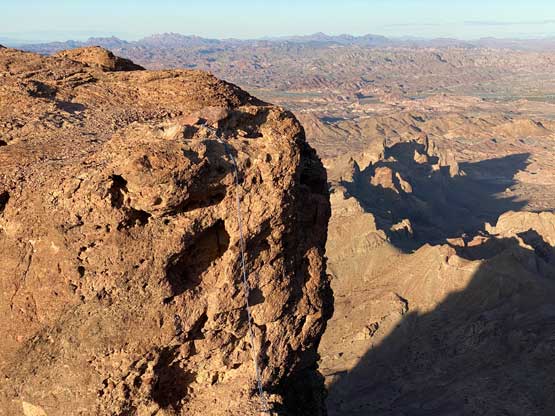
The route-finding wasn’t challenging on the series of ledges but as soon as I didn’t pay attention I could come to a dead-end. Then looked back and found the painted arrow and the obvious path. There wasn’t notable exposure because the ledges were wide. The next obstacle was an aluminum ladder. This one was indeed secured to the mountain, but much longer, more exposed and the securement was loose. I knew everyone else had climbed this ladder without a problem so I just gingerly committed. Then I scrambled onto the broad north ridge which soon led to the second crux, a sketchy but short up-climb. The initial moves were easy but the climb forced me to move leftward and the hardest couple moves (low class 5) were with considerable exposure. Then I came to the infamous rappel. It took me a while to find the anchor, which was unfortunately only one rusted bolt. I figured this single bolt was the only option for everyone else as well, so it’s probably okay. The bolt was quite a ways from the edge, so I used my 240 cm sling to extend it a bit. My second 30m rope was enough to get me down to the bottom and after that I quickly went ahead to tag the summit.


By this point I was doing good on time, so I slowed down a little bit on the return as I knew I definitely would have finished the technical sections before dark. I have to admit that I do not practice ascending a rope frequently but I knew the theory. I had exactly two prussiks with me, one long and one short. Of course the ascent turned out fairly smoothly but I have two things to point one. The first was the release of these prussiks was extremely difficult at times since I had to fully weight on them, and secondly the overcome of the lip was definitely not as straightforward as I thought. For the last meter I simply just climbed the rock instead (felt mid 5th), but in an scenario where climbing the rock (or ice) was impossible this could turn into a much harder fair.
After re-ascending this rope I quickly took down the anchor and moved to the next one. There was an existing rappel station above that exposed up-climb so I just rappelled in. The descent of those ledges were supposed to be easy and straightforward, but because I did not pay much attention at all on the ascent I made quite a few route-finding errors that resulted in some minor backtracking. The first crux felt trivial on the return especially with the rope fixed for self-belay. I then took a short break since I still had about 1 hour of daylight and the position and the lighting was really cool. After staffing everything back into the pack the weight felt heavy again. I still had to carefully downclimb that loosely placed wooden ladder as well as a few more 3rd class steps to get back to easy terrain. While scrambling down the class 2 gully I made another goal to finish the entire hike-out before dark, so I sped up again. I eventually did beat sunset and my round trip time was 2 hours 15 minutes.