Mount Sir Douglas
July 18-19, 2015
3406m
Kananaskis – Smith Dorrien Valley, AB/BC
Those who have visited Burstall Pass area must have noticed a gigantic mass of snow, ice and rock towering somewhere half a dozen clicks to the south – that’s Mt. Sir Douglas, the second highest, and one of the only two 11,000ers in Kananaskis Country. This peak sticks out from almost every vantage point and is one of the most sought-after peaks in its vicinity, but from mountaineering perspective it does not get climbed often. After doing some research I found the explanation to be obvious – the standard W. Ridge route of Mt. Sir Douglas has the reputation to be one of the worse piles of choss in the 11,000ers family. The only good stories I’ve heard are from technically oriented climbers ascending the more aesthetic NW Face. As of mid-July in a dry year this route has melted out revealing nothing but hard, black ice leaving the W. Ridge as the only option for non-ice climbers like myself.
But even the easiest W. Ridge would involve low-angled ice climbing on the accessing glacier, just shorter and easier than the NW Face. Given this year’s exceptionally dry conditions nearly all of the snow/ice routes were reported to be “ugly” by the professionals and on top of that we had a dump of fresh snow 2 days prior to the ascent, as well as weather forecast calling for 40% chance of showers with risks of thunderstorms in the afternoon. That was quite a gamble but we’d been very lucky with 11,000ers in recent years and we just hoped for one more time. False logic but that’s our hope. We did have other alternatives including Mt. Saskatchewan and Eon Mountain but comparing to Mt. Sir Douglas those peaks just could not raise enough interest/motivation between Vern, Ben and myself.
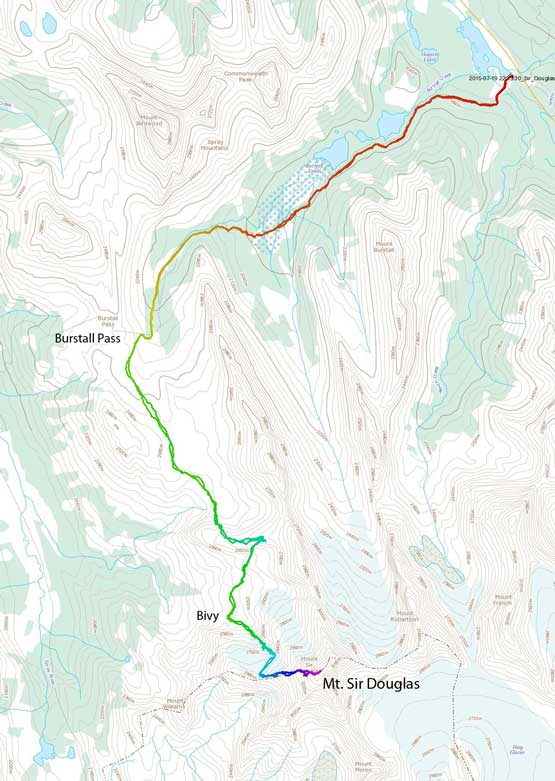
Approach and ascent route for Mt. Sir Douglas via W. Ridge. GPX DL
After a tedious drive out of Calgary due to horrible traffics we eventually made to Burstall Pass trail-head by 3 pm on Saturday afternoon. It looked like there’s quite a bit of fresh snow on all the high peaks but given Saturday’s sunny and hot weather we had high hope that our route would be back in shape soon. So off we went. Right at the start we bumped into Anton Baser and his wife. We had changed a lot of emails earlier in this year when planning the Twins but this was my first time meeting him in person. With Vern and Ben setting up a fast pace we made to the swampy section in short time. This was my first time hiking Burstall Pass trail in summer and I was surprised how boggy that part was. Thankfully we had multiple logs helping crossing the streams so didn’t need to take our boots off. After the swamp this trail started ascending (relatively steeply) towards the base of Snow Peak and then trending left towards Burstall Pass at just above treeline. We left the trail at treeline aiming towards the distant South Burstall Pass.

A view of Commonwealth Peak from the trail
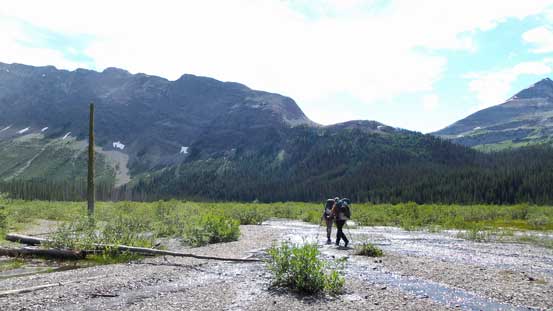
Ahead would be that swamp section
Looking up this valley was Robertson/Sir Douglas col – a popular ski destination

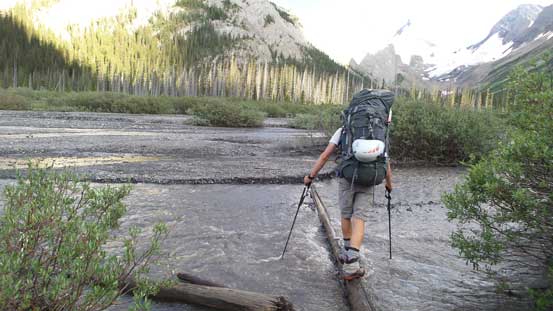
Me crossing one of the log bridges. Photo by Ben
Looking back from the rear end of this swampy section
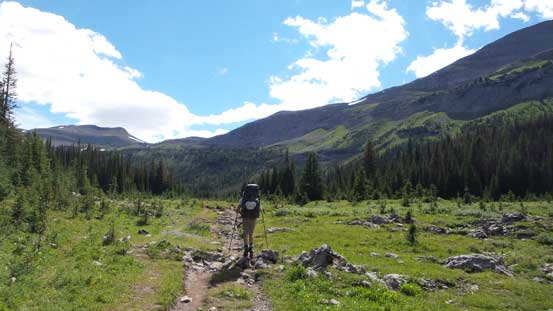
Heading towards Burstall Pass.
Vern on the trail. All these views were new to me

The very impressive Mt. Birdwood
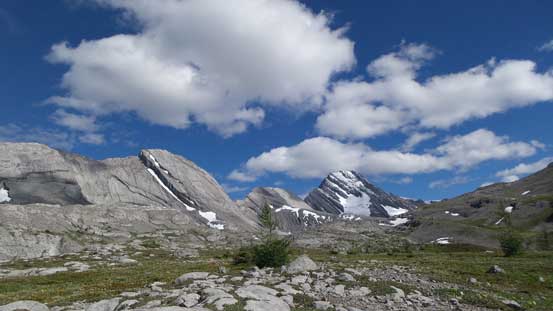
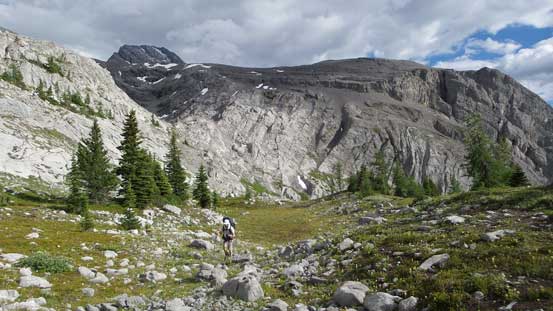
Here’s roughly where we left the trail. South Burstall Pass at center
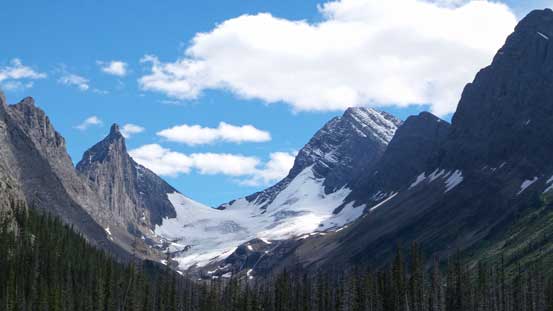
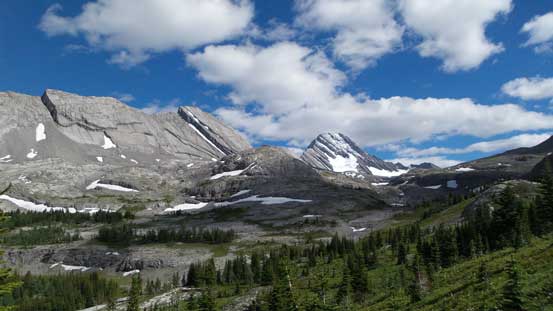
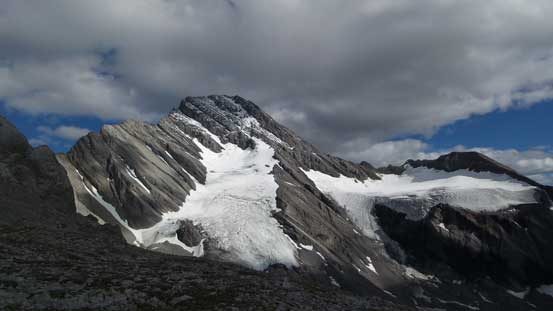
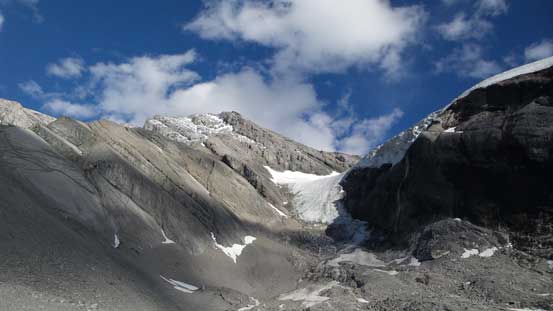
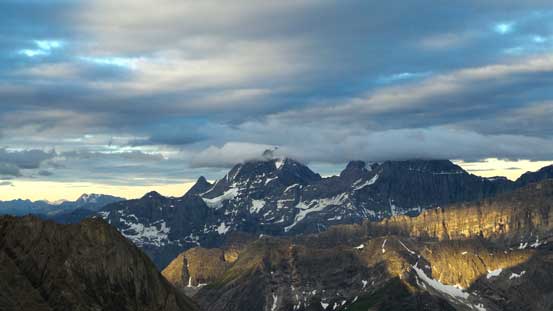
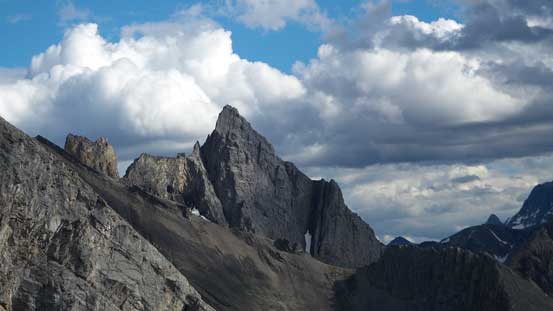
A zoomed-in view of our mighty objective – Mt. Sir Douglas
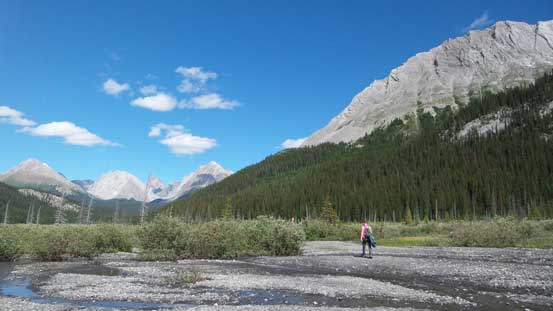
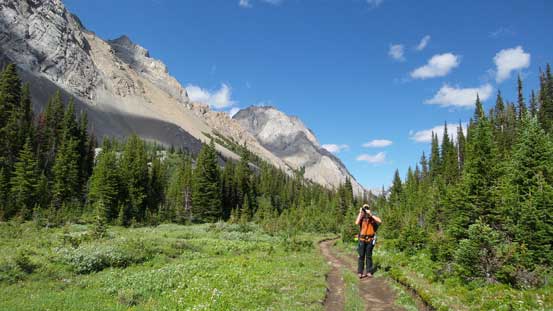
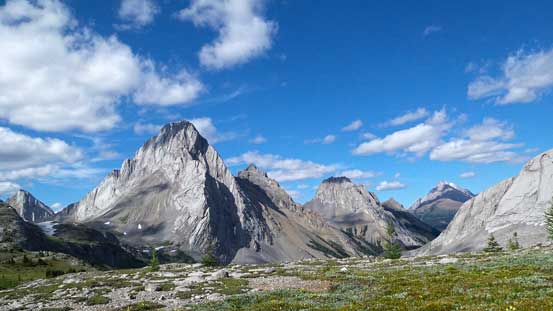
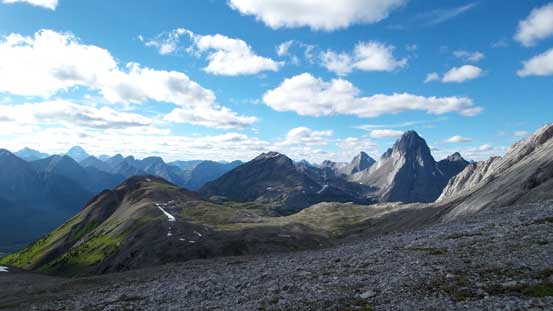
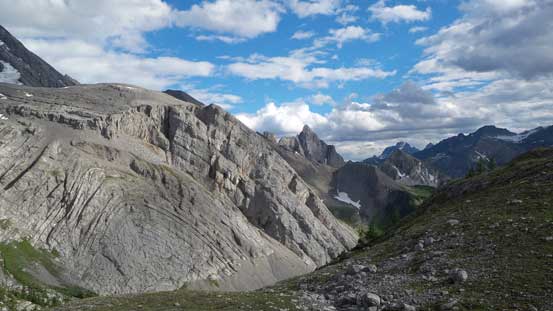
South Burstall Pass is really just a broad grassy plateau between the unofficially named “Whistling Rock Ridge” and “Burstall Pass Peak”. Up and over this pass we lost about 50 meters of height and this marked the end of the easy sections of this approach. We had done extensive research about Sir Douglas’ approach and it’s apparent we had two choices here. The route described in Bill Corbett’s The 11,000ers book keeps descending towards Palliser Pass and then contours around the lower ridge on side-hilling and bushy terrain, while climbers including Anton (whom we just met) and Dow Williams recommended ascending up and over the ridge ahead. We picked the latter of the two. The ascent up that ridge was tedious and very foreshortening and the mystery scree ramp on the other side did not come until the very far East end… By this point we were already higher than the Sir Douglas’ glacial tongue.
South Burstall Pass is a very scenic place
Looking back towards Mt. Birdwood
Looking ahead to the steep grind up Whistling Rock Ridge’s shoulder
Firstly we had to lose a bit of height from South Burstall Pass
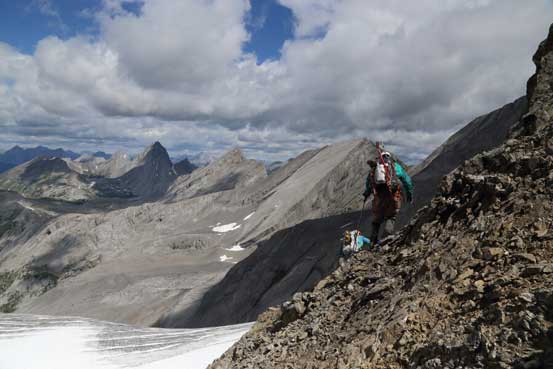
Eventually we gained the shoulder, looking ahead towards our objective
Looking back from the ridge/shoulder
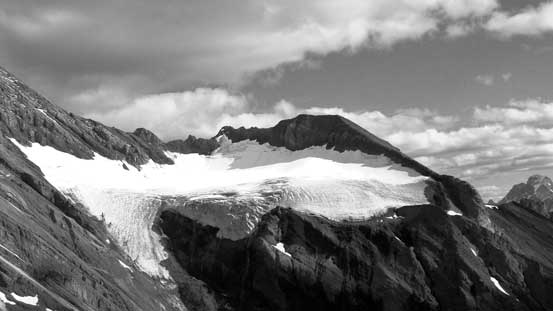
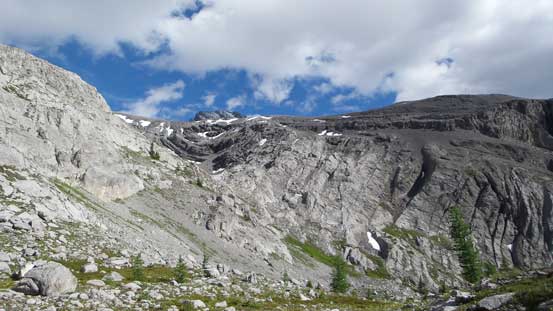
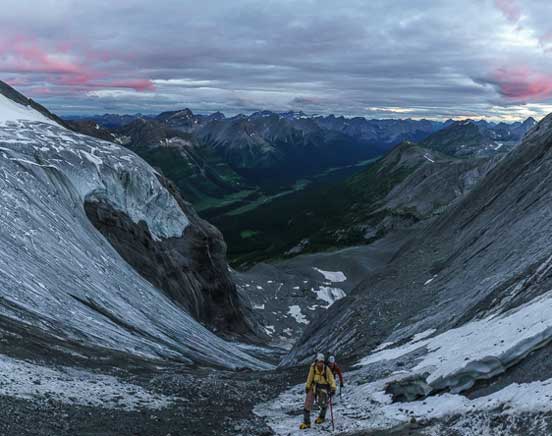
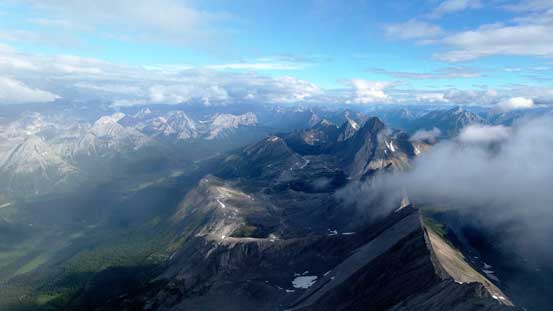
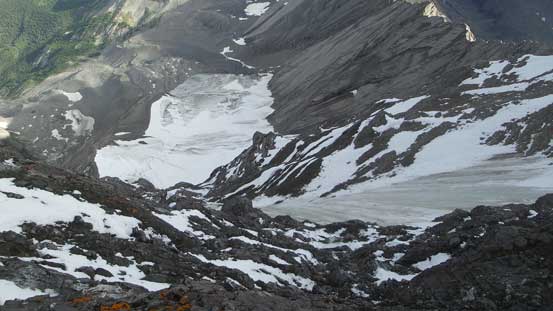
We got a bird-eye view of the glacier that we had to ascend the following day.
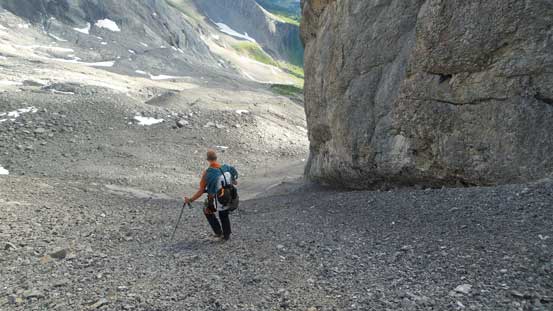
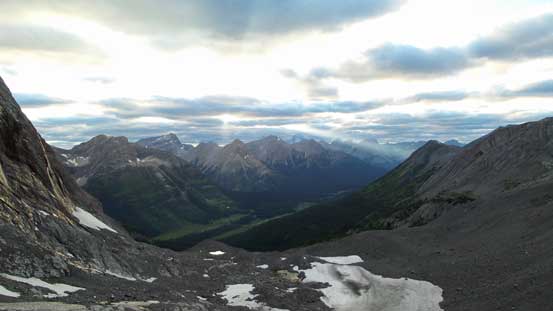
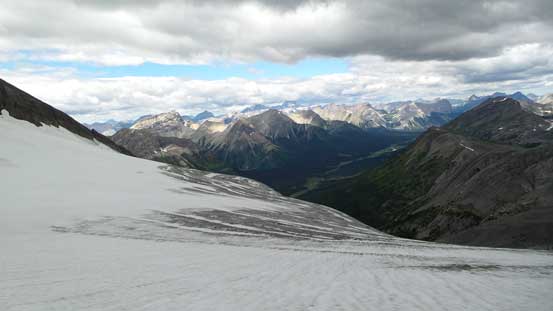
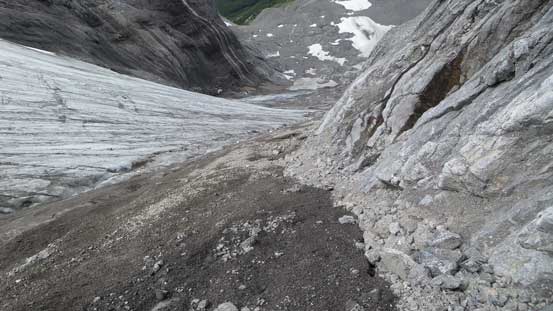
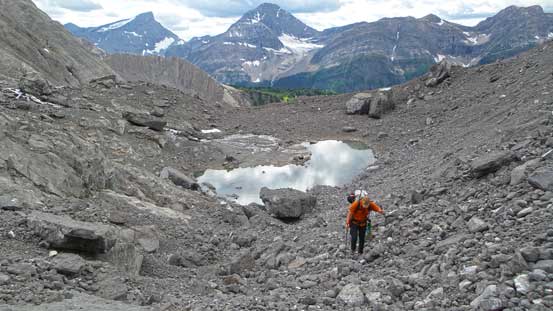
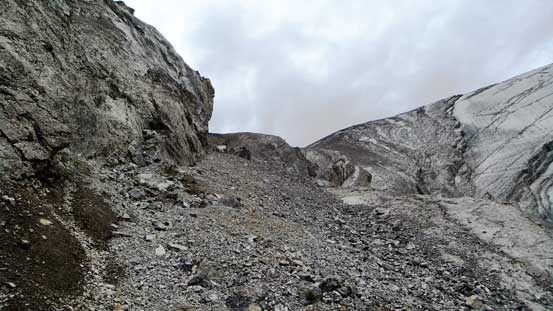
The scree ramp was very easy to descend thank to the looseness but we all knew a day later we’d all curse this part. The ground was very loose and the elevation drop was just massive – more than 300 vertical meters from the ridge top to the bivy site. Thankfully the bivy site was a very good one with running water, flat ground, great views and no bugs. It took us 4 hours to get here on a fast pace and while Vern and Ben decided to hang around camp I went up towards the glacial tongue to scout out the route. The glacier looked like pure ice and very steep to me so I wanted to check out what I’d be in for the next day. The grind up the moraine was loose and foreshortening so I eventually turned around at about halfway up, figuring there’s no point to slog this part twice if I didn’t have to…
Vern descending the scree ramp
Almost down to our bivy spot, looking ahead to the glacial tongue
I went up to check out the route, also got some nice views
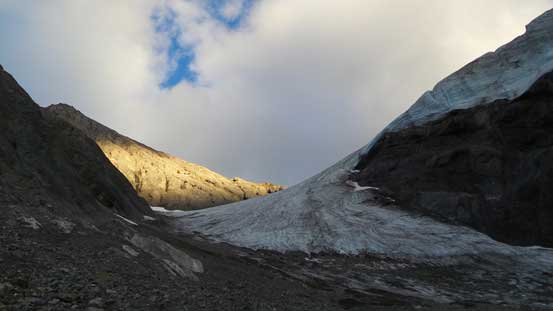
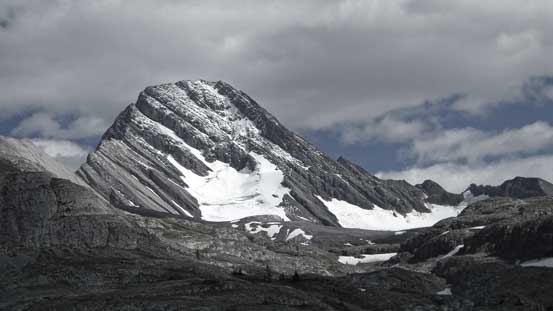
The last bit of sunlight shone on our objective
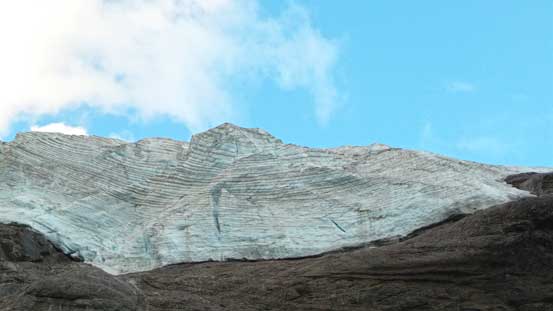
Cool looking seracs
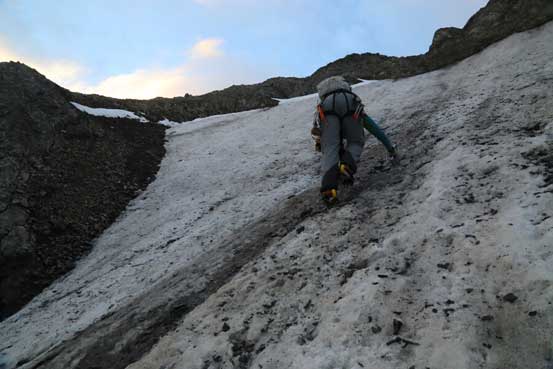
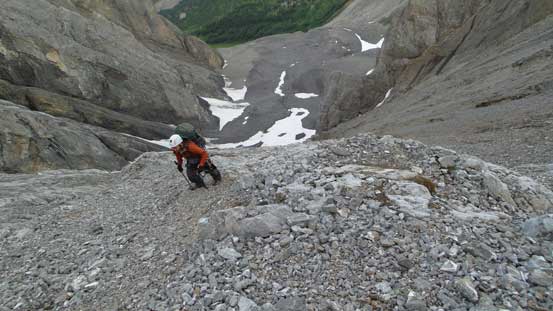
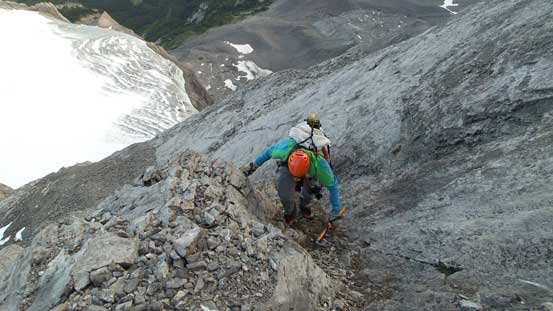
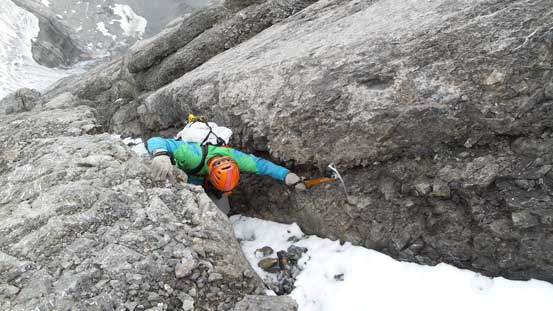
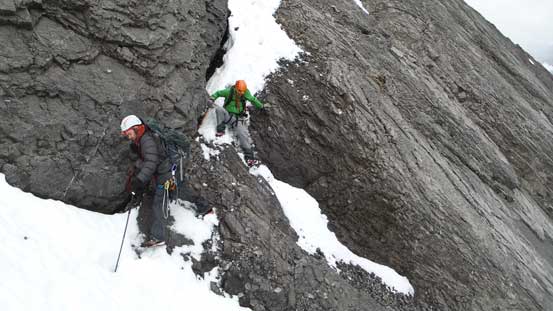
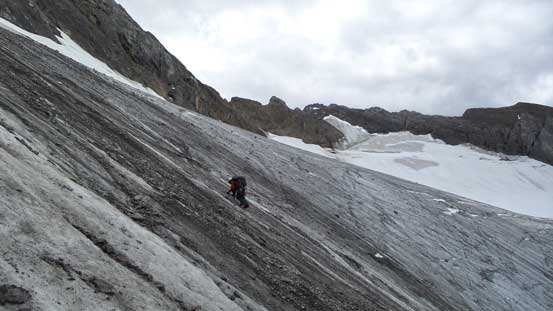
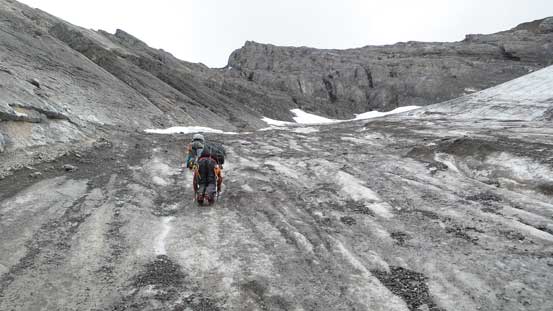
The weather did not look very good in the evening and by the time we went to bed it’d turned completely overcast with high peaks like Mt. Assiniboine soaking in the clouds. Thankfully there’s no rain otherwise we would have aborted the attempt. We woke up at 3 am and half of the sky had cleared up and in just less than 1 hour we were off towards the glacier. The slog was just as tedious as I remembered from the previous day and only much longer as we slowly worked our way up the climber’s left side. The higher we went the looser the scree was and eventually we hit the black ice (covered and embedded with debris). It appeared to be over my head as I did not have any experience dealing with this type of dirty ice, and once committed it’d be hard to back off. Ben was apparently not in his best physical conditions and mood neither and there’s rockfall coming down every minute or so. Thankfully Vern was more optimistic and volunteered to lead a couple steps up. By watching and following Vern I eventually gathered the courage and committed to the terrain, and thankfully it wasn’t nearly as difficult as I thought…
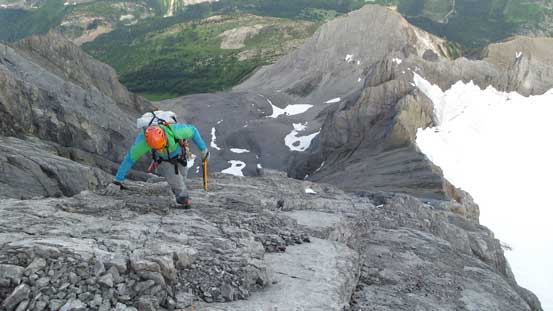
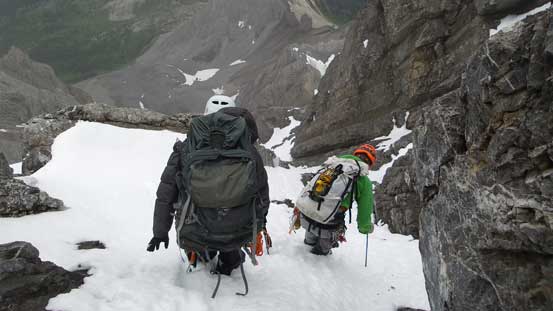
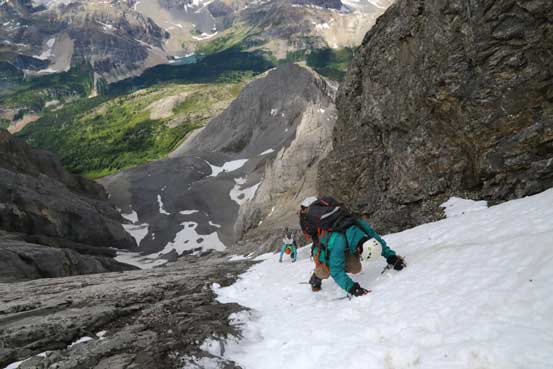
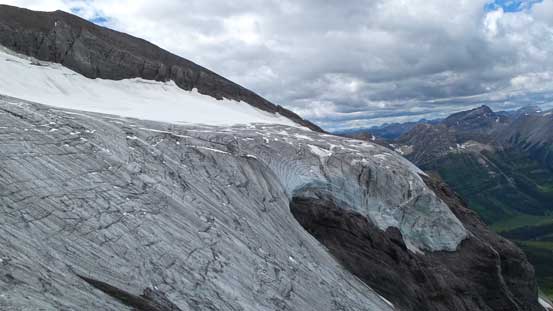
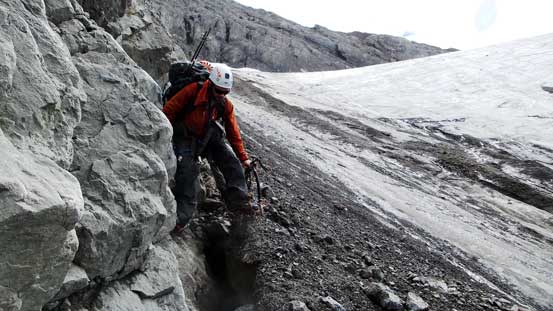
An hour or so later we all cleared the (dirty) ice section and got onto the glacial bench. One lesson I learnt was that Camp Corsa Nanotech (red) mountaineering axe is completely useless on hard glacial ice. I ended up climbing with pretty much just one tool (and that one wasn’t the proper ice tool neither). The morning colours were awesome but I was too focused on our efficiency so didn’t bother to take the camera out. Crossing the glacier was straightforward but the bergschrund was starting to open up. Thankfully there was a reasonable snow bridge and we all crossed it with no incidence. Shortly after that we had to ascend/cross another patch of dirty ice before transitioning onto the rock. The ascend to the col on Sir Douglas’ west ridge from the glacier was not technically difficult but very loose.
Me taking a break on a flatter section of the ice. Photo by Vern

Traversing on the glacier bench after ascending the nasty ice
Vern ascending another patch of ice before transitioning to rock. Photo by Ben
Me ascending the typical (loose) ground to gain the low col. Photo by Vern
Mt. Birdwood
Mt. King George

Vern cresting the col
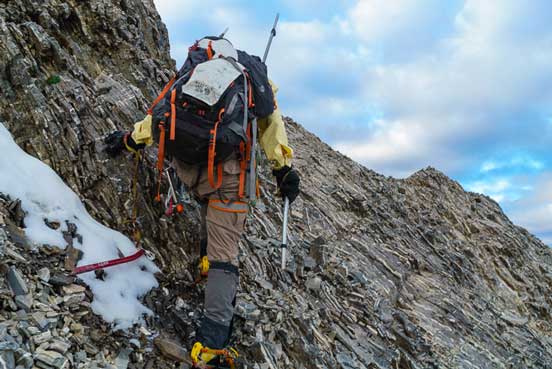
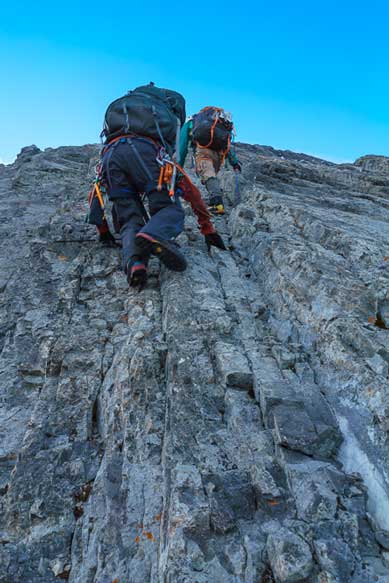
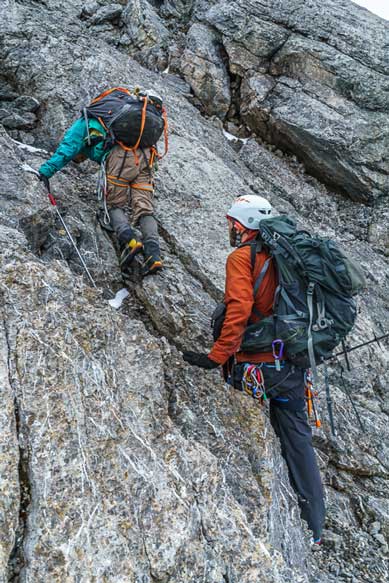
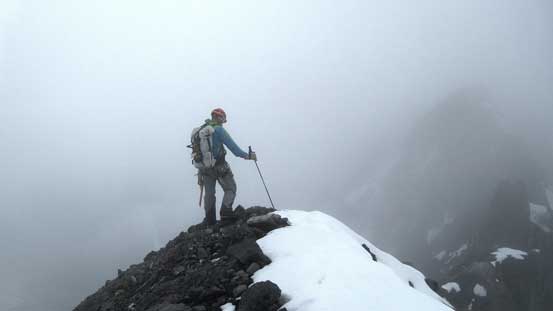
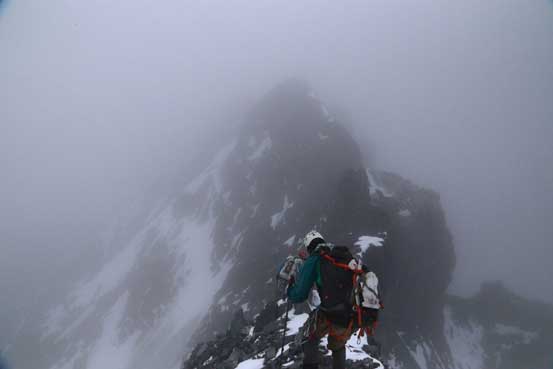
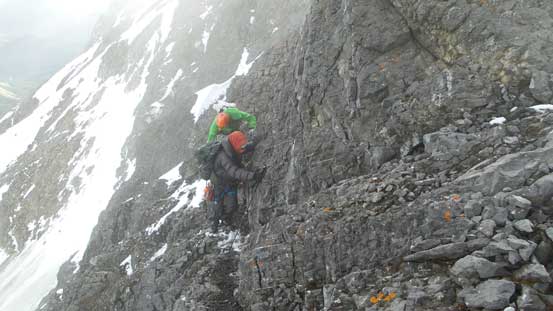
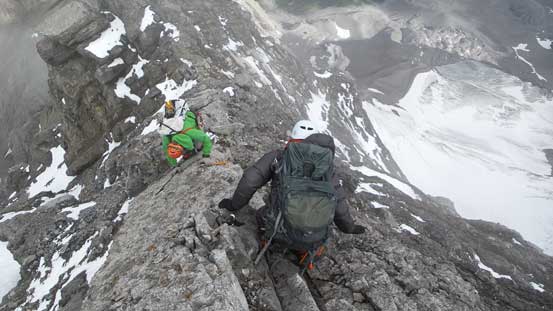
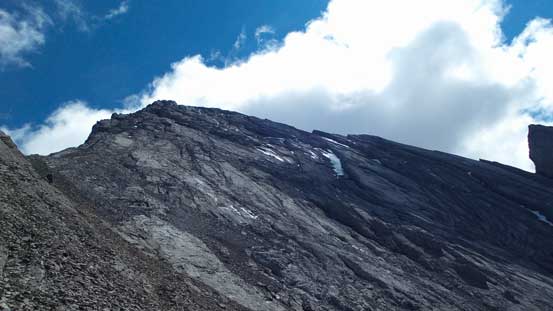
Given the technical and ugly terrain we just covered I was pretty impressed by our efficiency (we hadn’t bothered to use rope yet). Based on the weather forecast and the reputation of Sir Douglas’ west ridge I knew we had to pretty much keep free soloing the rest of the route. Thankfully the ridge turned out to be a lot better than expected so basically once hitting the col the hardest stuffs were already behind us. I’m not saying the west ridge was “easy” though, but just easier than what others made it sound. We ditched some of the ice gears at the col and immediately ahead we traversed on a scree path on climber’s right side of the ridge proper before bashing up very loose scree back to the ridge. Ahead were those “broken slabs covered by millions of ball bearing pebbles”… But once the scrambling started we realized the places you grab were generally solid. By sticking relatively close to the ridge we managed to stay on Class 3 or 4 terrain for a long while until making a route-finding mistake about 2/3 of the way up.
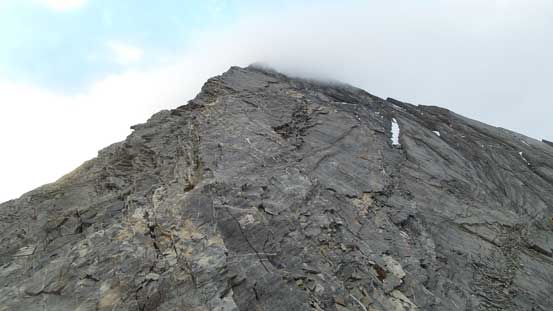
Looking ahead to the W. Ridge terrain
Vern picking a line up the steep scree to regain the ridge
Ben slogging up scree

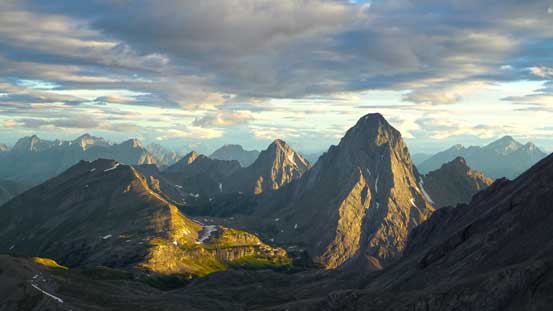
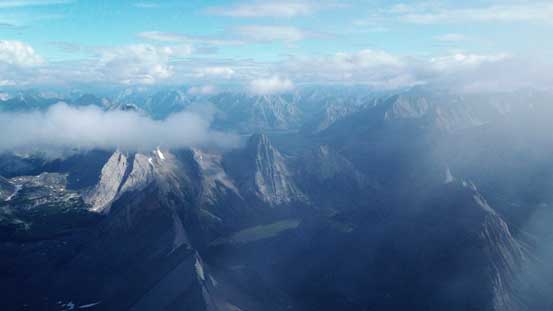
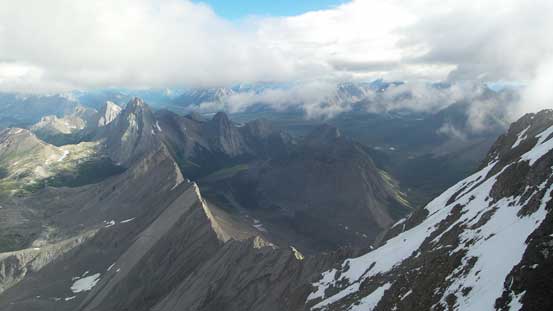
Great morning view of Royal Group

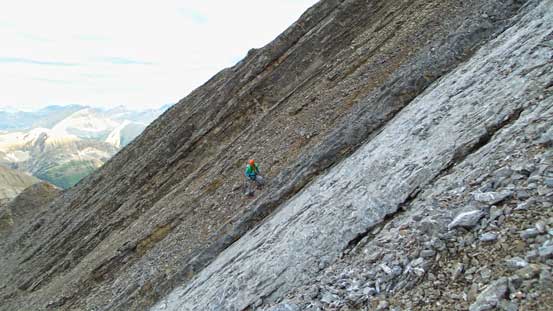
This sideway picture gives a better idea of the slope angle
Vern ascending the typical terrain on this route
A lot of slabs like this
More slabs. Photo by Vern
Higher up on the route, looking down
There’s also a lot of gullies like this to ascend.
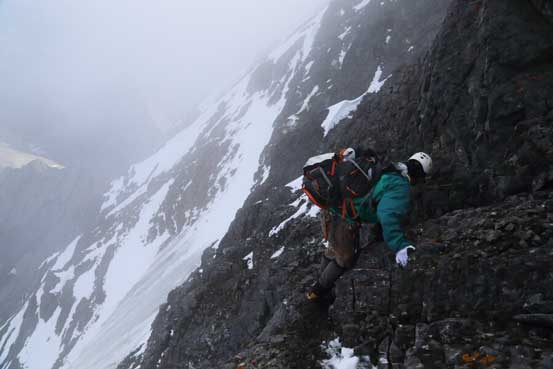
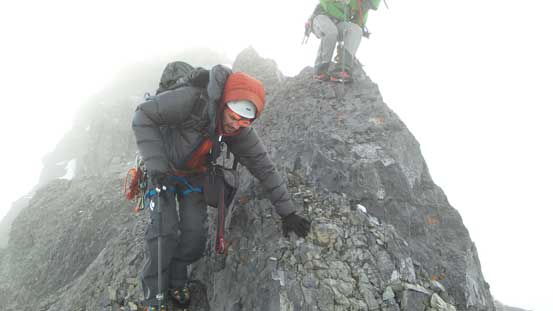
There’s a place where directly attacking the ridge proper had become a little bit more “interesting”. We should have traversed a bit to climber’s right but somehow managed to convince ourselves to ascend a gully on climber’s left. This route choice dumped us onto the NW face pretty much. We did spot a reasonable point to get back onto the W. Ridge proper so kept ascending and traversing, and eventually punished ourselves by a few 5th class, exposed and loose moves. Once back onto the ridge we followed it for a while and at the next harder position we ventured climber’s right onto the SW Face – this time we had to deal with some slabs covered by scree and snow, but nothing too terrifying. Shortly after that we arrived at the false summit.

Me and Vern coming up a loose step on the NW face side.. Photo by Ben
Me and Ben ascending one of the trickier steps on the NW Face side. Photo by Vern
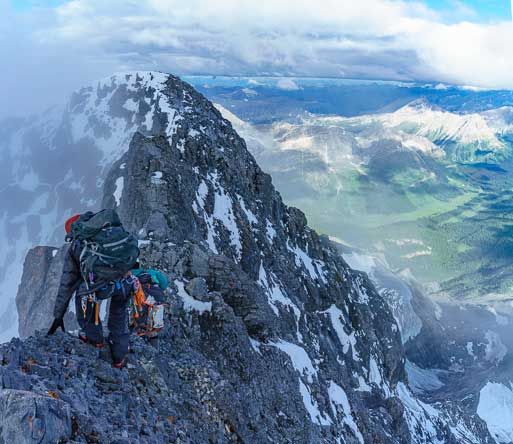
After regaining the ridge, this is me tackling the terrain ahead. Photo by Vern
Ben ascending the last few meters to the false summit
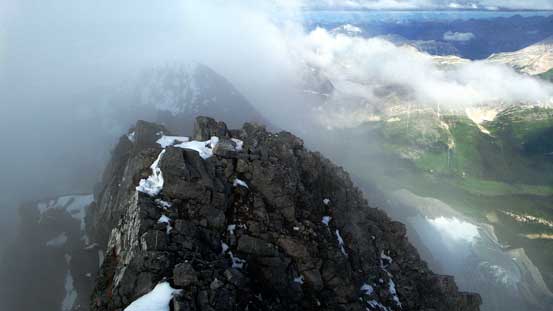
Vern on the false summit, checking out the route in a white-out
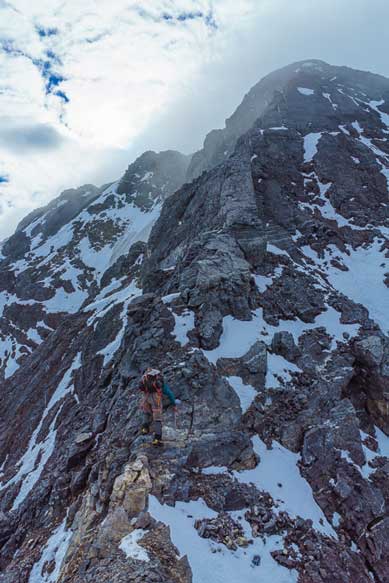
The traverse to the true summit looked intimidating but thank to the white-out conditions we couldn’t see much of the exposure. Getting down from the false summit was pretty tough but the trickiest section was negotiating around a pinnacle/gendarme. We went around it on left (north) side and that involved a few very committing moves – loose, wet and very exposed. Shortly after this bit of excitement we arrived at the summit. The clouds lifted up briefly to allow us snapping a couple pictures, but with the concern of the weather we immediately started the descent.
Vern and me starting the summit ridge traverse. Photo by Ben
Me traversing around that crux pinnacle. Photo by Ben

Ben coming down from the false summit
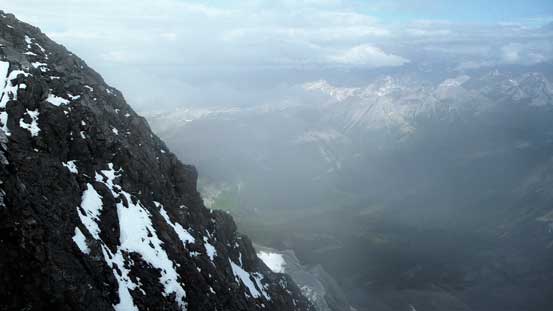
The clouds were coming in and out so we got some OK views…
The valley on left is the upper Spray River Valley. Mt. Birdwood looks tiny right of center.

Vern ascending the last few meters to the true summit
Almost on the summit, looking back
Another view looking way down towards some familiar peaks
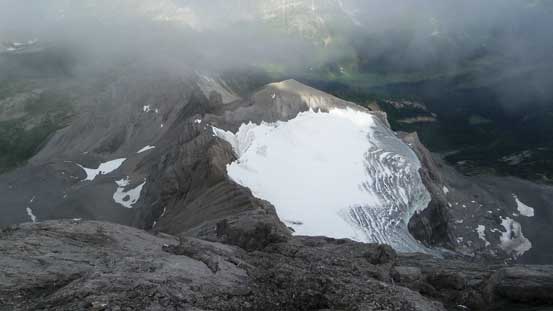
A bird-eye view of the glacier we ascended in the morning

Me on the summit of Mt. Sir Douglas, my 35th 11,000er!
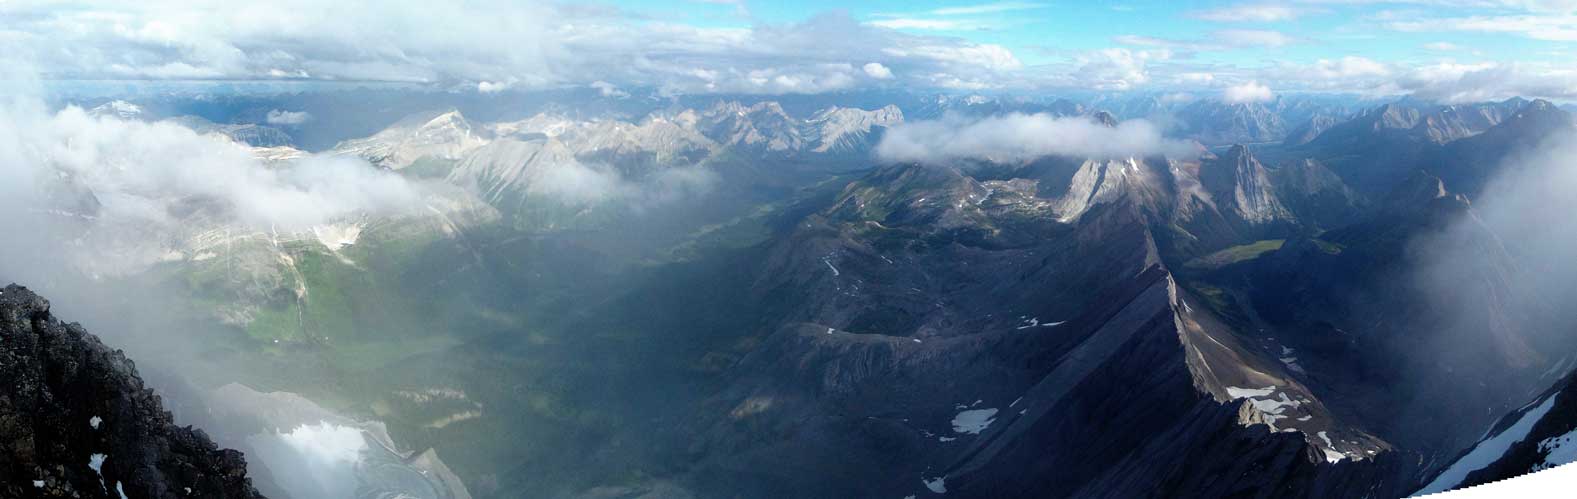
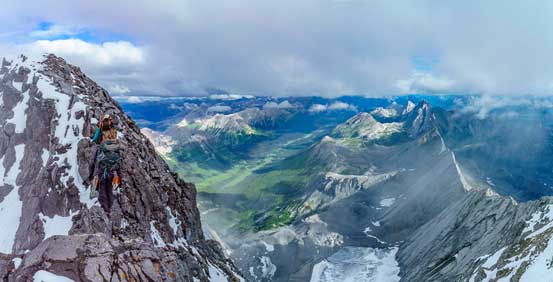
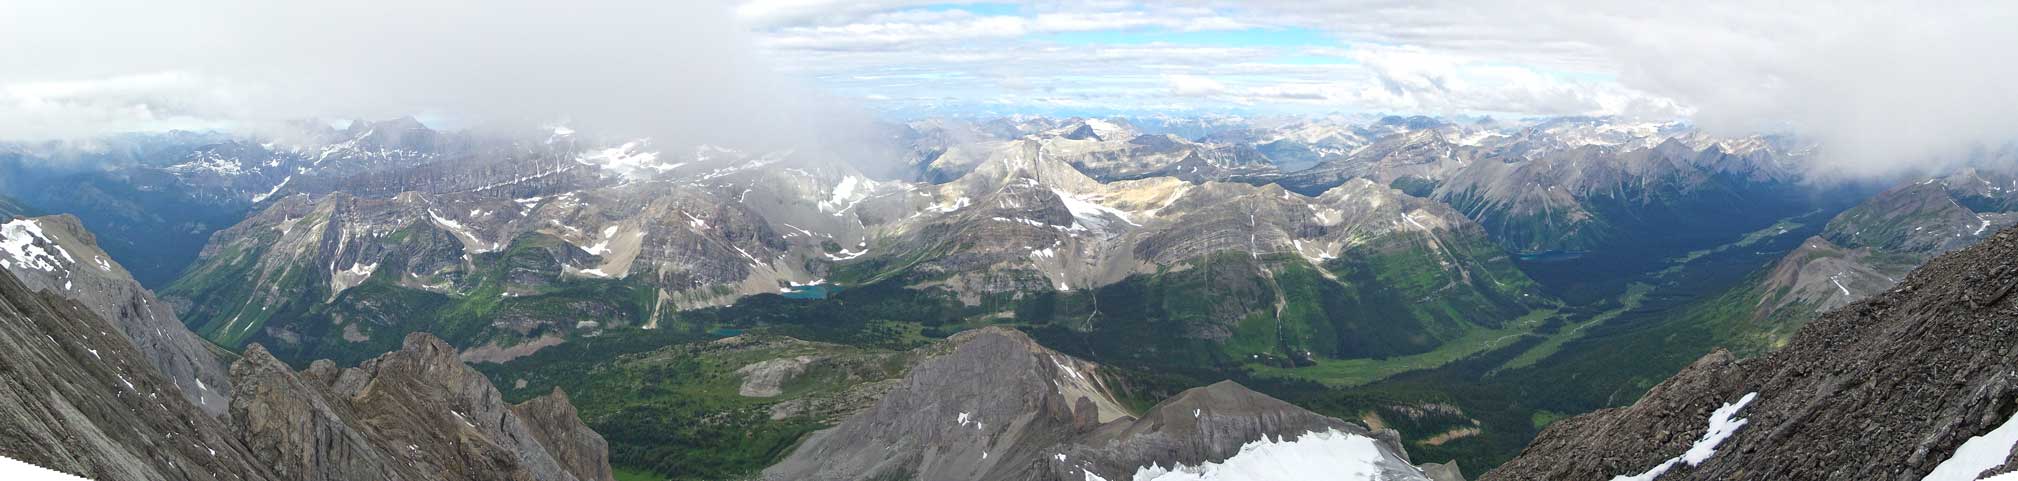
A panorama view from the summit. Click to view large size.
We all made back to the false summit quickly as the crux moves around that pinnacle felt significantly easier on the return. There’s no way we’d down-climb that NW Face section so at that point we picked the line down the SW side. There’s a snow gully assisting our descent and we went up for fair a long ways until the snow ran out, and then we had a problem… We simply went down too far on the SW side and it looked like we couldn’t traverse back onto the W. Ridge easily. Instead of taking a chance descending an unknown line we retraced some of our steps and tried our best to cut back towards the ridge on some interesting ground. Thankfully we eventually did manage to regain the W. Ridge but shortly after that I took a slip, fell and dislocated my shoulder… At high up on Mt. Sir Douglas this was surely not the greatest place to get injured. But.. I popped it back in, took a short rest and continued the descend…
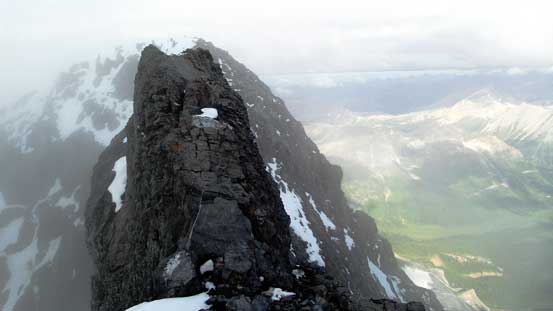
This is that gendarme we traversed around
Starting the descent
Careful foot placements are absolute on this exposed ridge. Photo by Vern
Traversing around the gendarme
Looking down the steep NW Face route
Another picture taking advantage of the brief moment when the clouds lifted up
Re-gaining back to the false summit. Photo by Vern
Descending the upper west ridge. Lots of care was required
Snow proved to be a faster way down
Vern down-climbing snow
Panorama view from the W. Ridge. Click to view large size.
Transitioning from snow back onto the rock
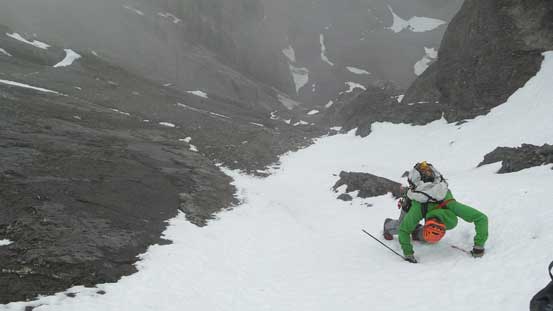
The good thing was most of the hard rock sections were already behind. Some careful descent on slabs covered by scree we came to another decision-making point. We spotted a long snow gully just to skier’s left of the ridge proper but that wasn’t the way we went up. The ridge would have worked but would be tedious so we figured it’s worth to take another gamble here and go down the snow. We had to strap crampons on this time and face inwards, but still it’s a fast process and brought us a long way down the mountain. I was the fastest one on this type of terrain and once the snow ran out I breathed a huge relief seeing an easy ledge traverse back onto the W. Ridge proper. From here back to the low col was nothing but easy, albeit loose ground.
Me down-climbing another (longer) snow gully. Photo by Ben

Vern down-climbing steep snow

Another panorama from the ridge. Click to view large size.
Looking back at the upper ridge

Finally got some sunshine on our faces. Time to put some sunscreen on…

Ben descending to the low col
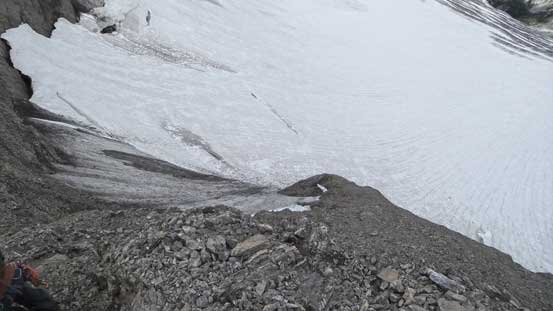
From the low col we had a couple options. The most obvious one was to do a full 60-meter rappel from a 2-pin station. It’d be the easiest option but also the most time-consuming and would involve the most amount of rock fall issue. Given our confidence on loose ground we decided against it (I think we all wanted to practice more for the Goodsirs)… Descending from the col back onto the ice/glacier was probably only 3rd class terrain, but extremely loose and ugly. It’s that type of frozen hard ground mixed with slabs and covered by pebbles, but we all made it down relatively quickly. Crampons on and ice tools out we crossed the ice patch, then the bergschrund and onto the glacier.
Looking down the steep section below the col. We went down the rock and then ice and finally snow
It’s not a difficult descent, but extremely loose… Photo by Ben

Ben down-climbing ice while Vern transitioning back on snow.
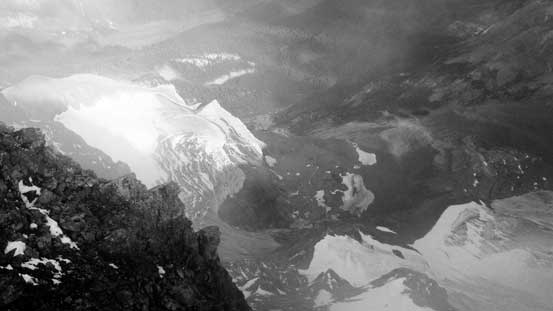
A view from this glacier.
The (thin) snow on this glacier had become soft and so did the ice underneath. We originally wanted to rappel the glacial tongue given the state of my arm, but once it’s the time to make a decision we decided against it again. None of us had ever built a v-thread before and we didn’t want to practice that on a real situation given the soft ice.. Plus if we couldn’t do it efficiently we’d expose ourselves to much more rock fall hazard. So it’s the time to downclimb again. I was quite nervous about it but once committing to it the problem was solved section by section, step by step. Not far down I got the rhythm figured out and within an hour, problem solved and we were back onto the scree. After some loose, but fast descent we were back to camp. Now? Time to pack up and head home…
Ben down-climbing the typical black ice
Oh the glacier…

Looking down from a rest spot. More down-climbing to come.
Typical, typical…

More down-climbing
The moat provided some variety than the ice
The ice section was almost over
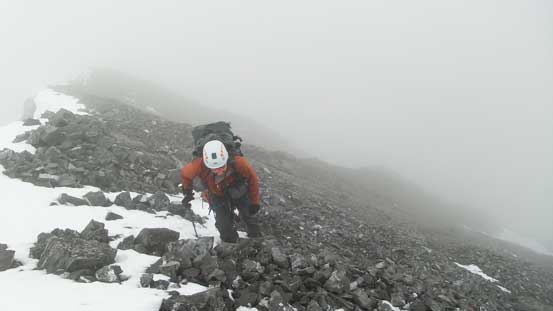
I did not want to look upwards to the huge slog ahead – 300+ meters of slog on loose rubble and scree back to the high shoulder. We all cursed how much gears we brought especially given the fact we did not end up using any of the rope, harness, rock pros or ice screws… Now we had to haul all of them back and our bodies were not the happiest. The climb (and descent) was a mentally exhausting game and we all felt very tired. Thankfully I didn’t forget to bring my iPod along and musics surely helped to kill the time. The descend from the high shoulder down to the low point below South Burstall Pass was all on hard ground (so hard on our knees), and once down we had another 50-100 vertical meters to slog upwards towards the pass…
Slogging back upwards after breaking camp
Oh this scree ramp. Tedious like hell….

At least we got great view of our objective
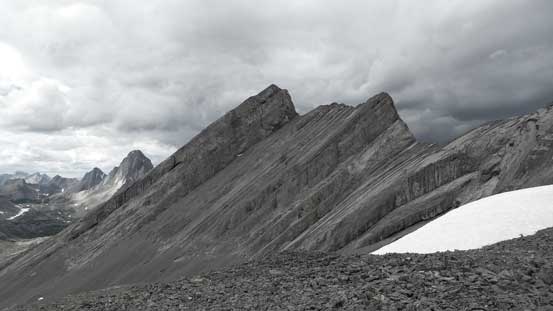
Whistling Rock Ridge. I haven’t seen a trip report yet except for Rick Collier’s winter ascent
Down to the low point below South Burstall Pass now
Looking back
Mt. Williams looks very pointy.
And now? Time for the trail slog. Wearing mountaineering boots that was far from the prettiest and felt like a death march… The last section after the swamp just kept on dragging forever and would be much better with a bike (but we didn’t think about that when planning this trip)… Eventually we made back to the parking lot and I think we spent roughly 17 hours on this day. It took us 4.5 hours up, 6.5 hours down and 5 hours or so to hike out.

Hiking back across South Burstall Pass

Another view of Whistling Rock Ridge

Mt. Birdwood pokes behind
Crossing the swampy section
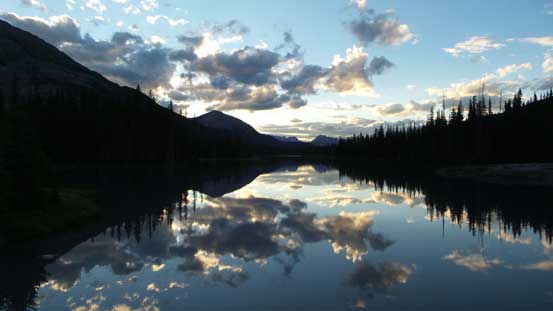
Dusk at “Mud Lake” near the Burstall Pass trail-head. Long day…
And now? Time to drive all the way back home. Vern did a great job getting us back to Calgary but Ben and I still had another 3 hours to go.. In the end this was an awesome trip successfully bagging one of the looser 11,000ers and at the same time, gaining a lot more confidence on low angled ice as this was my first time ice climbing. The ice was obviously hard (due to the lack of experience) but the rock was a lot easier than we thought and we managed to free solo climb both the ascend and the descent entirely. I also don’t know how I managed to finish the down-climb and the hike out with one semi-functional arm. I guess I must be tough as I didn’t even panic after being injured. Have to take it easily in the next short while and hopefully I can recover quickly and back in the game soon.
