Mount Woolley
September 6, 2014
3405m
Icefield Parkway (North), AB
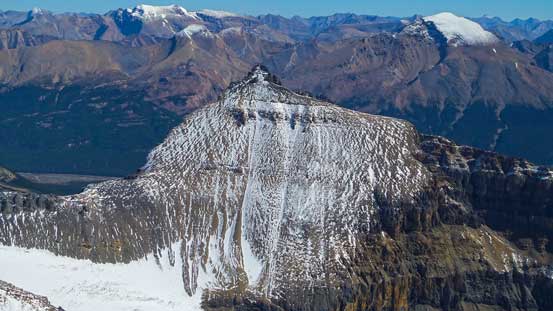
Mount Woolley and its lower neighbour, Diadem Peak, are two of the 11,000ers immediately north of the famous Columbia Icefield. They share the same approach and most of the climb. Though considerably easier and smaller than some of the grand objectives nearby like Mount Alberta, they themselves are beautiful snow climbs, and for the most important, they are located in such a beautiful area with some of the finest Rockies view on a clear day. For scramblers and mountaineers at all levels, bagging a peak or two in this area should be on everyone’s wish list. Obviously I’d been wishing to climb them for more than a year already.

Ascent routes for Little Alberta, Mt. Woolley, Diadem Peak and Mushroom Peak. GPX DL
All factors lined up nicely and Vern, Ben and I settled our objectives on Woolley/Diadem, potentially our last 11,000er trip in this year. As usual, we’d plan 3 days and bag a few other peaks nearby. On the first day (Friday), we slogged a long way up and over Woolley Shoulder, down to Lloyd McKay Hut, further down and around Little Alberta and bagged it via the southwest slopes. That was a long slog considering the climb we had to do the day after. Oh well, we had the night to recover… At 5 am Saturday morning we woke up under starry sky, had a quick breakfast and started shortly after 6 am. Most parties would choose to start way earlier than this but after observing how crevassed the lower glacier was we wanted to be able to clearly see the terrain (not with head-lamps on)…
The climber’s right side of this lower glacier looked ugly and was covered with lots of debris so we opted to ascend straight up the toe. On the approach we aimed more-or-less straight towards the toe, jumping across multiple streams. Near the base we put crampons on. The initial part on this glacier was ice and quite steep (good practice of French technique). We stayed relatively in a compression zone well to the left of the obvious crevasses but away from the serac fall zone. Higher up we started to encounter crevasses and entered a maze of holes… The glacier was snow covered but only by the recent storm snow (about a few inches). Beneath the surface snow our crampons could bite firmly on the ice. The key was to probe every step forward and make sure to step on solid ice. I was shocked by how bad this glacier was as I never remember reading trip reports saying Woolley/Diadem being “heavily crevassed”. Well, I guess the glaciers do get a good beat-up by this summer’s dryness… At one point the terrain ahead looked almost impassible but looking carefully I led a line turning sharply climber’s left, crossing a monster sized crevasse and taking a sharp right turn to the base of the 1st couloir.

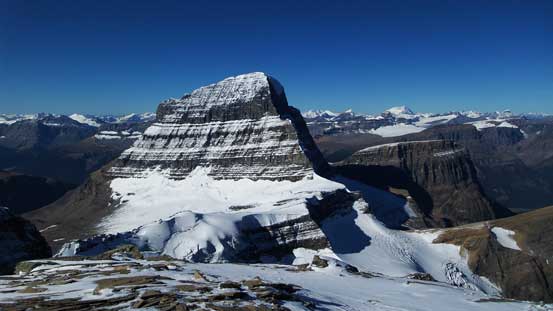
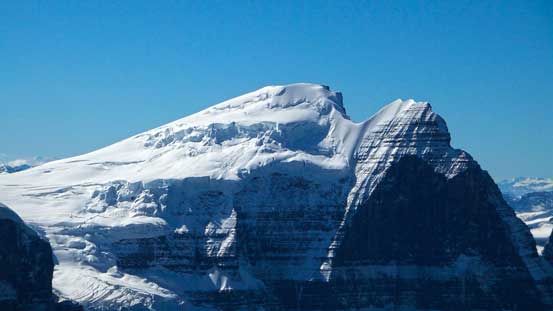
Mt. Woolley and Diadem seen from the previous day.
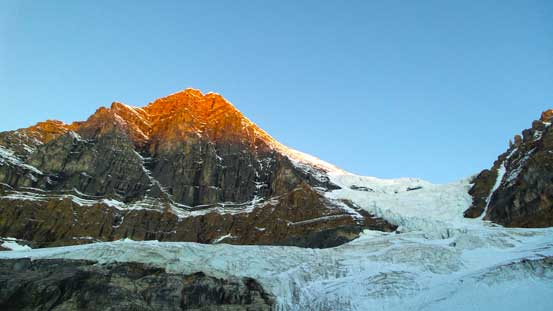
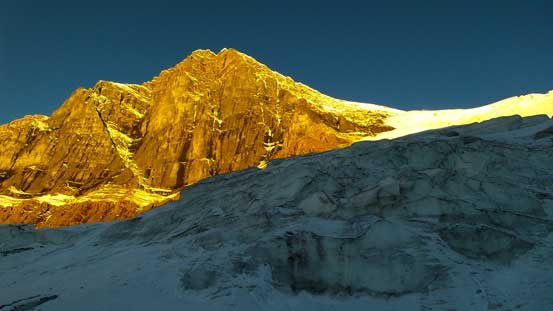
Mt. Woolley at alpenglow.

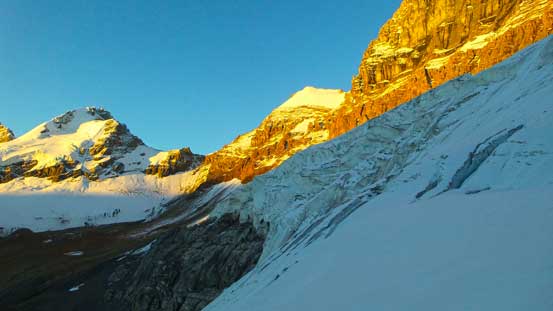
Gaining the glacier.

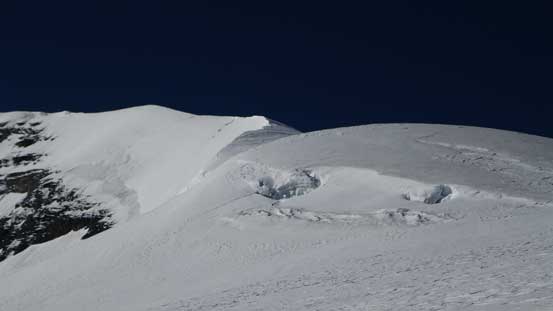
Looking ahead to the massive icefall towards the col

Alpenglow on Cromwell and Engelhard
Mt. Woolley and the glacier in morning glow
More gorgeous view from this morning
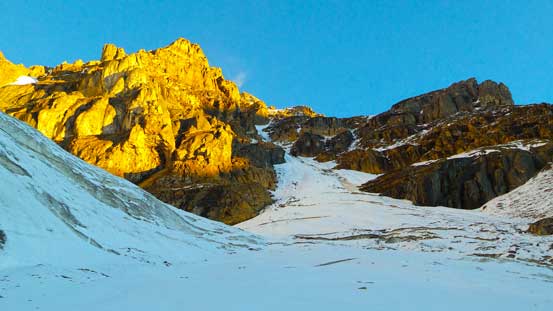
Ascending towards the 1st couloir. You can see ahead being a maze of crevasses

Another view of Stutfield, Cromwell and Engelhard

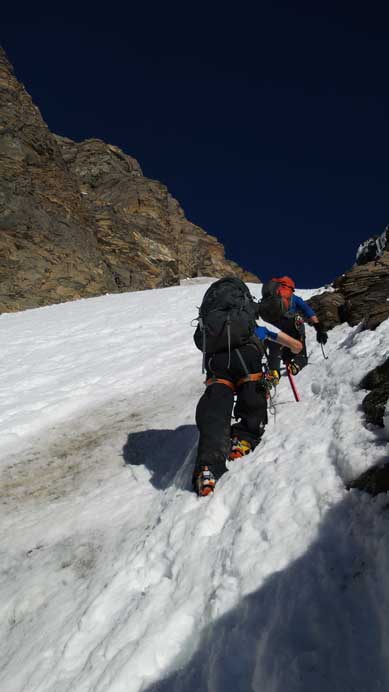
Ben crossing a crevasse. Very typical terrain leading towards the first crux..

And, this is typical at the first crux. Photo by Ben

Ben negotiating the crevasse field. Crevasses that can suck in your house!
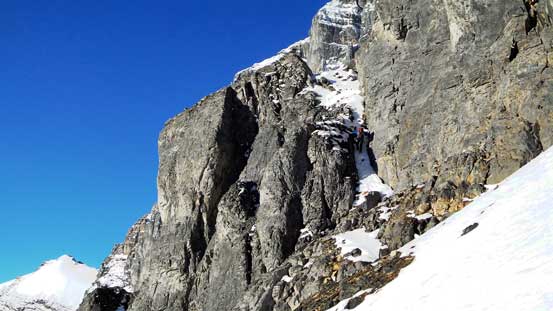
There’re two route choices for the next stage. Over the past people had gone straight up the 2nd couloir which was the more direct line to Woolley/Diadem col, but exposed to active seracs for quite a while and icy in late season condition. After the discovery of a key chimney on the south side of Diadem not many people would stick to the original route. The route we would take ascends the obvious couloir (1st couloir) on Diadem Peak first, exits it just before it starts to steepen, ascend a key chimney followed by a series of ledges diagonally up climber’s left and intersect the 2nd couloir way up high. There’s a big moat/bergschrund to cross to access the 1st couloir and a few open crevasses higher up in this couloir… Again, I had never read a trip report indicating this problem. The couloir was not as steep as appeared and we didn’t even bother to use ice axe. It was a little bit confusing as where to exit – the key is to look for an obvious rock outcrop on the left side. We exited the couloir just below this rock outcrop and it worked perfectly. We then traversed horizontally on scree and snow before ascending the chimney – pretty straightforward even with fresh snow. Above the chimney there’s a cairn indicating we were on route.

Vern and Ben crossing the huge bergschrund/moat using a snow bridge

The same bergschrund. We had to traverse on thin snow covered hard dirt/ice just above it (don’t slip)!
Now, ascending the first couloir

Me and Vern heading up. Photo by Ben
Vern scrambling up the critical chimney on the traversing section.
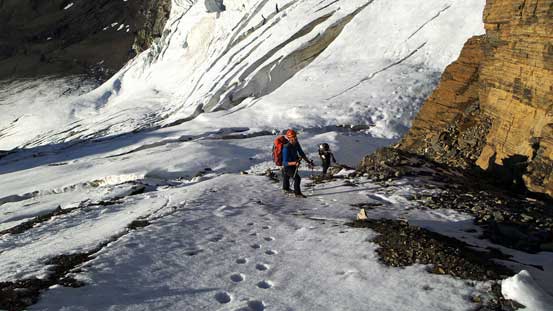
The next stage would be ascending a series of down-sloping and loose ledges diagonally up climber’s left. Due to the fresh snow we kept crampons on. It was not as bad as we thought overall. There was one section of wet and down-sloping rocks but other than that we managed to stay on scree most of the time. Eventually we had enough of these craps so traversed over to the 2nd couloir. We were afraid to have gone up too high and the couloir looked pretty easy anyway. Near the entrance we took out the ice tool and proceeded upwards. It’s 40-45 degree climb and the new snow certainly assisted us. Instead of front-pointing on ice/hard snow we could just kick step and thus saved a lot of energy on the calves.

Impressive ice chunks on Woolley/Diadem

A huge ice cave… Probably not the greatest place to go explore..
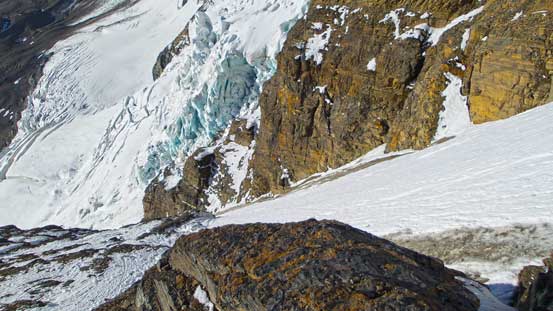
Now we’re about to ascend the 2nd couloir, this is looking down.
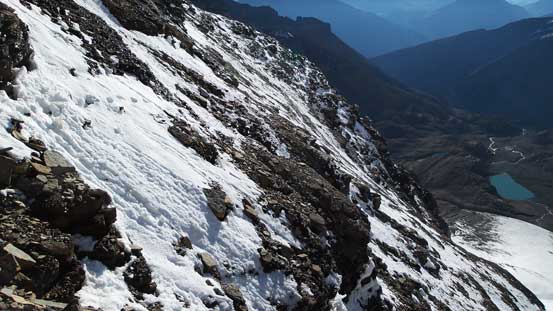
Looking back at the down-sloping snow covered terrain we just traversed/ascended.
Vern and Ben kicking step up the couloir. At places it’s actually post-holing…

Vern exiting the 2nd couloir

The East face of Mt. Woolley dominates the view here
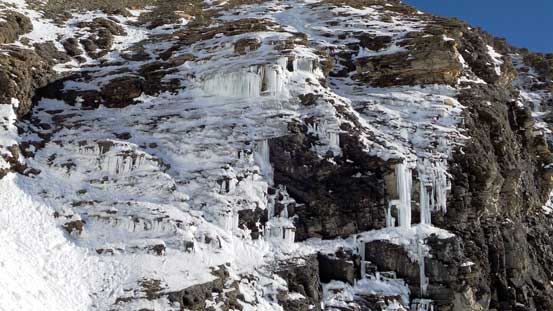
Icicles that’ll melt out soon during the day.
Exiting the 2nd couloir we saw another maze of crevasses on the upper glacier (with some freakin’ huge ones right on the edge). But looking carefully we found it’s possible to stick climber’s right on scree. Though tedious at time this seemed to be the only right choice on this particular day. Side-hilling on scree with crampons on sucked at a big time and I removed them soon. Thankfully we were able to stick to scree pretty much the entire way up to Woolley/Diadem col. Near the col I put crampons on again and ready for the next part. The rest of the ascent was simply following Woolley’s north ridge up, but not as easy as it sounded. There were again, a ton of crevasses on the slopes and some were poorly bridged by the new snow. For the most part we could feel the crampons’ bite on ice but there were a few crevasses we had to cross on the old snow bridges. We also aimed a bit to the right side due to an obvious crevasse on the ridge proper and this route choice actually led us to a fantastic viewpoint of Mt. Alberta.

Above the 2nd couloir, only to find another field of crevasses…
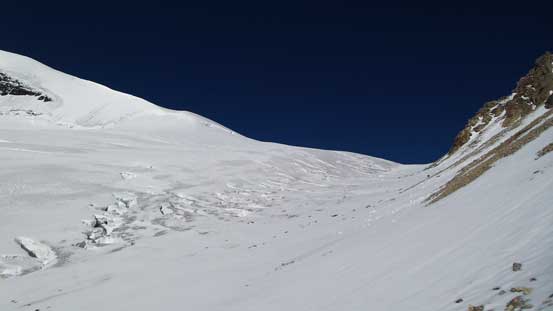
Ahead there’d be more endless mazes. But we could stay on climber’s right on scree.

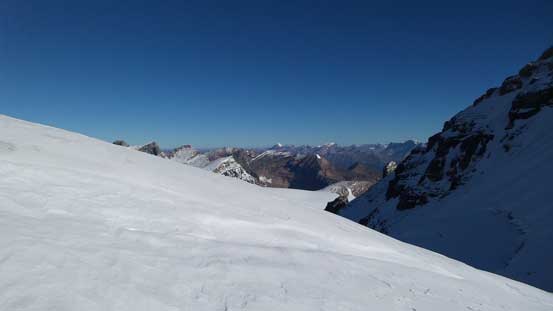
Already stellar views looking back. You can see Ben traversing on scree
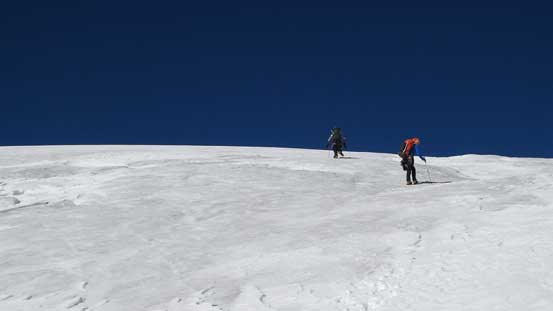
We took a short-cut line up Woolley’s north slope rather than going all the way to the col
Looking over Woolley/Diadem col towards the north side
Woolley’s north ridge. Looks corniced and there’re hidden crevasses on this ridge!
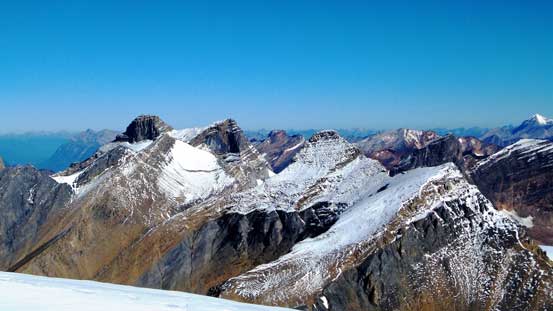
Peaks in Sir Winston Churchill Range – Mt. GEC et al.

Vern ascending the north glacier, with Diadem Peak behind – our next objective
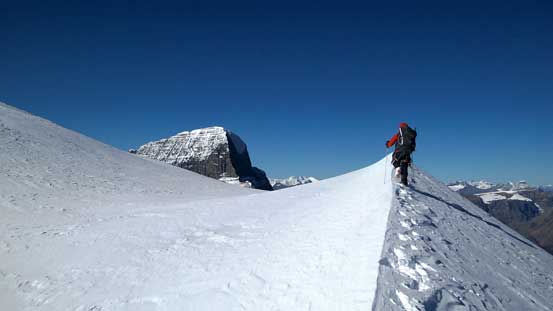
Ben leading up a mini snow arete. Alberta slowly showing up!

Vern following up this snow arete. We left the ridge proper here to avoid a few obvious cracks…
Now comes the million-dollar view of Mt. Alberta!!

Looking back, Diadem Peak starts to look small

North Twin and Twins Tower!

Mt. Unwin and Mt. Charlton – another twin summit I’d like to climb

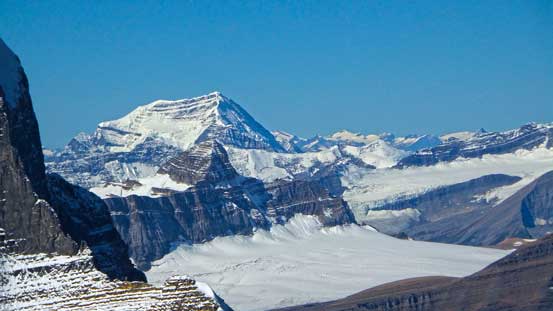
Mt. Brazeau was one of my favourite trips

The Twins rise behind impressive ice formation on Woolley’s southwest slope.
Back to the north ridge, it soon narrowed down. The left side appeared to be giant cornices so we stayed on the right side, probing carefully making sure we could feel the rocks underneath. Towards the end of this undulating, narrow and corniced section we had no choice but ascending to the ridge crest. I had memories from Eric’s trip report that this part was not on a cornice. The next 5 m or so was balancing on a very exposed snow ridge with no room for error. The drop-off to left side was the entire east face. It was thrilling to look down that way. After this bit of excitement the rest of the way was an easy snow slog. The summit view was as expected, 5-star towards each direction with Alberta and the Twins stealing the show. In the distance we could also identify giants like Tsar, Clemenceau, Unwin/Charlton and Warren/Brazeau.

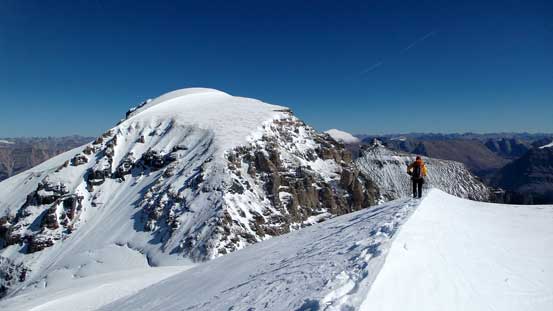
Looking ahead up the narrow section of Woolley’s north ridge
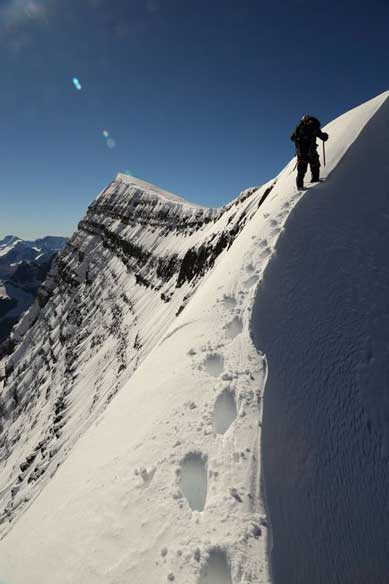
Me ascending the narrow snow arete. Photo by Ben
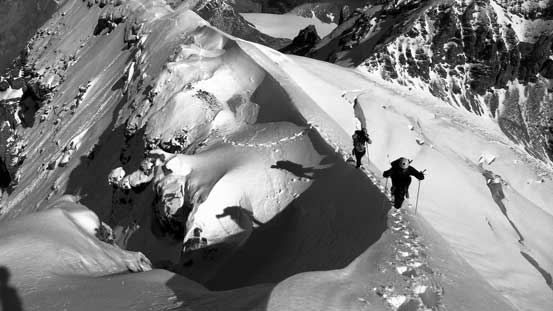
Ben and Vern following up.

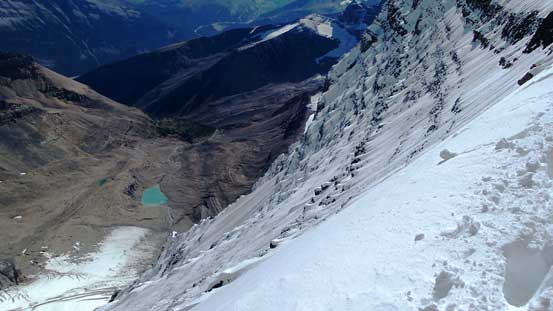
There’s a neat glacial fed lake – that’s also the exposure you have to deal with…

Vern on the arete!

Vern finishing the exposed bit
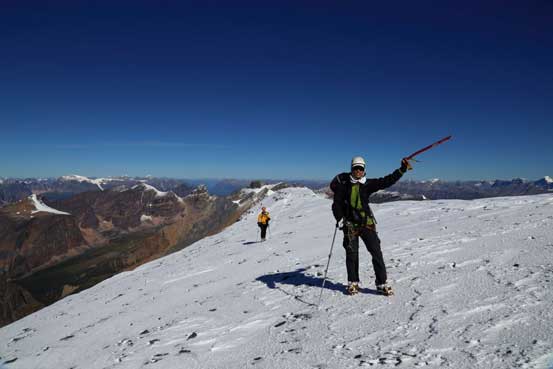
Me arriving at the summit. Photo by Ben

Summit Panorama. Click to view large size.
Mt. King Edward. Too bad we didn’t have the time/condition to plan it this summer.

A close-up view of the East face of Mt. Alberta

Mt. Mary Vaux showed up behind the summit cornice.

Part of the “Black Hole” – impressive walls including the North Face of Twins Tower
Mt. Clemenceau is huge!!

Mt. Hooker and Serenity Mountain on the Hooker Icefield – an area I’d like to explore

The Adament Group in the northern Selkirks

Tsar Mountain is another huge one in the Rockies.

Mt. Scott, another high peak on the Hooker Icefield

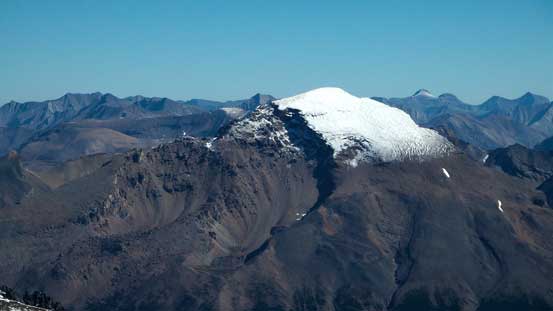
Catacombs Mountain which we ascended last year – another favourite of mine
Sunwapta Peak
Mushroom Peak will be our last objective in this trip

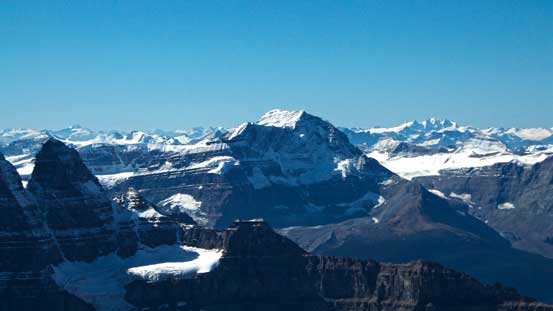
The Stutfields

Mt. Athabasca. We got probably the best alpenglow view from its ascent.
North Twin again.

Mt. Fryatt and Mt. Edith Cavell, with Mt. Robson poking behind on the left skyline

Peaks in Winston Churchill Range. Kerkeslin behind in the background.

Vern taking in the views.

Me on the summit of Mt. Woolley, my 16th 11,000er!

Another panorama from the summit. Click to view large size.
On the descent we retraced exactly our up-tracks except for near the end where we decided to take a more direct line to Woolley/Diadem col. There were lots of suspicious crevasses and we had to probe carefully making sure it’s solid ice underneath, and soon we were at the col. We took a short break and ditched a bunch of unnecessary gears.
The exposure down the East side was huge!

So, no mistake allowed on this section.

Vern descending the summit ridge

And, down the north slopes. Diadem Peak in the background would be our next objective
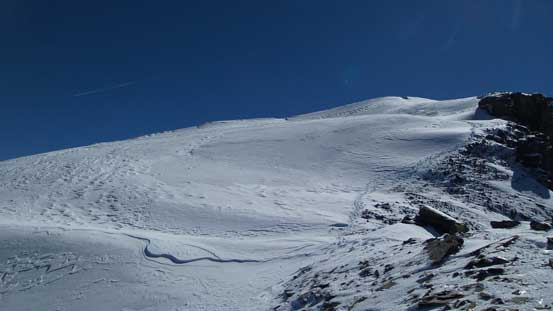
Looking back up Woolley’s north slopes
Diadem starts to look big again

Back to Woolley/Diadem col
Obviously we’d have to ascend Diadem Peak next…
