Mount Sir Donald
August 1, 2014
3284m
Rogers Pass, BC
The Matterhorn shaped Mt. Sir Donald is one of the most prominent mountains in the interior of British Columbia and it’s the landmark of Rogers Pass. Though not the highest in its vicinity (higher peaks include Mt. Dawson massive just to the south of Illecillewaet Neve), it towers above most of the adjacent peaks by considerable amount of height. It’s equally the Mt. Assiniboine in Rogers Pass area, only shaper and tougher to climb. The most popular route, also probably the easiest route up its summit is by the classic NW Ridge from Uto/Sir Donald col on blocky quartzite rock (III, 5.4). The position of this ridge and the climbing quality is so good that it’s listed as one of the fifty classics in North America – should be on every climber’s wish list.
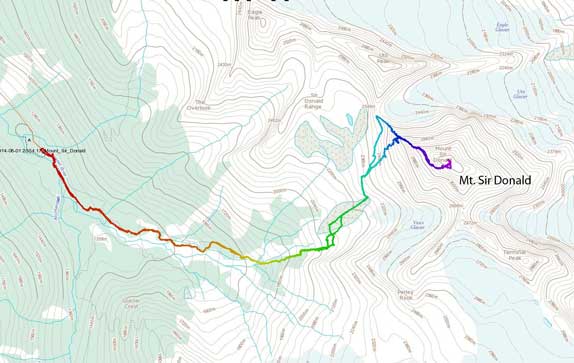
Mt. Sir Donald ascent route via NW Ridge. GPX DL
The climb is by no mean easy. It’s a sustained 4th class climb with fifth class steps throwing in here and there, combined with severe exposure accompanying for the entire ascent. Depends on the route choice in micro-terrain, I’ve seem climbers rating it at 5.6 but some others saying it’s no more than 5.2, but most people agree with the official 5.4 rating. Compared with other classic climbs in the Rockies like East Ridge of Mt. Edith Cavell or the North Ridge of Mt. Assiniboine, this one is much more sustained and offers harder technical crux moves. What makes it even more challenging is the descent. Parties not comfortable to down-climb short but very exposed 5th class steps will likely require more than 20 rappels and I’ve heard some very experienced mountaineers being forced to bivouac on the ridge. On the meantime the weather contributes to the challenge as if it rains, the lichen infested quartzite will get extremely slippery and parties who get caught in a thunderstorm will likely need an epic to get off this mountain.
Ben and I had been talking about this ascent for more than a few months already, and this past Friday seemed like the perfect day with zero chance of precipitation and warm temperature, so that’s it.. Our plan was to hike in to lower bivy site on Thursday evening and climb the mountain and hike out on Friday, but it didn’t turn out that way. The first mistake we made was not packing up by Wednesday evening, and the second mistake was not leaving Edmonton until almost 3 pm.. It’s an exhausting 7.5-hour drive to the trail-head at Rogers Pass (about halfway to Vancouver) and by the time we got there it was already dark. There’d be no prize without pushing hard so a wake-up call at 1:30 am was in the order and we decided to just day-trip it. Apparently I did not get even one minute of sleep but that was fine. It was hard going in the dark and we didn’t start the plod until 2:30 am. Not far in Ben realized he forgot his sunglasses so we wasted about 15 minutes right at the start.
The hike-in was on a well-defined trail with signs at all junctions. It’s steep but just as other Rogers Pass trails, we gained elevation very quickly. There’s little to describe in the dark and we just simply put one foot in front of the other. A large creek crossing marked the end of official trail, and finding a way to cross this raging creek in the dark was also kind of interesting. We managed to do so and on the opposite of this creek we filled up the water bottles (a whole 3 L for me) as there’d be no water source after this for the rest of this climb…
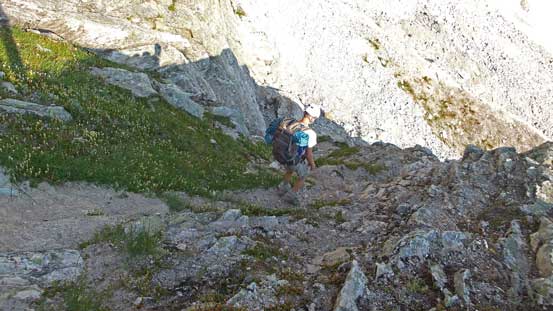
After a bit of side-hilling on poorly defined path we came to a moraine crest. The path led us straight up this moraine to its end before breaking through a rock band via a loose gully. After this bit the long side-hill bashing towards Uto/Sir Donald col started – it also got bright enough at this point so we didn’t need to use head-lamp anymore. The trail/path was poorly defined on this side-hill traverse but for the most part we were able to follow. Except for one snow slope (flat enough to walk across) the route was all dry, so it was a good call to leave ice axe and crampons in car. Near the end a wide ledge led us through the final cliff band and we were at Uto/Sir Donald col by sunrise time. There was only one group ahead of us on the ridge but more groups were coming up from the low bivy site though (thankfully everyone was soloing on this day so nobody was slowing down the whole gang).
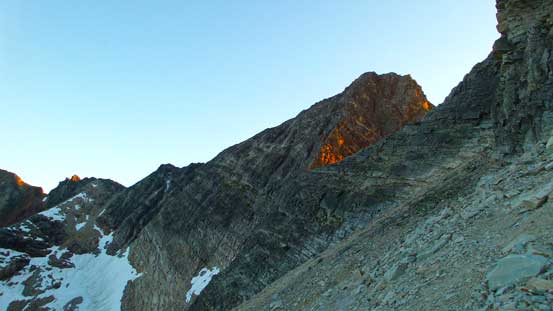
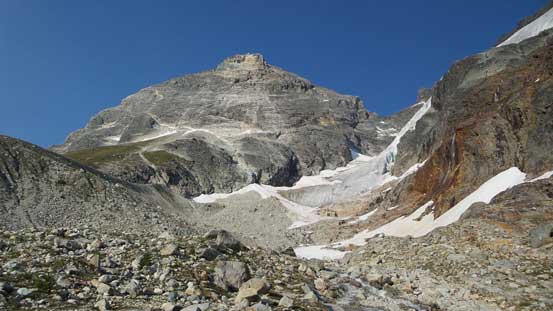
Uto Peak seen from the approach. A wide ledge would lead us to the col

Alpenglow on Eagle Peak
Alpenglow on the peaks north of Highway 1 – Cheops Mountain, etc.

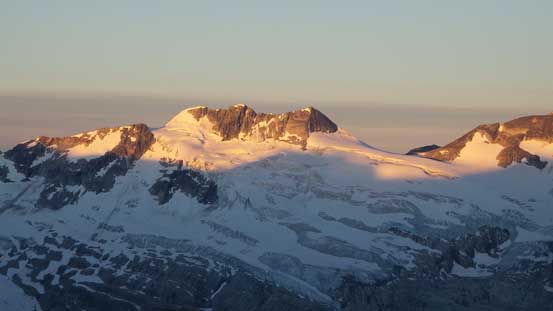
And, glow on the NE Face of Mt. Bonny. Mt. Swanzy is the bump on its left shoulder.
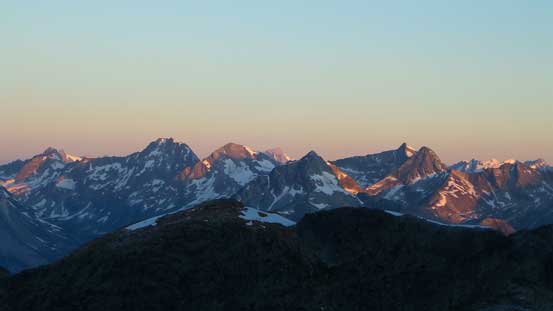
Mt. Jupitor massif – Leda, Pollux and Custer Peaks from L to R

Me at the col with NW Ridge ahead. Looks very exciting. Photo by Ben

Gorgeous sunrise from Uto/Sir Donald col
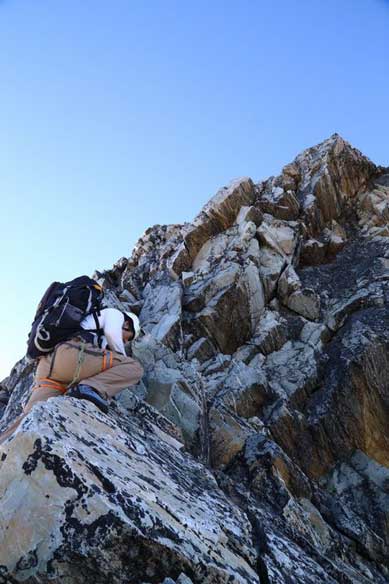
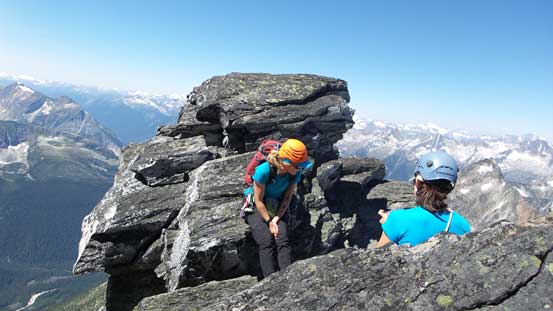
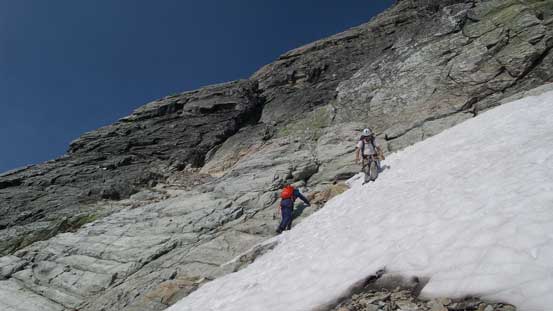
Looking ahead, the ridge looked intimidating but not as bad as what’s typically described by other sources. After a short break I switched to rock shoes while Ben continued on using his scrambling boots. Our plan was to free solo for as much as we could as speed is very, very important on this route. Though there were a lot of 5th class steps, “breaks” always existed between a few 5th class moves so I never felt the need to put in any protection. Yes it’s severely exposed but exposure wouldn’t affect my climbing performance… We had to do some route-finding on the lower 1/3 of the climb as we had to detour to climber’s left (onto the north face) often. I remember we had to pull up an overhanging step (felt definitely harder than 5.4) and a couple similar steps with bouldering type of challenges. I’m not sure if we’d picked the easiest line though. In any case, I felt the lower 1/3 of this climb was the most sustained actually. This section terminated at the top of West Face rappelling route (the start of official bolted rappel station #5, station number refers to the Climber’s Descent Guide to Mount Sir Donald by Parks Canada).

Ben starting the ridge.
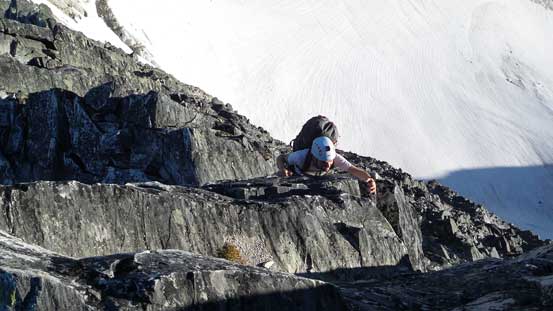
Ben climbing up a challenging step
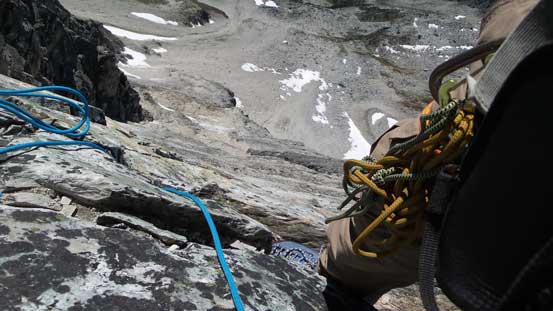
Looking down.

Me pulling up an overhanging boundary step. Photo by Ben
At places we had to traverse on the north side
Typical climbing on the lower 1/3

Exposed ridge climb.
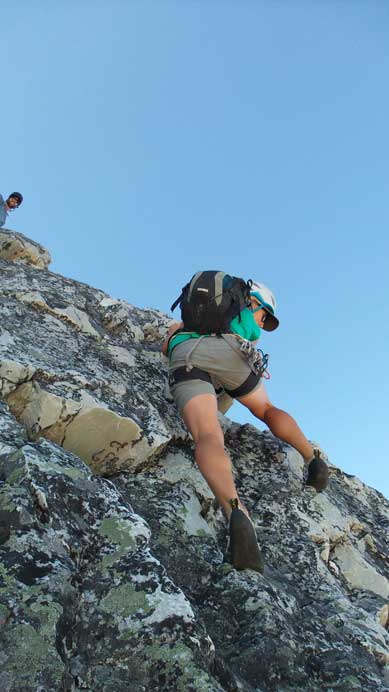
The next section, from rappel station #5 to station #4 was the technical crux (warn you that we used the summit bypass on the upper 1/3 so I can’t say it’s harder the direct route up the summit tower). After climbing up a very exposed ridge section with occasional detours on climber’s right (onto the west face) using some narrow ledges, we came to a near vertical wall. No matter what route we took, the climbing was sustained and committing and the holds were small. It’s at this point one of the groups behind caught us up and passed us. We took our time here and got up to station #4 with no incident. After this bit, the angle eased a little bit and terrain started to become mostly 4th class again. There were still 5th class steps though. I remember there were a few steps being quite committing but the challenging stuffs were generally less than 10 m high and separated by more 4th class scrambling in between. Soon we made to the “bench” – where the summit bypass route separates from the summit tower direct route. By this point we’d done the middle 1/3 of this route.
Me starting the crux section. Photo by Ben

Ben traversing some small ledges on the west side side.
One of the groups behind passed us on this section.

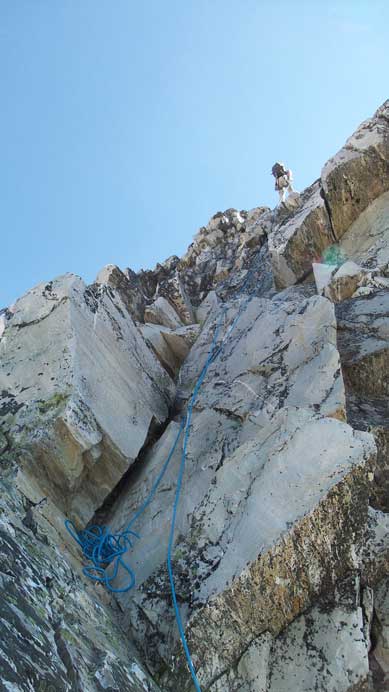
Ben tackling the crux pitch – sustained 5th class with crazy exposure.
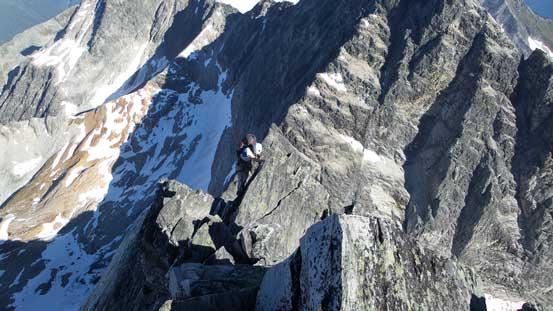
Typical positioning for the rest of middle 1/3
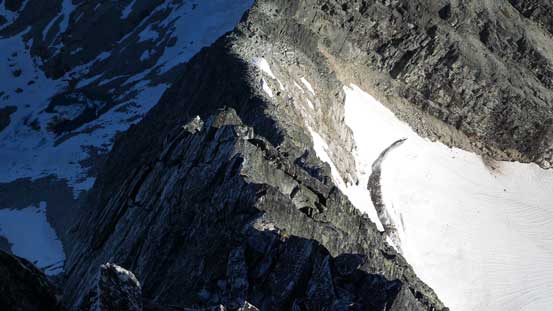
Already got higher than Uto Peak

Starting to see the immense Illicilleweat Neve
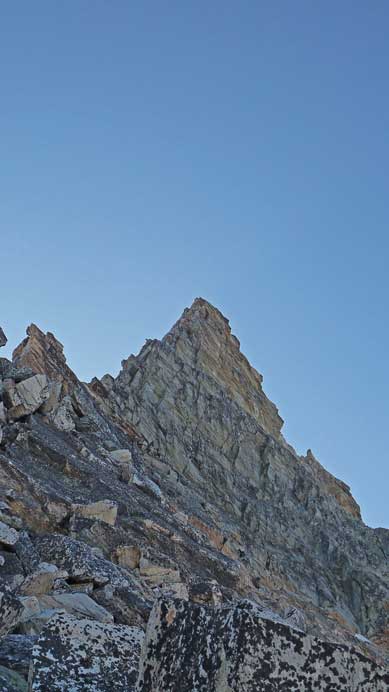
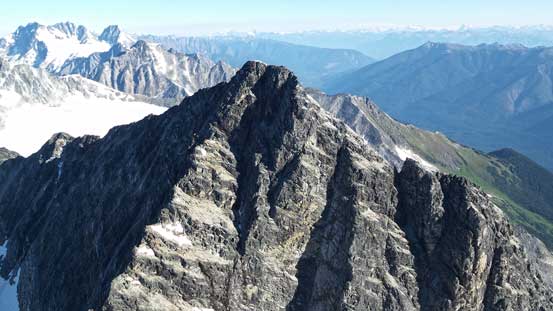
The summit tower (upper 1/3) ahead. We decided to skip this challenge
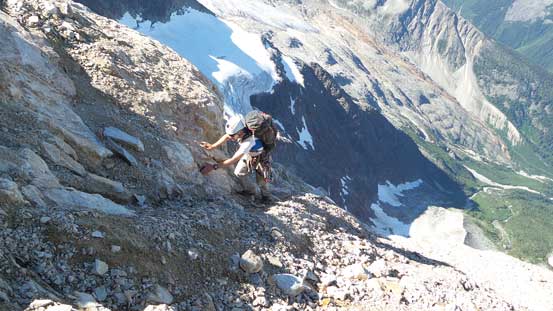
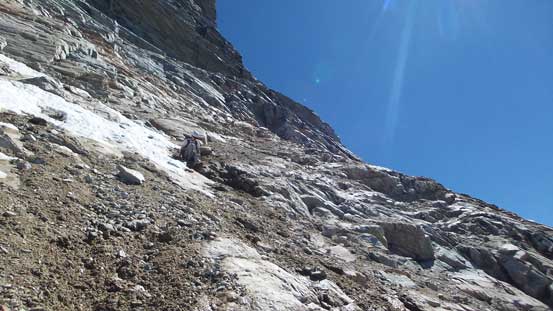
We took a well deserved rest here, and the next party behind caught us up (again, everybody was free soloing so they were all pretty fast). They, together with the two previous parties would all take the direct route. We, on the other hand, decided to switch back to scrambling boots and skip this challenge after seeing the bypass route being dry (not 100% dry but dry enough so we didn’t have to step onto snow and ice). This bypass route, though loose, looked straightforward and much more scrambler friendly than the direct route. In fact, it’s only class 3 so basically from here on it’s a scramble to the summit via this route.
We didn’t do our best at route-finding though as we took a higher line than necessary and got ourselves onto some very ugly down-sloping concrete hard terrain with loose pebbles on top and huge exposure towards the run out zone. We discovered the easier line and basically you want to be on a path/trail otherwise you’re not on the best line. I felt very insecure especially without hiking poles. We eventually figured out the problem and descended very awkwardly to a bit lower and found some reasonable ground to traverse/ascend while getting around the snow field. Then after ascending a section of slippery and very loose ground we came around the corner, and ahead would be a long and foreshortened section of class 3 scrambling. We scramble’d up initially on climber’s left, but then more towards middle. We managed to pick a line to keep on scrambling terrain and eventually crested the south ridge.
Ben negotiating the summit bypass route – loose and tedious
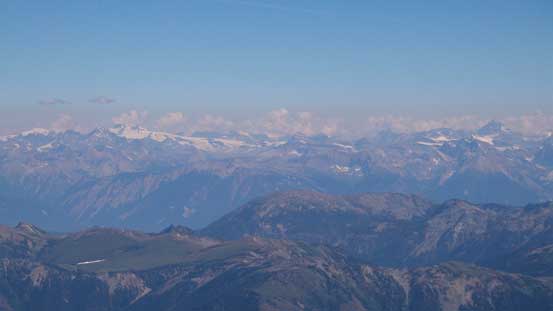
A few more minutes of scrambling brought us to the summit. Apparently all other parties had summitted ahead of us using the direct route so we took a more time consuming line up. Everyone would descend the bypass route though, so having already ascended it we did have one advantage that we wouldn’t get lost for sure… The view was incredible towards each direction with most of the Selkirks below us. In the distance we could also see the Monashees and the Purcells (especially the Bugaboos), and a whole panorama of Rockies from Clemenceau all the way to Goodsirs.
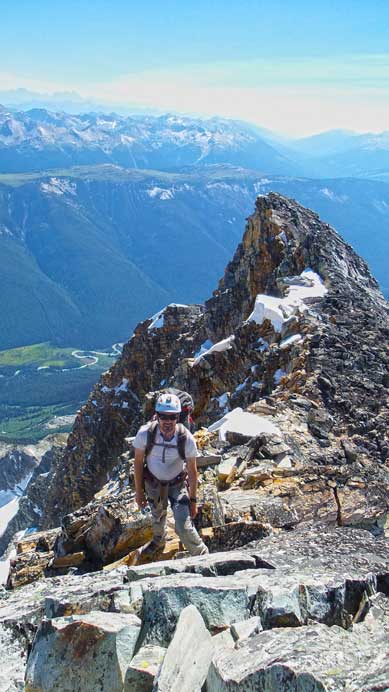
Approaching the summit from south ridge side

Summit Panorama. Click to view large size.

Looking down at Mt. Rogers – I’m happy to have it climbed too!
Hope Peak and Charity Peak and some icefields in the southern Selkirks

Iconoclast Mountain, one of the major summits in northern Selkirks
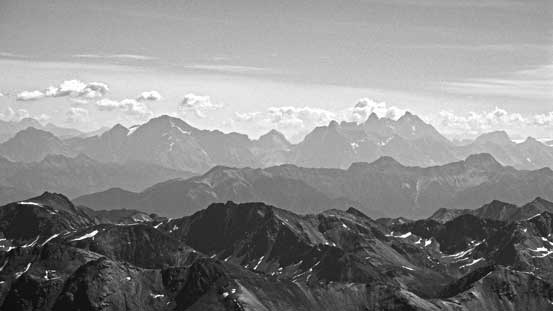
Mt. Vaux and Mt. Goodsir -giant loose bastards in the Rockies
The stretch of Columbia Icefield, and Mt. Columbia, Mt. Bryce

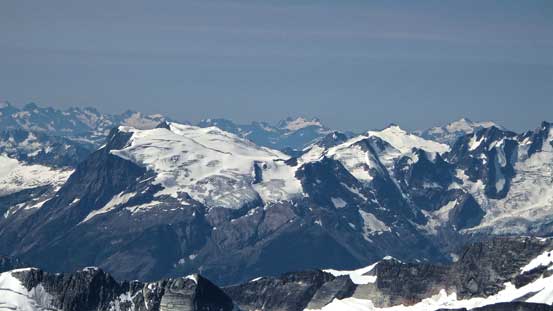
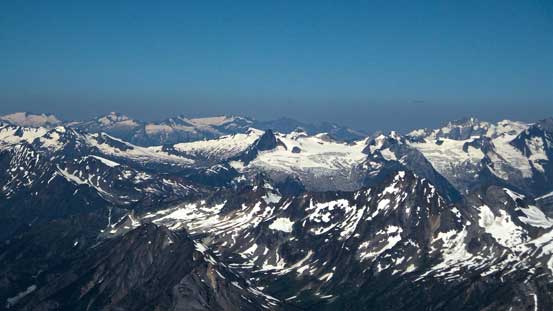
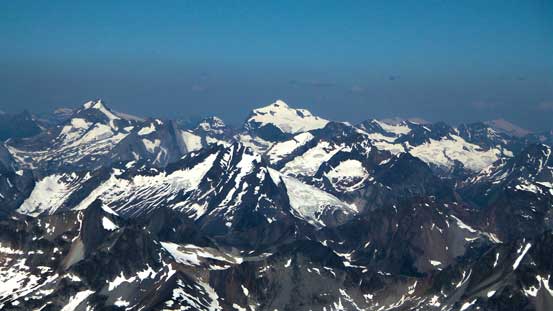
Selwyn and Hasler Peaks on Mt. Dawson massive

That big mountain sticking out is the iconic Howser Towers in the Bugaboos!

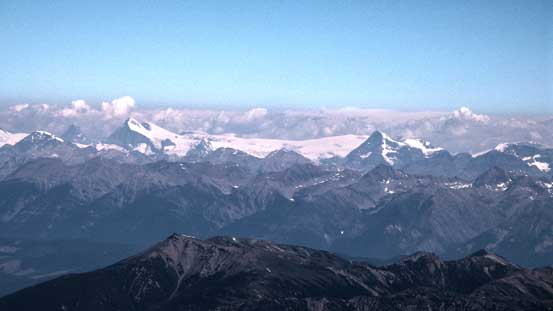
Mt. Clemenceau, Tsar Mountain and Chaba Icefield.
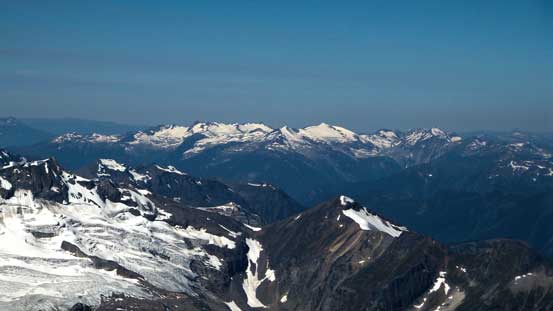
Icefield in Mt. Revelstoke N. Park. Peaks including Inverness Peaks

Sorcerer Mountain
Fang Rock and the icefield
From Lyells to Forbes on the horizon – giants in the central Rockies

Peaks on the Freshfield Icefield dominate the skyline.

Looking over the NE Face of Mt. Bonny towards more peaks in the Selkirks

Looking south into Deville Neve. Giants in Selkirks including Grand, Wheeler, etc.
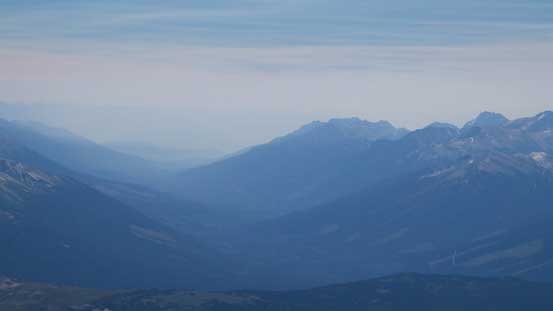
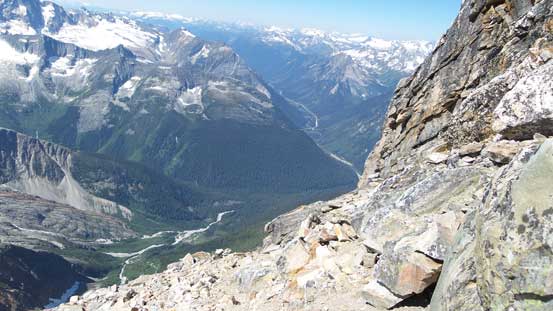
Splillimacheen River Valley
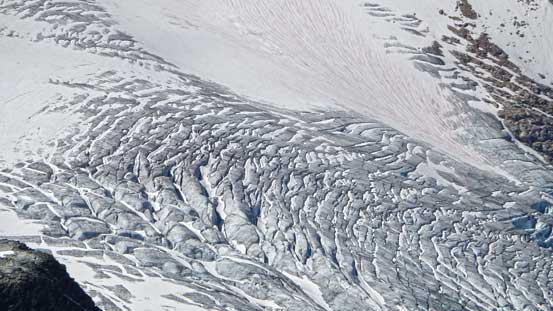
Crevasses on Illecilliwaet Glacier
Mt. Holway in the northern Selkirks
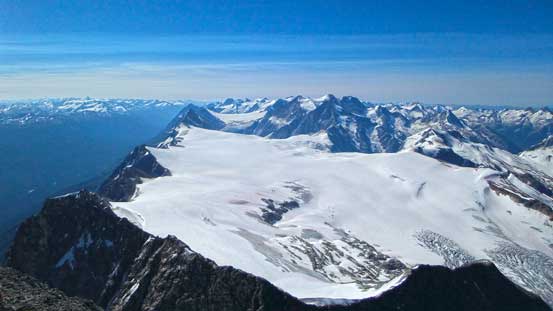
Looking down at Illecillewaet Neve from the summit

Panorama of Beaver River Valley. Click to view large size.
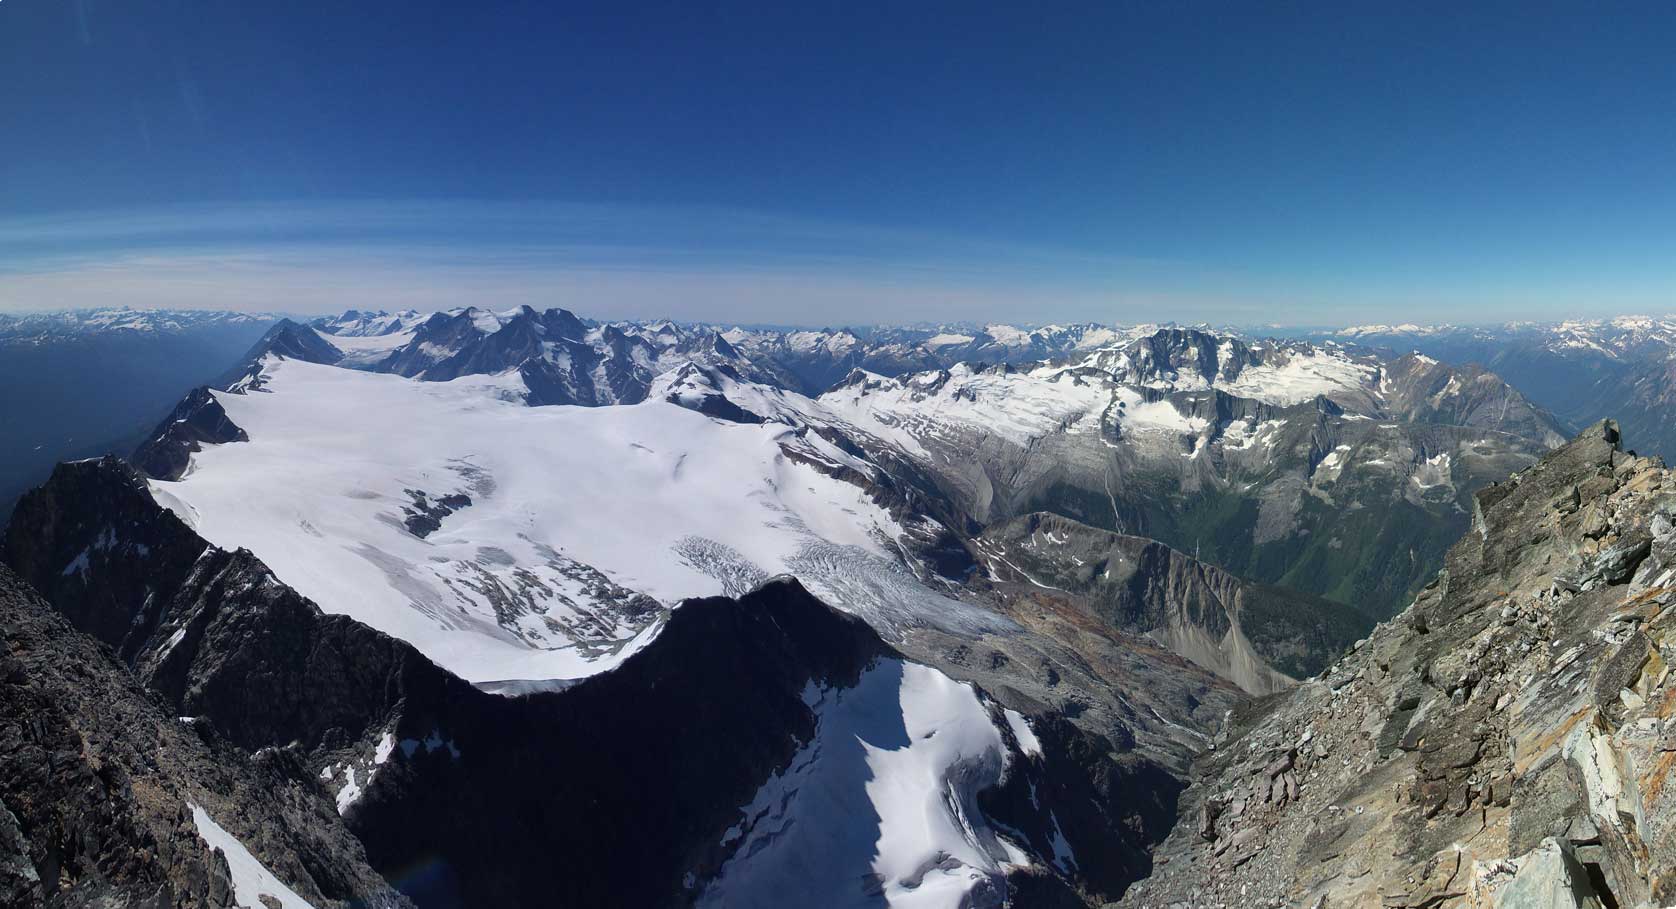
Another panorama from the summit. Click to view large size.
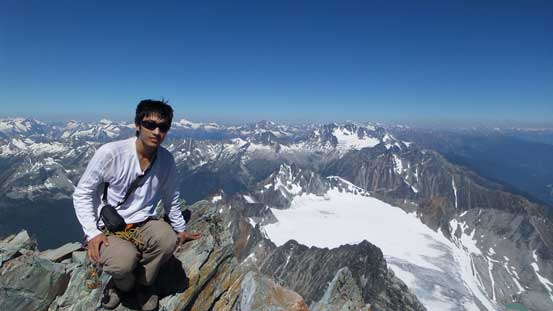
Me on the summit of Mt. Sir Donald
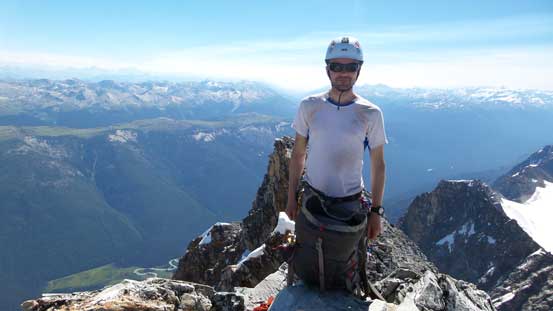
Ben on the summit of Mt. Sir Donald
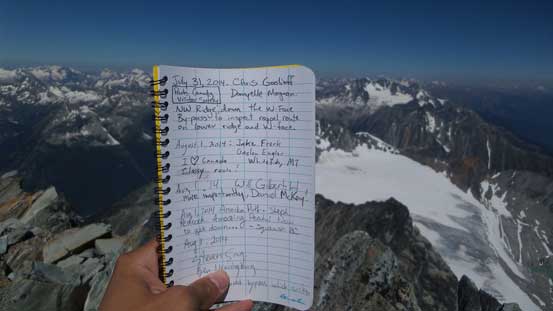
The summit register!
Due to the committing nature of this descent we had little time to soak in the views. It’s overall not as bad as expected but I agree with others, the descent will take longer (~ 2x) than the ascent time, especially if you have to rappel off the summit tower. For us that part was easy as we just down scrambled the bypass route. The loose nature of this bypass made it an ideal descent route and we got down in no time. Within about half an hour we made back to the NW ridge proper – already down 1/3 of the ridge… The middle 1/3 of the ridge wasn’t as bad as expected neither. Actually, on the ascent I already knew this section wouldn’t be a problem to down-climb. A few 5th class vertical steps provided some challenges but we both managed to down-climb almost this entire section, skipping maybe 10 rappel stations including 2 bolted ones. We caught up the two girls from Squamish at this stage, and also met two Taiwanese climbers (very experienced) on their way up.

Descending loose class 2/3 terrain for a long way initially
Then, around the corner and onto the “white band”
Going around the patch of snow/ice

Side-hill bashing across the white band
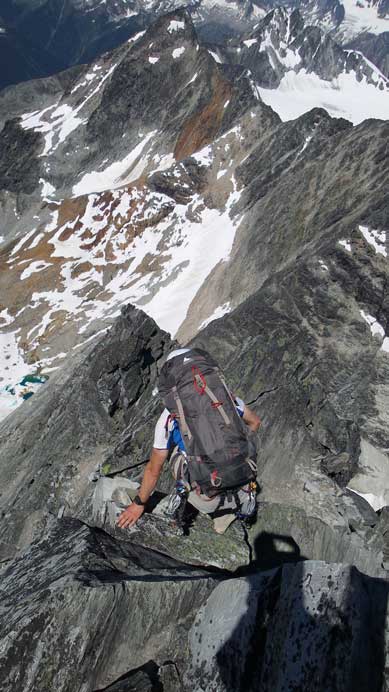
Starting to down-climb the NW Ridge
We caught up this two girls from Squamish

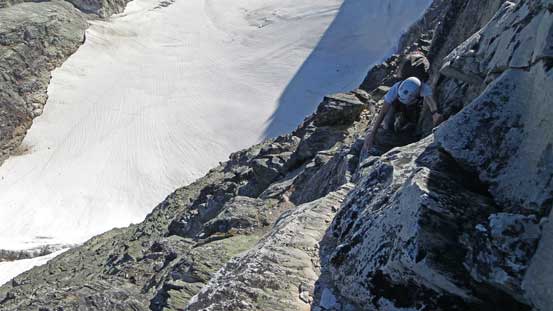
This part was the hardest down-climb we did

A closer look at Ben down-climbing

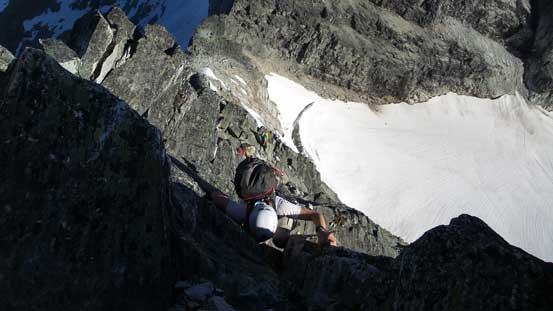
More down-climbing

And, more…

Uto Peak
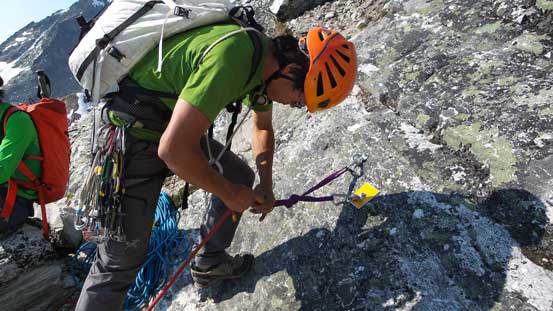
Still on the ridge (middle 1/3 of the ridge), everybody decided to start rapping at the official station #3. Looking down I was quite confident to down-climb this section too but I knew we’d have to rappel #4 regardless and one extra rappel wouldn’t matter too much time wise. We were already way ahead of schedule at this point. Basically even if we needed 50 minutes to finish one rappel, we’d still get back down to the trail before dark, so we were not on a rush at all. I found our first rappel (official rappel #3) was relatively difficult as it followed the ridgeline down, so the rope wasn’t constantly weighted. Rappel #4 was the mandatory one and the trickiest. It brought us down the crux section and this is the site of a fatal accident a number of years back. The key was to rappel the exact way we came up – down the north face side rather than the south/west side. If going down the wrong direction you’ll end up hanging in air with rope (assuming you use 60 m rope) not reaching the ground. You should notice this big overhang on the way up. Anyway, we rappelled this section correctly and made down to the official station #5. This was the last station on the ridge and we’d start the West Face rappel route from here.
Ben rapping the official Rappel #4 (our second rappel)
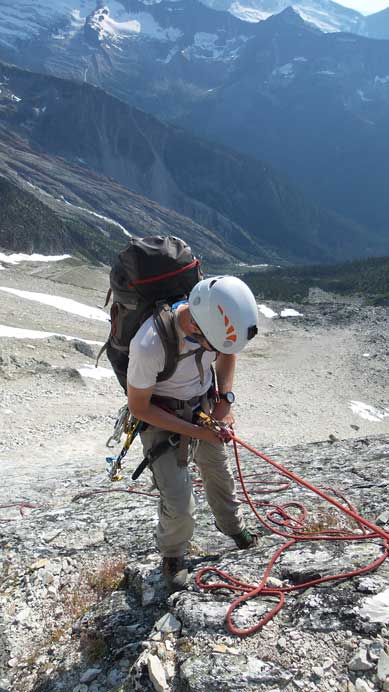
Rappels #5 to #10 would bring us mostly straight down the west face slabs, from bolted station to another bolted station. Sounded pretty easy but we both suck at rope management (lack of experience). We all knew what to do but just couldn’t do it efficiently. The rope got twisted all the time and we even had to re-coil during the middle of the rappel and re-throw down, and then it twisted again… That was frustrating and created significant friction. Basically it took us 2 times longer to finish one rappel than the other groups. Soon enough, after a few rappels the Taiwanese climbers caught us from behind. We decided to team up for the last few raps and this worked perfectly (thank them a big time for helping us out). After these 6 raps in a series we came to easier ground. Some class 2-3 scrambling with one optional snow slope brought us quite a long ways down to the final two raps.
Due to a massive rock slide last year, the last two stations was relocated on the far skier’s right side. To speed things up, one of the Taiwanese climber lowered me down using my 70 m rope, and at the same time, Ben rappelled down their 60 m rope. And then the Taiwanese climbers would do double-length rappels. By this way we all skip’d official Rappel #12. So overall, Ben only did 9 rappels in total and I only did 7 (being lowered down twice near the end). We could also down-climb our first rappel too if needed.
Looking down the rappel route from station #5

Ben rapping the official Rappel 5 (our 3rd rap)

Can you see Ben rappelling? I took this picture from a sideway angle
The Taiwanese climbers caught us up and helped us out for the rest of the descent.
An optional snow slope

Some view from the rappel route
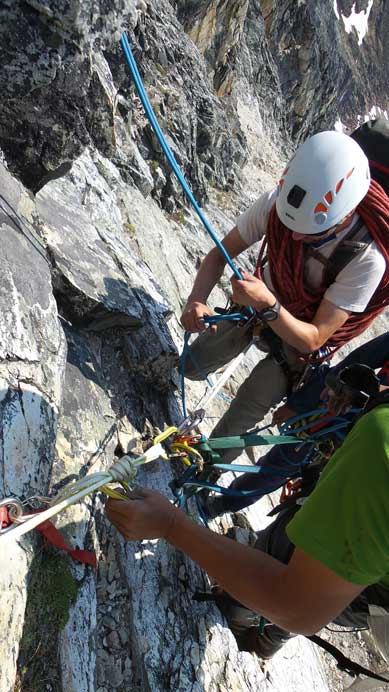
Preparing for the last two rappel – we decided to combine them into one
Ben ready for the double-length rappel
Down to easier ground, I immediately had to slog back to Uto/Sir Donald col to retrieve my hiking poles – poor decision to leave them there in the morning. This costed me an extra 150 m height gain or so with more than half an hour’s time. But that’s okay as we had lots of time to get down before dark. The side-hilling sucked just as in the morning. The rest of the hike-out on Sir Donald trail was fast and scenic, but hot and steep… We passed more people on their way up with one group carrying gigantic packs. They brought all camping gears to enjoy a night at Uto/Sir Donald col – a very scenic place for sunrise/sunset.
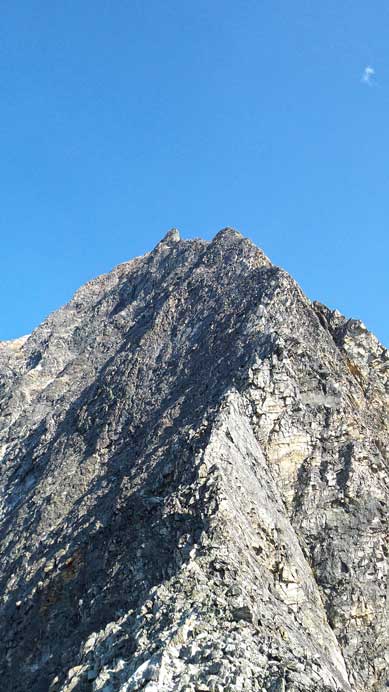
NW ridge seen from Uto/Sir Donald col in the afternoon.

These views are bones for me for leaving my poles at the col…

North Face of Sir Donald
Back to the descent.
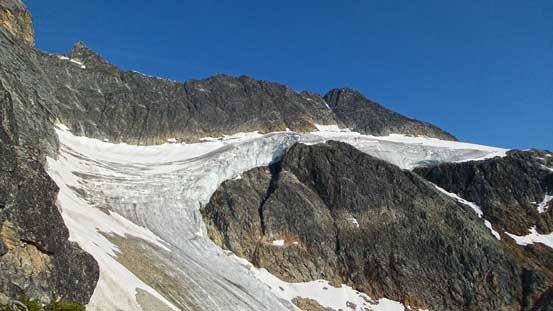
Glaciers hanging below Terminal Peak

Hiking down a long moraine crest
Looking back at Mt. Sir Donald
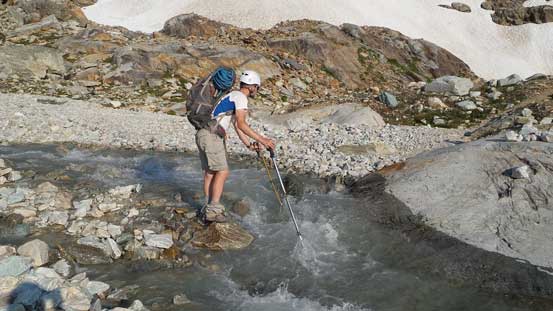
Crossing a raging creek. A bit too wide so Ben just forded it.
Back to car, exhausted but very satisfied. Our round trip time was 18 hours including all the stops and detours – not a bad pace considering many experienced climbers would typically plan 3 days on it… This was surely one of my top 2 climbs to date. It’s a bigger mountain and a more sustained climb than Bugaboo Spire but technically (significantly) easier. On Bugaboo Spire I had to rely on my partners to give me top-rope belay but on Sir Donald I never felt the need to take out rope on the ascent. My climbing skill is way better on face climbs than crack/slabs that’s for sure, and blocky quartzite is also my strength. I had lots of fun climbing on this quartzite ridge and the technical challenge never exceeded my comfort level. I can’t say it’s a well rated fifty classic as it’s the only one I’d done (and the only one I could do given my current experience), but it’s certainly a classic. I’d highly recommend it to folks comfortable soloing sustained 4th class ridge with 5th class steps here and there.

Amazing stuff. I have long wondered what it would be like to climb via this ridge. I have learned stuff from your blog – this climb, as well as Mount Bryce and East ridge of Mt. Edith Cavell look great and are very well documented. Thank you for maintaining such good info. I occasionally consult your website, as well as Vern Dewitt’s website for ‘beta’ on various peaks. My own repeat travels to the Rockies have seen me do various scrambles and entry-level mountaineering routes (Mt. Athabasca via Silverhorn, the President, Pilot Mountain, and, recently the west ridge of Cavell)…but I have not yet worked up the courage for very extended free climbs such as this one. I might just try it. Thanks!
Great review and trip report Steven… I felt anxious at times looking at the photos. It’s never the climb rating but the exposure. Oh ya… I hate downsloping gravel ledges LOL don’t blame you for not liking that part.
The catch for Mt. Sir Donald that most don’t realize that it’s a peak more “designed” for those coming from a scrambling background, rather than for the technically oriented rock climbers. Those as far as I know who found MSD “easier than expected” are all strong, confident and somewhat bold scramblers. The climbing never gets harder than 5.4 and is never sustained and all hard sections are “face climbing” so you don’t need much technical rock skills, however, the route is long that if you pitch everything out you are not gonna finish the climb in time. High confidence on scrambling extremely exposed 4th class terrain is a must and at the same time, you want to be efficient on multi-pitch rappelling (which I was definitely not in 2014).
Thanks for the feedback Steven, I consider myself a scrambler over a climber and fall into the category you are in. I’ll climb and protect small sections but prefer short roping and quick moving. I avoid big climb routes and enjoy the movement across the mountain.
Back in 2002, I soloed this route in around eight hours car to car. I forgot my sunglasses but luckily found a pair of glamorous women’s sunglasses at the col so I wore those, much to the amusement of other people on the route.
could you let me know where you get the map at the top of the page from?
gpsvisualizer.com